Previously, I wrote an article on how you can connect to a Linux EC2 instance using SSH via Terminal. In this article, we’re going to talk about connecting to a Windows Server EC2 instance and remotely managing it from your Mac.
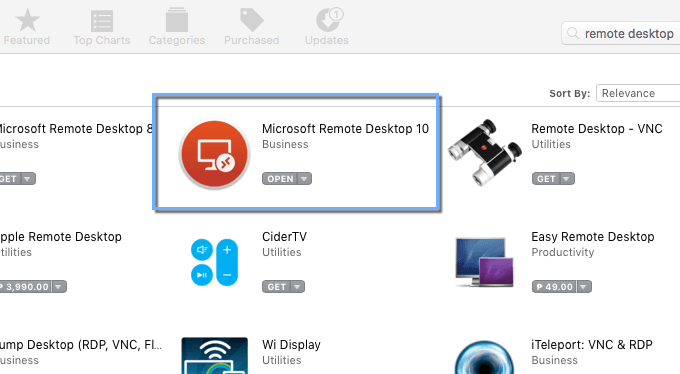
The first thing you’ll need is a running installation of Microsoft Remote Desktop. That should be easy because Microsoft Remote Desktop is listed in the App Store. Just type in ‘remote desktop’ in the search box to display the app you’re looking for.
As of this writing, there are two versions being displayed on the App Store. You’ll want to install the latest — version 10. It’s the one with the circular icon.
Once the installation completes, you can then access Remote Desktop by bringing up Launchpad (F4 button) and then selecting its icon there. We use our RDP (remote desktop protocol) client quite often, so we’ve placed it on the Dock for easy access. To put yours there, just drag the icon onto the Dock.
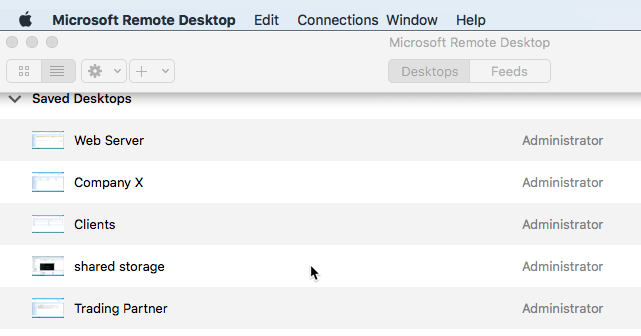
Tap the icon to launch the app. Here’s our running installation of Microsoft Desktop with a few saved desktops.
To connect to an EC2 instance, you’ll need three pieces of information:
- The Public DNS hostname or Public IP address,
- The administrative user name, and
- The administrative user name password
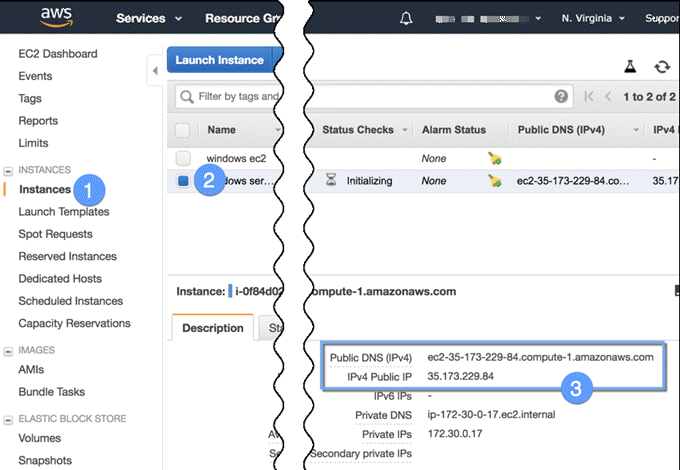
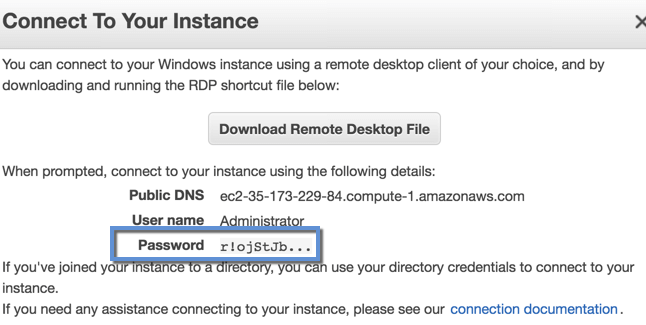
To obtain the public DNS hostname or IP address, go to your EC2 Dashboard, navigate to the Instances menu and then select the EC2 instance whose hostname or IP address you want to retrieve. You should see those pieces of information on the middle-right hand side of the page.
The administrative user name is just Administrator by default. However, there are a couple things you need to do to obtain that username’s corresponding password.
First, while you’re launching an instance (i.e., before it’s even created and added to the list of instances shown above), select a key pair that you want to associate with that instance. We already outlined the steps to obtain a key pair in the article “SSH to an EC2 Instance from Mac”, so I suggest you read that first.
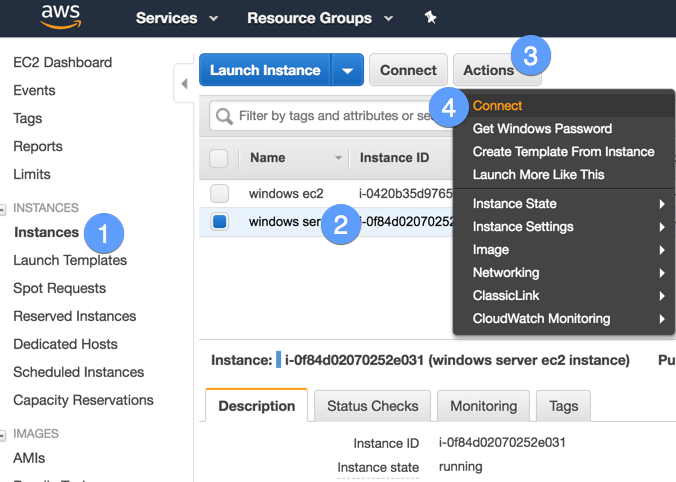
Once the instance is launched, you can then proceed with the process of obtaining the password. Select the instance, expand the Actions drop-down list, and then click Connect.
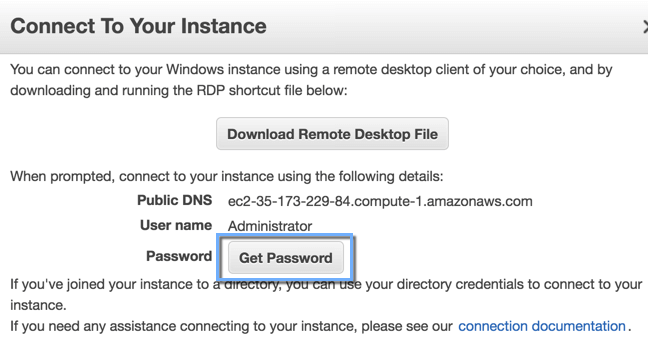
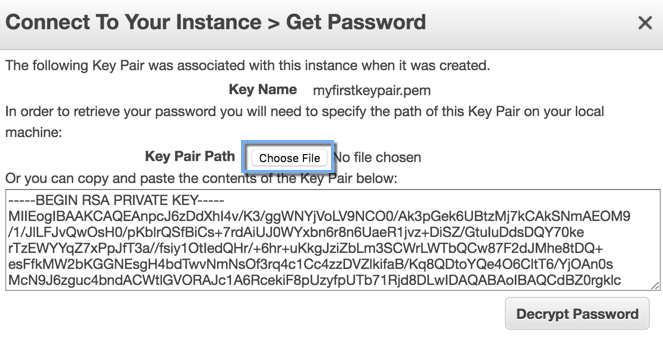
When the Connect To Your Instance dialog box appears, click the Get Password button.
The password will then be shown in encrypted form. In order to decrypt that, you need to point to the private key file associated with the key pair that’s in turn associated with this EC2 instance. In our example, that would be myfirstkeypair.pem.
To point to the file in question, specify the Key Pair Path by clicking the Choose File button and then navigating to the location of that file on your local system.
Once the file has been successfully loaded, click the Decrypt Password button.
If the decryption succeeds, you should then see your password on the screen. Copy and paste that password onto a safe location.
Now that you have all the pieces to connect to your EC2 instance, you can now head back to your Remote Desktop application and connect from there.
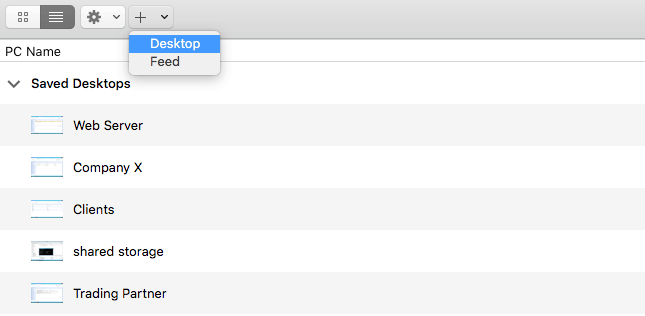
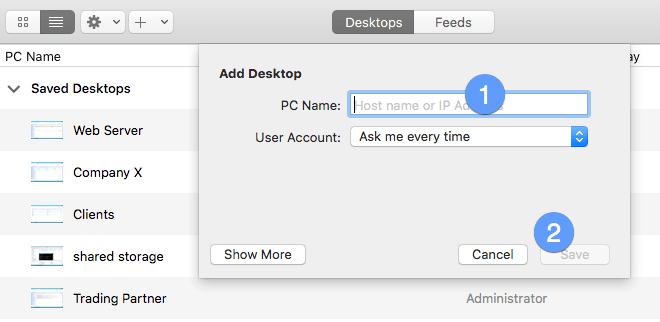
Expand the [+] icon on the upper-right and select Desktop.
When the Add Desktop dialog appears, enter your EC2 instance’s public hostname or IP address into the PC Name field and click Save.
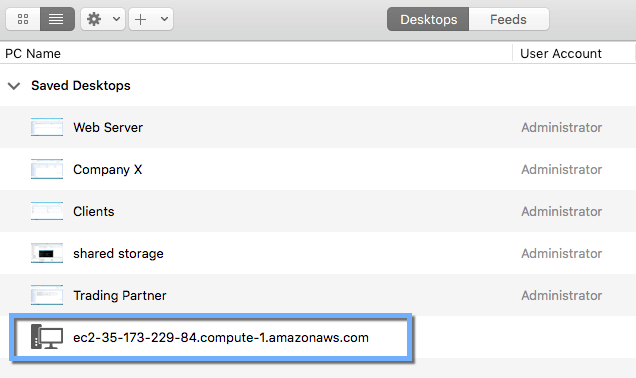
You should then see your newly created desktop among the list of existing desktops. You may change that name to a more human-friendly one by right-clicking on it, clicking the Edit menu and then changing contents of the Friendly Name field.
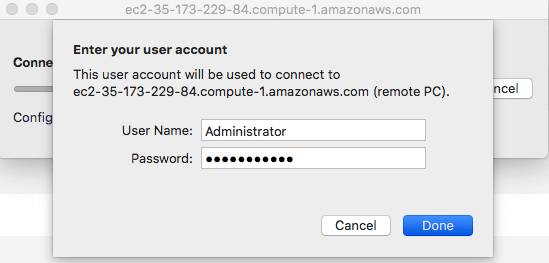
To connect, just double-click your newly added desktop and then enter your login credentials.
If all goes well, you should be able to login to your Windows EC2 instance in the cloud. Enjoy!

