Are you looking to split a Windows image file (WIM) to multiple image (SWM) files, but don’t know where to start? In this tutorial, we’ll walk you through the process and tell you all you need to know about the splitting process.
What are WIM files?

First off, what is a Windows image file? What purpose does it serve? The WIM format is used to create disk image files. Developers use WIM to store the contents of an entire hard drive in one file.
Vendors would use WIM to preload a computer system with the OS and other applications. The reason they do it this way is because WIM has a tendency to load faster. They’re also less likely to run into errors.
WIM files are bootable, so they’re also used to jumpstart the installation process.
What are SWM files?

WIM files tend to have a large file size given the amount of information stored inside. So sometimes it’s necessary to split WIM into several smaller SWM files that allows administrators to store all that data across multiple storage devices.
One example would be storing SWM files oi multiple DVDs instead of trying to save one WIM file onto a single DVD.
Limitations to Splitting Files
There are limits set for splitting files. Users are not allowed to split SWM files, for example. Also, users need to store all SWM files in the same folder. For any DVD deployments, you’ll need to copy all the files to the destination PC before Windows setup can be run.
Splitting the Image File

Follow the following steps to split a Windows image file into smaller SWM files.
First, let’s mount the Windows ISO file. Open the Command Prompt by launching Run (Windows + R) and typing CMD. Once Command Prompt is open, enter this command:
Dism /Split-Image /ImageFile:C:<wim location>
/SWMFile:C:\<swm target location> /FileSize:<SWM file size limit>
Remember to replace the following values:
- C:<WIM Location> – Replace with the location of the WIM file you want to convert to SWM.
- C:<SWM Target Location> – The location where you want to store the converted SWM files.
- <SWM file size limit> – The maximum file size of each SWM file in MB.
An example of this would be:
Dism /Split-Image /ImageFile:D:\sources\install.wim
/SWMFile:E:\sources\install.swm /FileSize:3800

Storing SWM files on USB

Storing SWM files on a USB drive is a great idea. This will come in handy if you need to install Windows 10 from a USB drive.
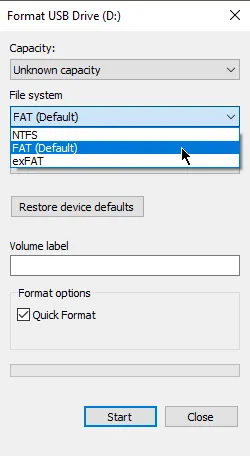
Saving WIM directly on a USB drive can sometimes fail because most USBs are formatted using the FAT32 format. FAT32 is necessary because it allows USB devices to boot BIOS- or UEFI-based PCs. However, FAT32 files can’t store anything over 4 GB. This is where SWM files come in.
Just remember: all SWM files need to be stored in the same folder to work.
Storing SWM files on DVD

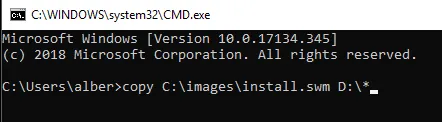
As with USBs, SWM files can also be kept on DVDs. Use Command Prompt to copy the SWM files to the DVD. In the command prompt, type:
copy C:\<location> <destination>*
In this example, replace <Location> with the location of the SWM file. Replace <Destination> with the target destination. An example of that would be:
copy C:\images\install.swm D:\*
Do this until all the SWM files you intend to copy are saved on DVDs.
Load the DVDs on the computer you intend to use the files on. Copy the content of the DVDs on the computer until all files had been transferred. You can then use Windows Setup or a script to apply the Windows image.