Hello fellow sysadmins and techies! I recently had a request from a client of mine to deploy a Citrix XenApp environment on a budget. What does on a budget mean? We all know, one small server, that should host all of the components, with no need for high-availability or load balancing.
So as a part-time freelancer I thought it would be good and productive to write up a simple step-by-step guide on how to deploy a Citrix XenApp environment on a budget host for all those small clients out there that want the functionality, but don’t have or don’t want to spend those big bucks on several servers.
So without further ado, let’s deep dive into the step-by-step guide and see what’s going on.
Install and Deploy Citrix XenApp
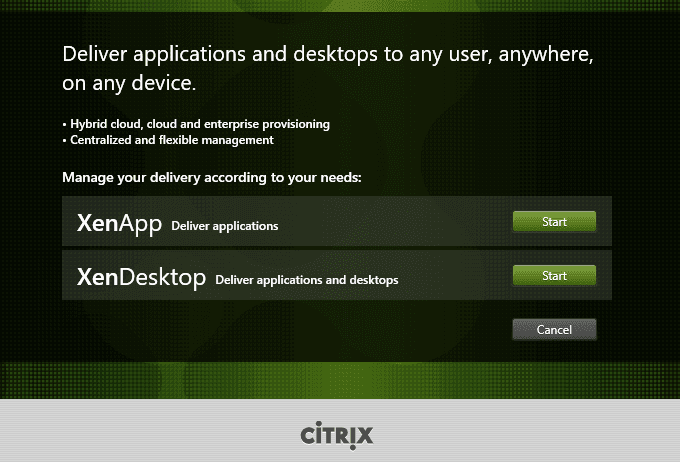
After downloading the XenApp/XenDesktop ISO from the Citrix product page, we are met with this dark green, very mysterious splash screen with two options: XenApp and XenDesktop. Since we want a XenApp deployment we will just hit the Start button and get on with our journey.
By the way, I recommend extracting the ISO and placing it in the root C:\ of your server since we are going to have to restart several times and after each restart, the ISO won’t be auto-mounted and the installer won’t be able to find the files.
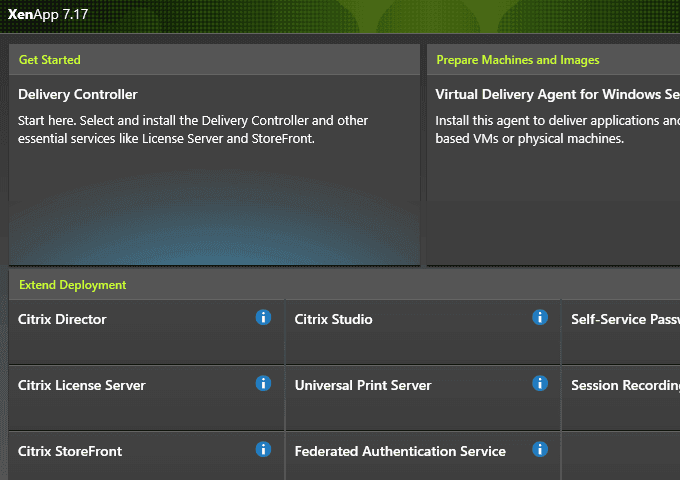
The next screen greets us with several options for installing the Delivery Controller, Virtual Delivery Agent, Director, Studio and so forth.
We will start with installing the Delivery Controller and going forward from there. The Delivery Controller manages the deployment, user access, brokering between VDAs, and it is also used to provide desktop and server images for Machine Creation Services (VDI). Its equivalent is the Remote Desktop Session Broker from the Microsoft RDS world.
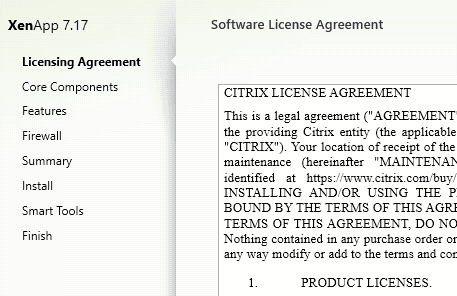
Once we click on the Delivery Controller we are met by the usual EULA. You can go ahead and read through it to understand exactly what you are getting yourself into, in very tiresome legal terms. Or we can just go ahead, hit Accept and then continue with the installation.
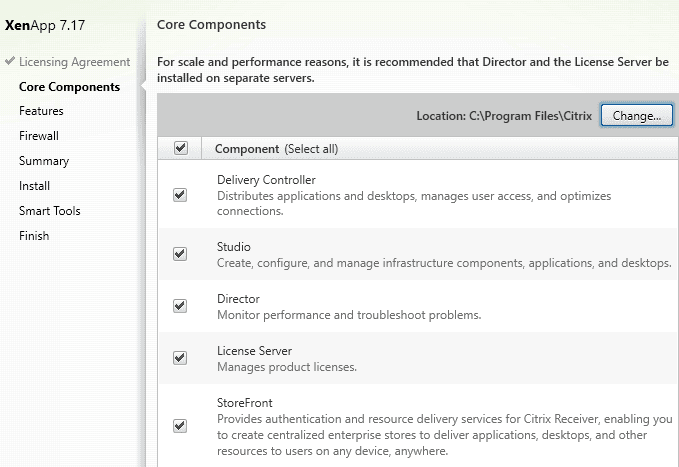
The next screen lets us select which components we want to install. As a rule of thumb, 99% of time you will install all of the components on at least one delivery controller even in a multi-server environment. Two components that stands out are the Studio, which is basically the management UI for our entire deployment and the StoreFront, which is the web gateway to the applications and desktops we want to publish, similar to RD Web Access.
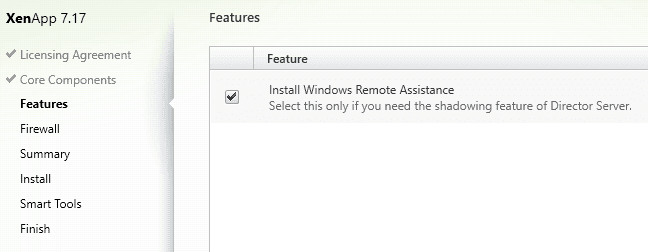
On the next screen, we want to select the Remote Assistance option and then click Next.
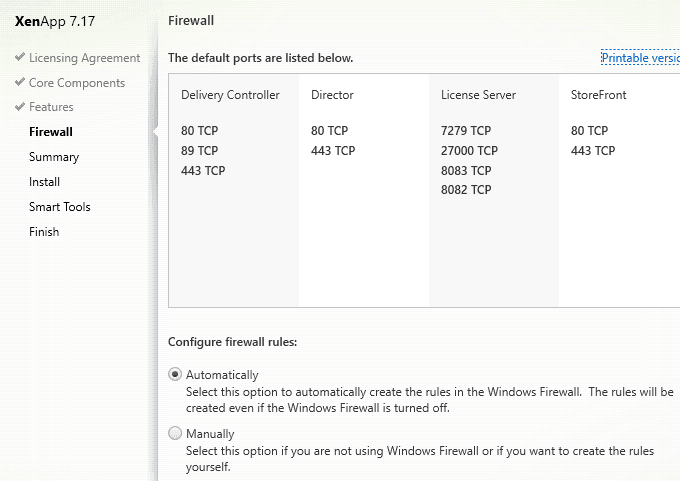
The next step is to check the firewall ports and rules we need for successful communication. You have two options: either set them to Automatically through the installer or Manually. Either is OK.
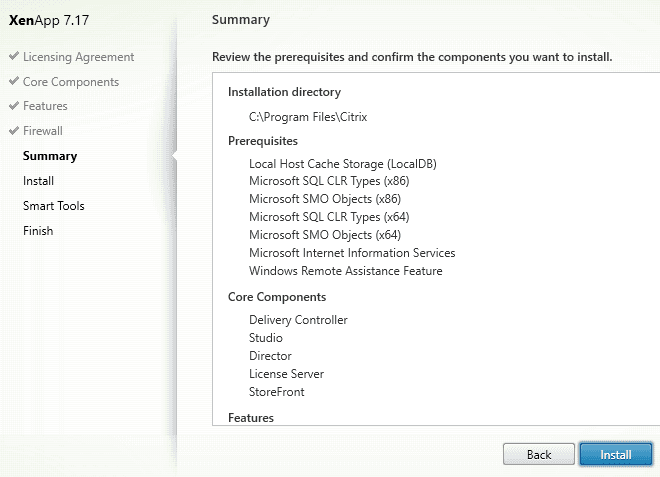
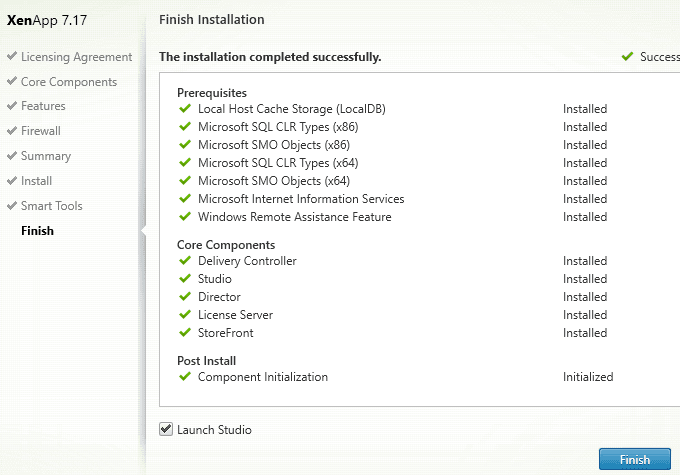
We finally get to the first summary screen. Double check if you are OK with the prerequisites and the core components and hit Install.
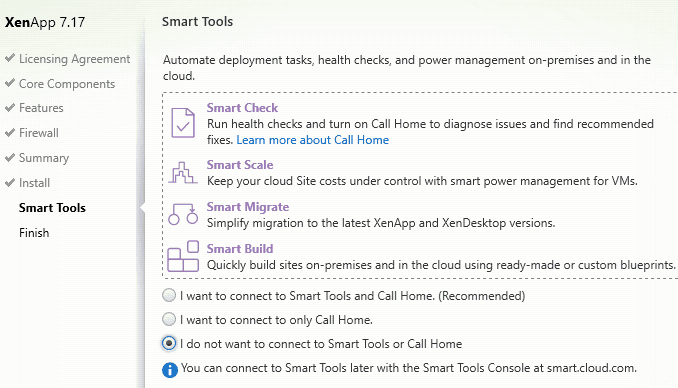
Once the installer has finished, just check I do not want to connect to Smart Tools or Call Home and hit Next.
Subsequently, click Finish on the Final Installation screen.
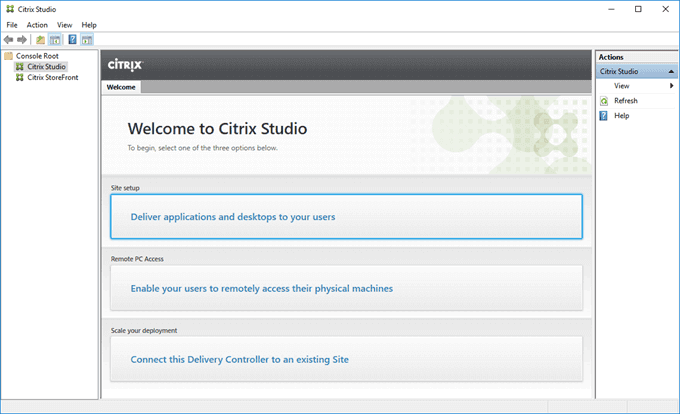
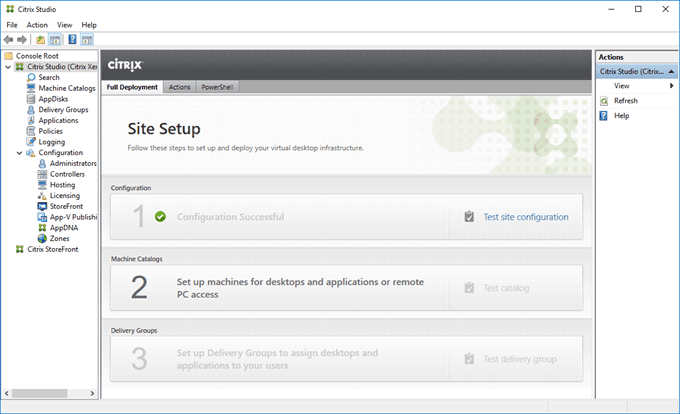
Hurray! We have all our major components installed. Next, we need to open the Citrix Studio and start configuring our deployment with a simple published application.
Our next step is to configure our Delivery Controller. We will choose the first option Deliver applications and desktops to your users. This will start the Site Configuration wizard.
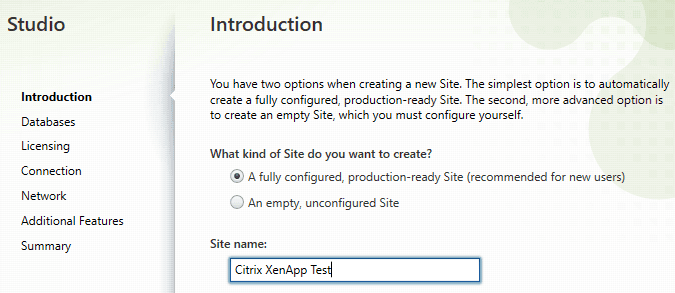
On the first page, choose to deploy A fully configured, production ready site. Next, choose a name for this site. I chose to call it Citrix XenApp Test.
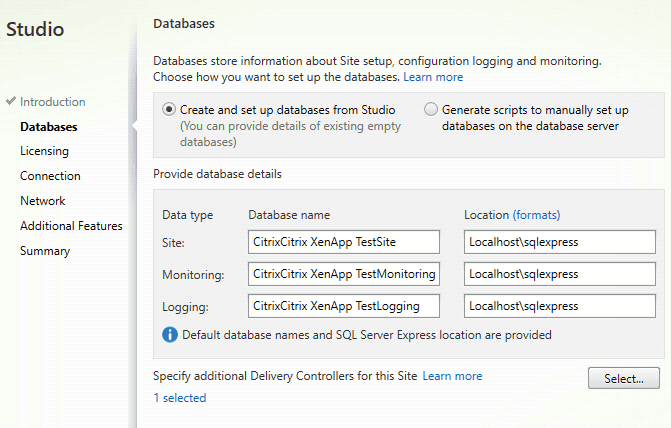
On the Databases screen, we have two options. We can either create the databases required automatically or we can generate a script that will allow us to deploy the databases on a separate SQL server. For our purposes, we will choose the default option.
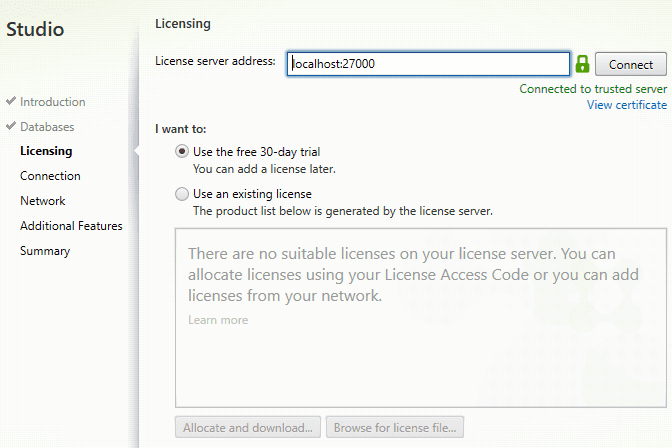
On the next screen, we specify the Citrix License Server and configure our existing Citrix license. The default values are localhost, since we installed the License server prior to this tutorial on the same server and the default license is a 30-day trial. We will use the default values.
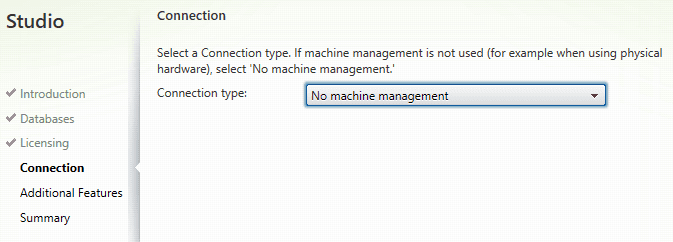
Next we need to specify the type of Machine Management we are using. Since we’re not using any Hypervisor, we will just choose No Machine Management.
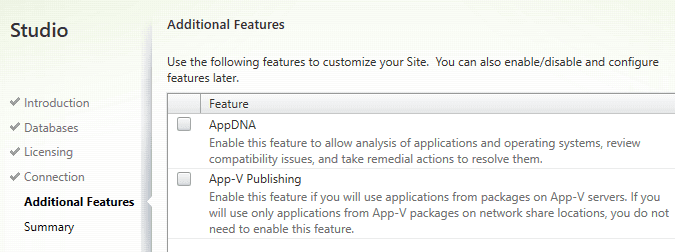
On our next screen, we have the option to choose AppDNA or App-V Publishing. Since this is a basic scenario where we won’t need those extra features, we will make sure they are unchecked and hit Next.
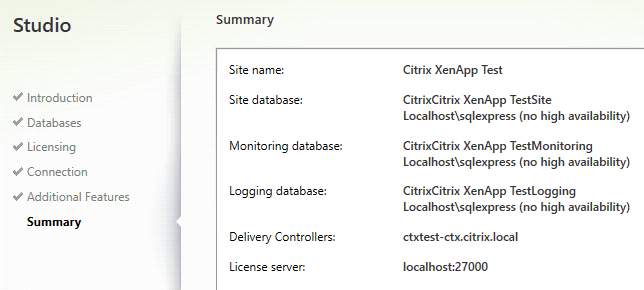
On our last screen, the Summary screen we just hit Finish and wait for the configuration to complete.
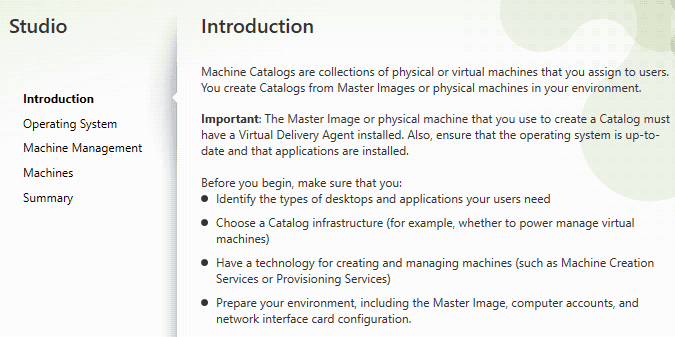
Now that we have our Delivery Controller set up, let’s move on to the Machine Catalog. The Machine Catalog is basically like adding Session Host servers in an RDS environment. All the servers which are in the Machine Catalog will deliver either Desktops or Apps to the end user.
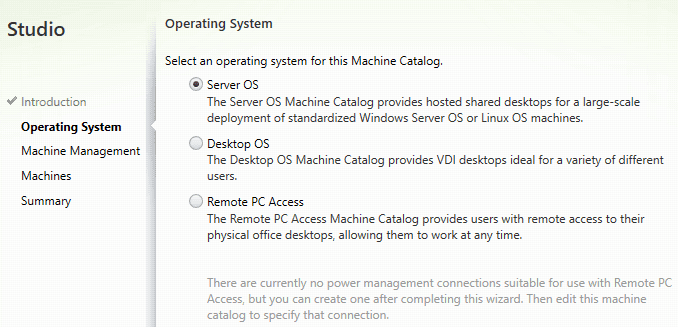
After we pass the Introduction screen, we have our first choice: Server OS, Desktop OS or Remote PC Access. Since we are deploying a XenApp Infrastructure, we will leave the default first choice for Server OS and hit the Next button.
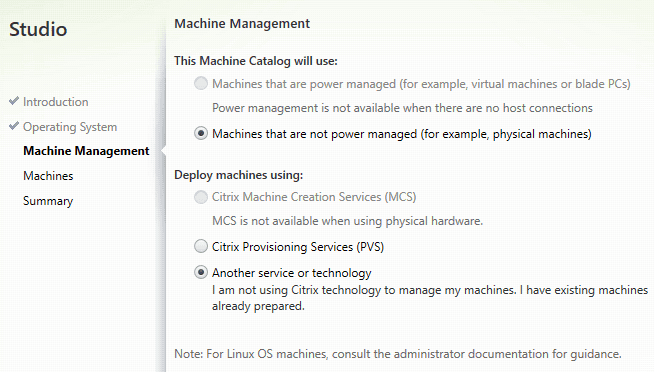
Since we chose No Machine Management in our first wizard, the automatic values are set in the next prompt. We just leave them as they are and hit the Next button.
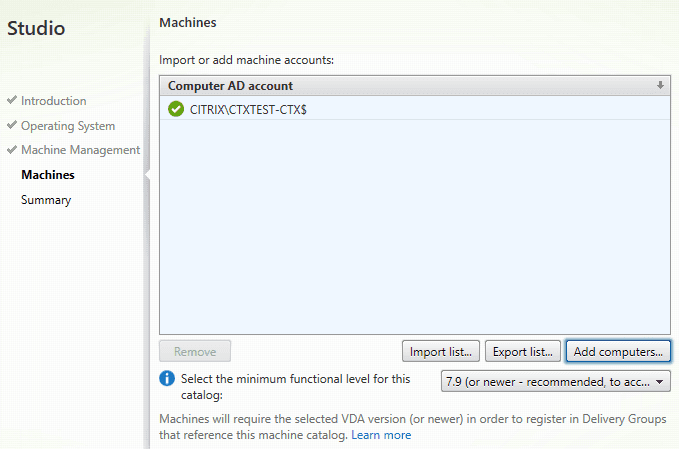
Next we need to choose the server or servers we want to add to the Machine Catalog. Since we are doing a one server deployment, we will add the same server from AD. Just click the Add Computers button and put in the server you are currently working on. In my case, it’s CTXTEST-CTX.
Then we click Next and Finish. FYI, if you see a blue question mark next to the machine account, it means that no VDA is present on the server. If that’s the case, just go into the ISO, relaunch the splash screen and install the Virtual Delivery Agent.
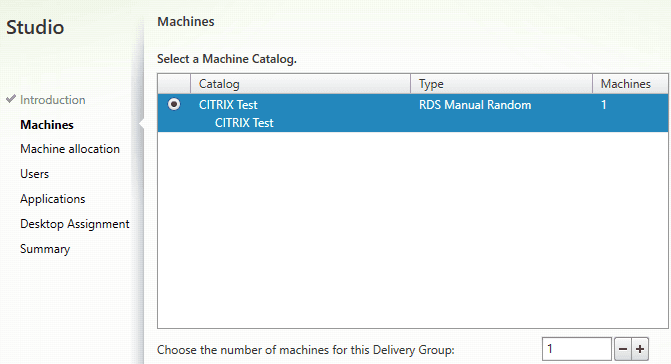
Next we will set up the Delivery Group and test our deployment. On the first screen, we will choose the Machine Catalog we created earlier in the tutorial.
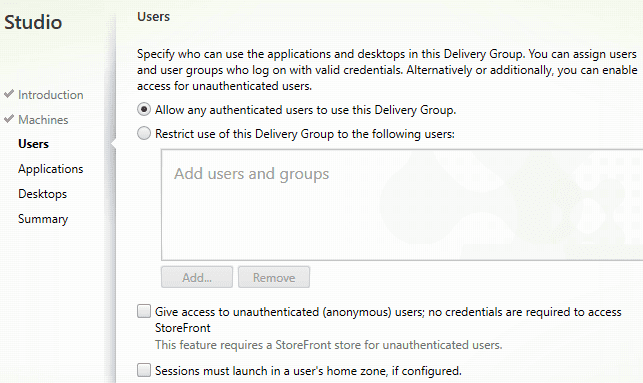
The next step is to define which users will have access to this delivery group. Before we go forward, the Delivery Group is like a collection in RDS. In a collection, we define user groups that will have access to that specific collection and the resources it offers.
Same thing here, we can either choose All Authenticated Users have access or we can specify which user groups we want to have access. The two checkboxes at the end need to stay unchecked since we don’t want anonymous access and we don’t have any home directories enabled for the users in AD.
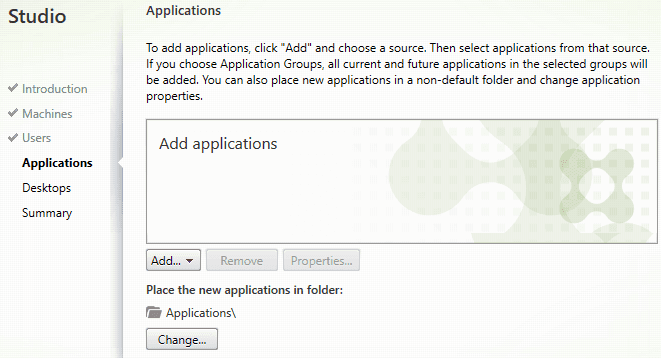
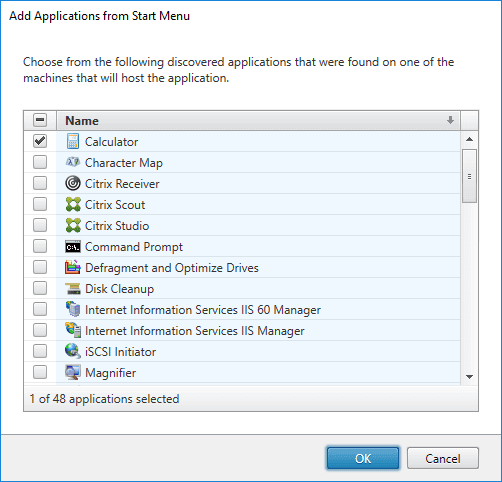
Next, we finally add the applications we want to publish. Same as in RemoteApp, we have the option to choose any application installed on our server. For this tutorial, I chose the Calculator application.
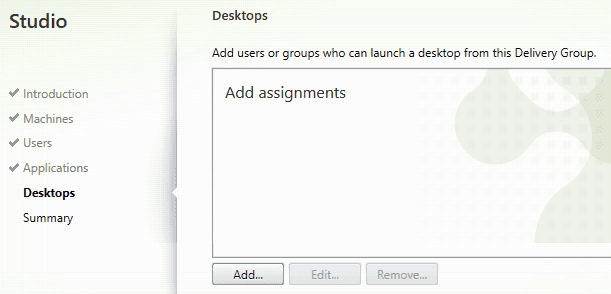
Next, we have the option to allow users to launch the desktop of the Server OS we are hosting. I chose to not to configure this option since I just want the application to be published.
At this point we’re done with all the configuration!
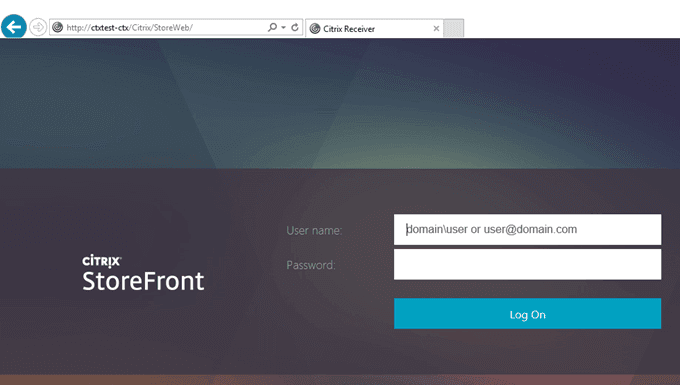
Now let’s test our deployment. Open any web browser and go to http://localhost/Citrix/StoreWeb or from a remote machine substitute localhost with the name of the server.
If everything works correctly we will be greeted with the following Citrix StoreFront login page.
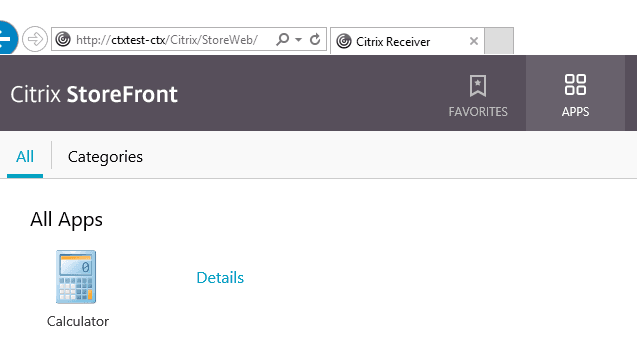
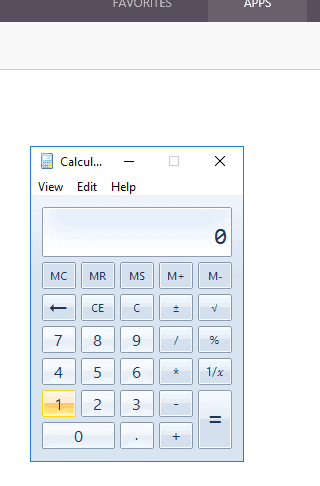
Now, login with a domain username and password. Next you should get the welcome screen where we can select either Favorites or Apps. Let’s click on Apps. We should see the Calculator application. Click the application and it should launch in a seamless mode just like it is installed locally on your computer.
I hope you enjoyed this tutorial and I’m looking forward to your comments or suggestions. If you have any questions, feel free to comment also. Thank you and have a great Sysadmin day!

