Windows 10 users can create a personal cloud server that lets them transfer files without limits. In this guide, we’ll show you how to create a local FTP server that gives you more control over how you share files.
Enable FTP on Windows 10
File transfer protocol or FTP is an old way of transferring files from one computer to another. These days, cloud-based solutions exist and they are more practical for most users. However, users would often have to pay to be able to transfer large files.
That is not the case with FTP. And Windows 10 users would be surprised by how easy it is to configure their computer and enable FTP.
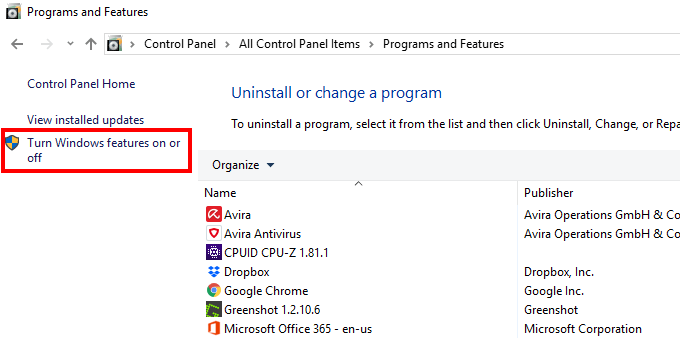
Go to Control Panel > All Control Panel Items > Programs and Features. Click Turn Windows Features On or Off located on the left-hand panel.
A new window will pop up called Windows Features. Search for the Internet Information Services folder and expand. Check FTP Extensibility under FTP Server. Also, check the Web Management Tools subfolder (with the default selections on).
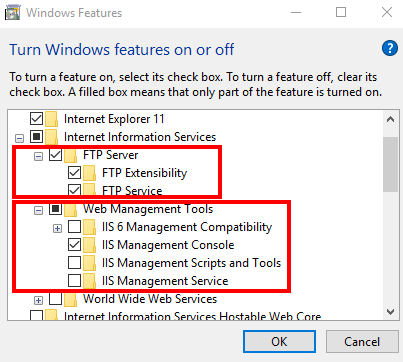
Once you’re done with the changes, hit OK.
Configure an FTP site
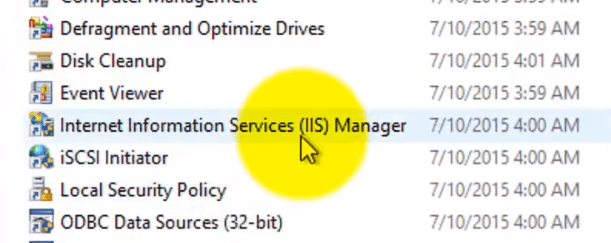
Go to Control Panel > All Control Panel Items > Administrative Tools. Go ahead and open Internet Information Services (IIS) Manager.
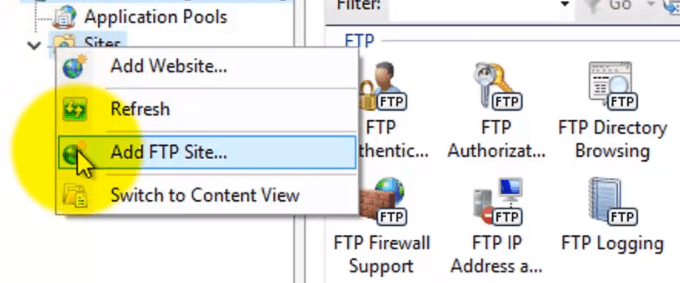
A new window will pop up. On the left-hand panel, expand the root and then right-click the Sites folder. Click Add FTP Site.
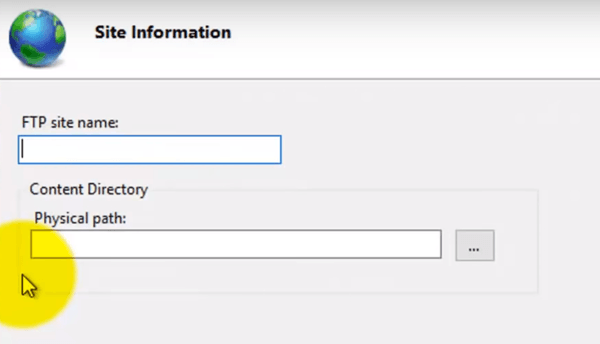
Add an FTP site name and path to the folder you’ll be using to send and receive files. Click Next when you’re done.
On the next page (Bindings and SSL settings), select No SSL under SSL options.

Leave the rest of the settings as is. Click Next. On the Authentication and Authorization Information page, check Basic under Authentication.
Under Authorization, select Specified Users then provide your Windows 10 account to gain access to the server. A local account name is also acceptable. Finally, check Read and Write under Permissions.
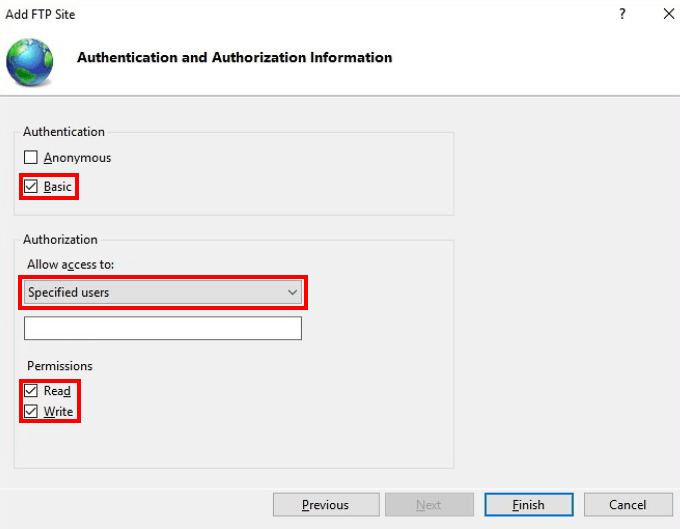
Click Finish when you’re done.
Configure Windows Firewall to Enable FTP Access
Windows Firewall blocks connections that are trying to reach FTP servers. So if you have Firewall activated, you need to change some settings so you can gain FTP access.
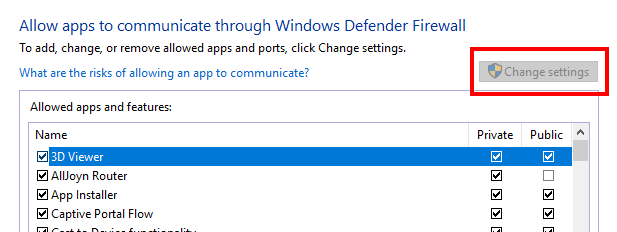
Use Windows Search to find and open Windows Defender Firewall. Select Allow an App or Feature Through Windows Firewall.

In the next window, click Change Settings to edit the list of apps. Select FTP Server and make sure to check Allow for both Public and Private networks.
Try connecting to your FTP server now from your local network and it should work.
Connect from External Locations
Follow these instructions if you want to connect to your FTP server over the internet.
Open Command Prompt and type IPCONFIG then press Enter. Take note of the Default Gateway IP address.

Open a browser and type your IP address in the address bar. You will be asked to sign in using your router credentials. Find the Port Forwarding section. The interface would be different depending on your provider. It is usually under the WAN or NAT settings.

Fill in the following information:
- Service name – Enter your desired FTP name.
- Port range – Use port 21.
- TCP/IP Address – The same as your IPv4 address. Type IPCONFIG in Command Prompt if unsure.
- Local TCP/IP port – Use port 21 again.
- Protocol – Use TCP.
Apply all your changes and then exit.


