Oracle database is loaded with a ton of features that makes it an essential tool in the world of modern business. Every time a newer version of the database is released from Oracle, new features are added that help to improve the existing operations and processes of corporations across the globe.
Oracle Database 12c is a popular update, and we will walk you through the steps to install a new database on a Windows 10 machine. Let’s have a look.
Steps for Installing and Setting-up Oracle 12c
Before you set up the Oracle database in Windows, you will need to download the set-up package from the official website first. Once you have the ZIP file, you can extract it to any folder on your system and then double-click on the setup.exe file to start the installation.
Note: You will need to have an account on Oracle to download the package. If not, you will need to complete the registration to get started.
STEP 1: Launch the setup.exe file and enter your email address if you would like to be notified of security updates from Oracle. If you are not interested, then you can ignore and click on Next.

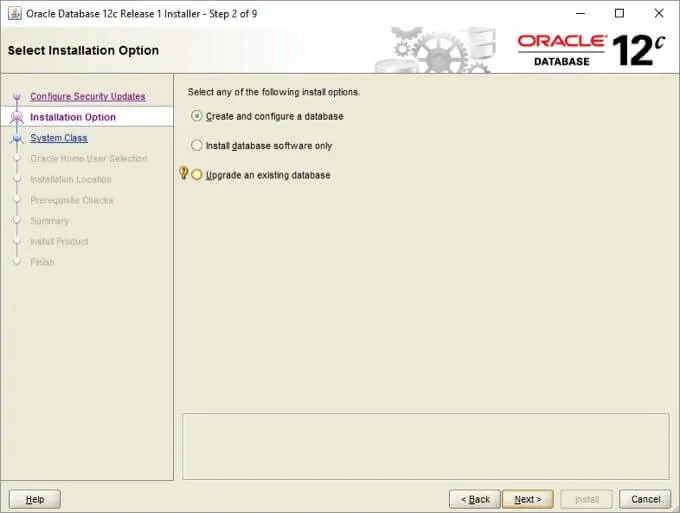
STEP 2: In the second step, the setup will ask you if you want to-
- Create and configure a database
- Install database software only
- Upgrade an existing database
In this article, we are installing a new database, so we will select the first option.
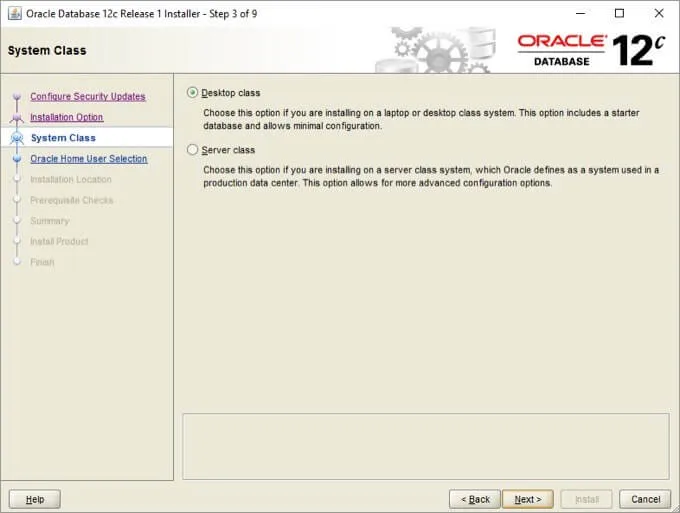
STEP 3: Now in this step, the installer will request you to select the system class. Since we are installing the database on a desktop system and not a server, we will be choosing Desktop Class. Hit Next to continue.
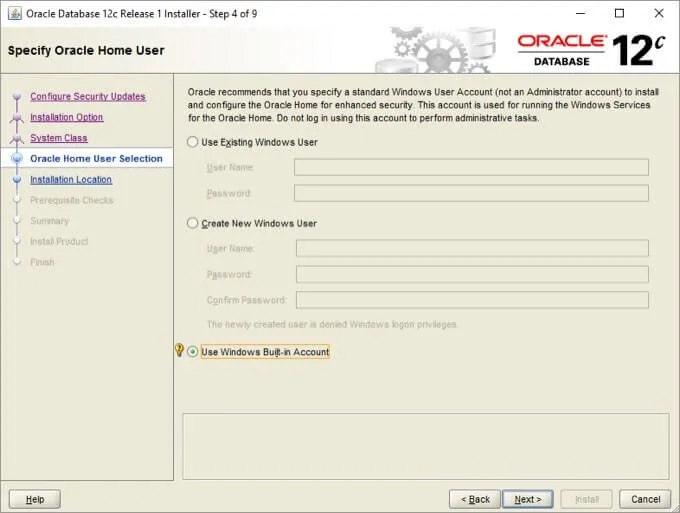
STEP 4: In this step, we have to choose the type of Windows user account to use for configuring Oracle Home. You should choose a standard Windows user account for security purposes. It is not recommended to use an Administrator account. In our case, we chose the Windows Built-in Account.
STEP 5: On the next screen, you will have to configure the following three options:
- Select the folder where you want the Oracle Database to be installed
You can proceed with the default location provided by the installer. The default location is the C drive of the desktop. However, you can also change this location if you want. This is the location where the Oracle server will store all the important files such as data files, control files, and redo logs.
- Enter the global database name and password
Enter an administrative password for the database that conforms to the Oracle recommended standards. The password created for the global database shall be used later in Step-8 for logging-in to the administrator accounts like SYS and SYSTEM.
- Enter the pluggable database name
A pluggable database is a compilation of schema objects, schemas, and nonschema objects that appears as a non-CDB to an Oracle Net Client.
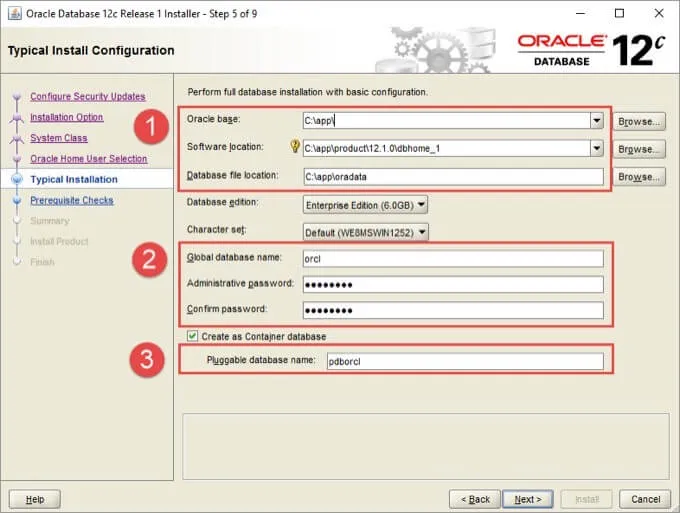
Note: By default, the setup creates a container database and pluggable database ‘pdborcl’. The pluggable database has the same HR schema.
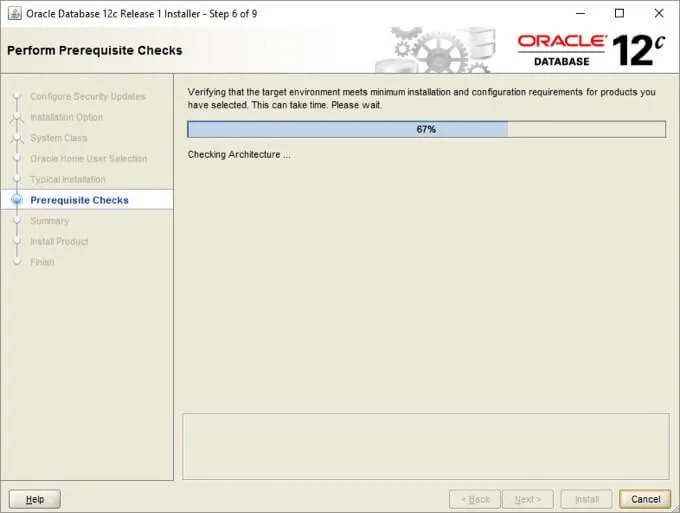
STEP 6: In this step, you don’t have to do anything except wait for the installer to complete the prerequisite check.
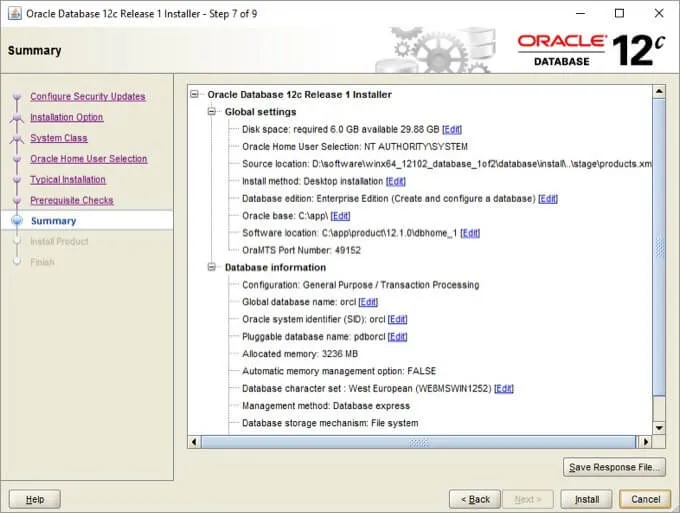
STEP 7: At this step of the installation process, the set-up will display a summary of information like global settings, database information, etc. Make sure to review all such information and then hit the Install button if everything appears good.
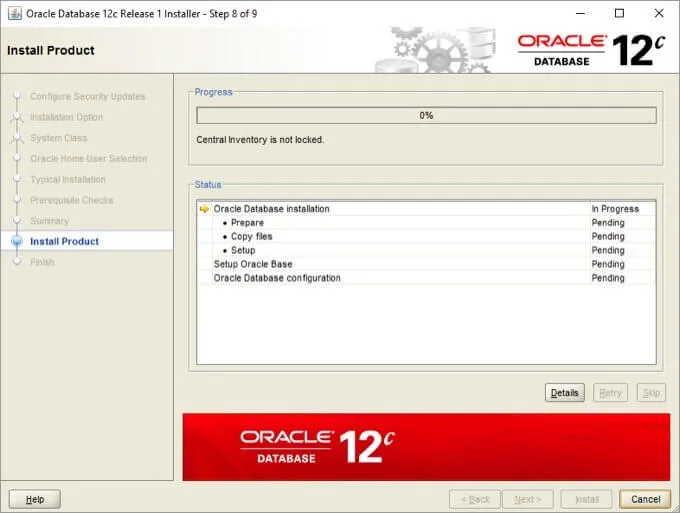
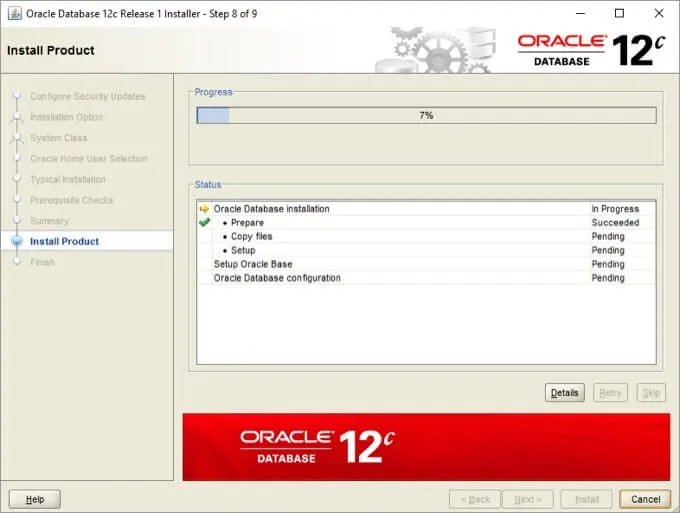
STEP 8: The database files will now be installed and the process will take some time depending on your system.
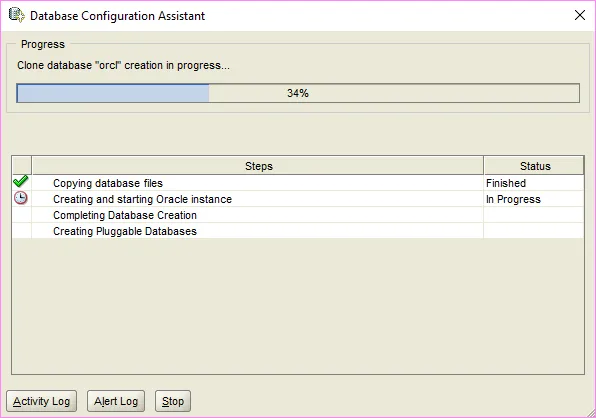
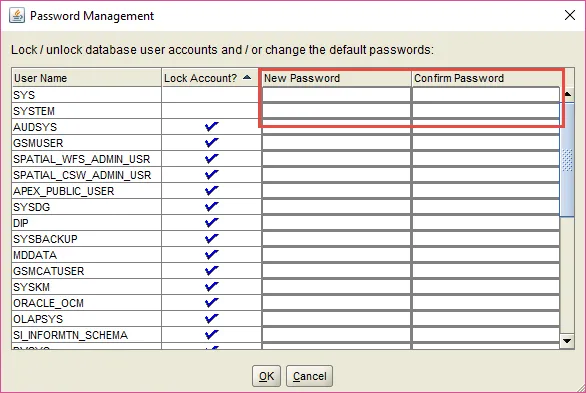
At some point, the Database Configuration Assistant window will pop-up. Click on the Password management button to set-up the password for Oracle Database accounts.
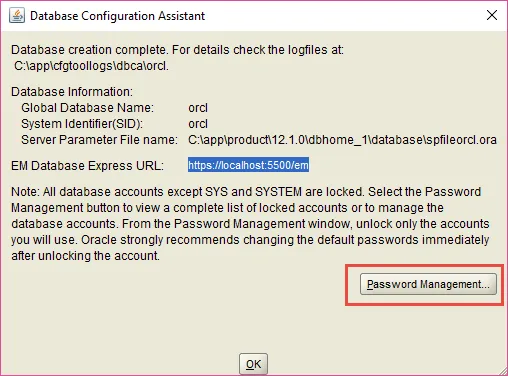
Type in the password twice for both the SYS and SYSTEM user accounts created for the Global database in the Step-5.
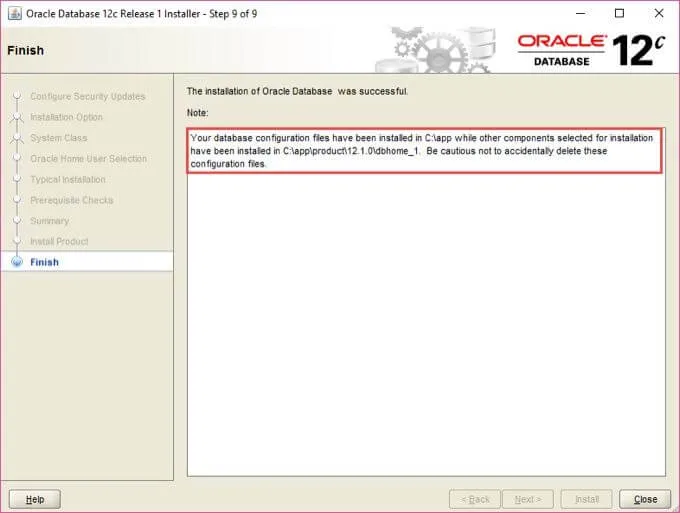
STEP 9: The final window will display a successful message if no errors occurred during the installation. You can click on the Close button.
All it takes is 9-easy steps to install the Oracle Database 12c on Windows. When you are done with the installation, you can initiate the process of connecting to the Oracle Database.
Connect to Oracle Database
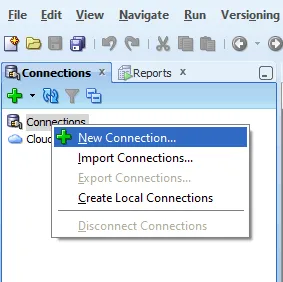
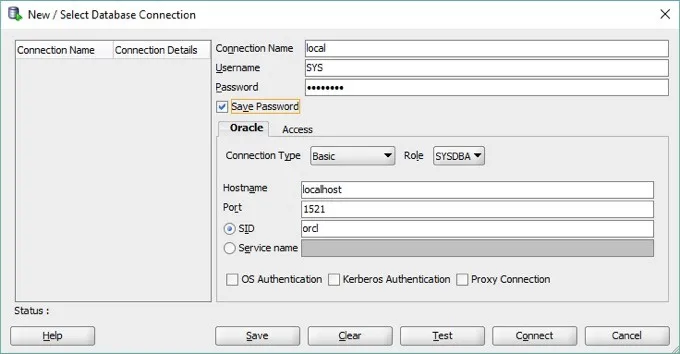
To connect to the Oracle database, you will need to open the SQL developer application, which is provided by the Oracle Database itself. Then, right-click the connections and select New Connection for creating a new connection.
After that, you can start filling in the information that was provided by you in the installation process. Hit the Connect button and you will be connected to the Oracle database.
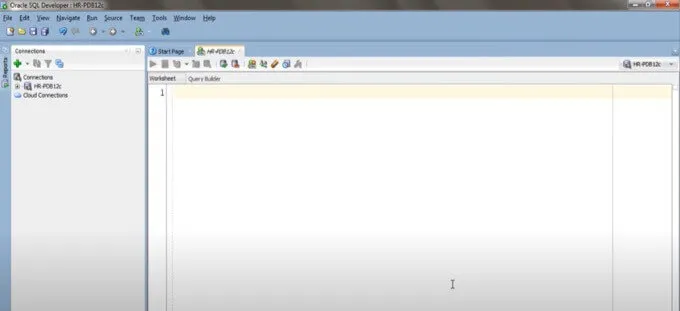
At this point, the SQL Developer will display all the objects in the database:
The installation of Oracle database 12c is complete and you are now ready to start exploring Oracle.