In a previous post, we taught you how to set up an AWS S3 bucket for storing files. As it’s not the only enterprise-class cloud-based storage solution out there, we thought it would be a good idea to do similar posts for other similar solutions like Azure Files and Google Storage.
We bet there are some of you who would also like to try those out. In this tutorial, you’ll learn how to set up an Azure Files file share.

As with Amazon S3, Azure Files isn’t for home or small business use. The people who would likely be interested in using Azure Files would be mostly large businesses.
Let’s now proceed with the tutorial.
Create an Azure Files File Share
First thing’s first. We’ll assume you already have an Microsoft Azure account. If you already have one, go to the Azure site (azure.microsoft.com) and sign in.

Next, navigate to the Portal.

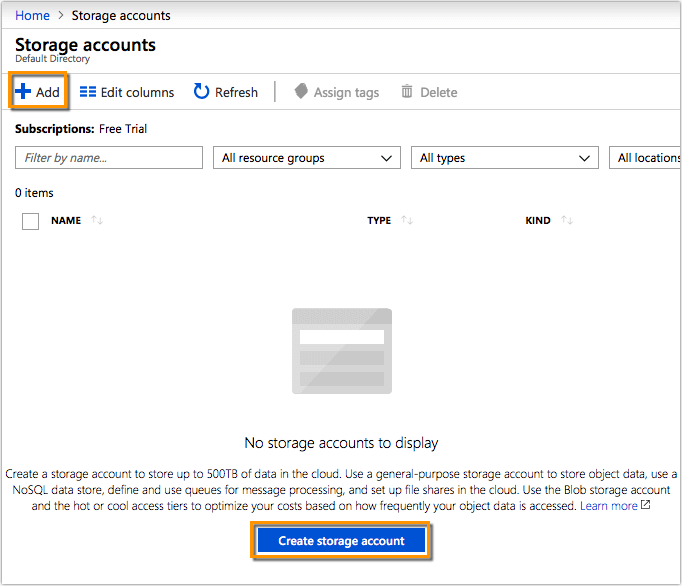
You should then see a large collection of Azure services. What we’re interested in is the one named Storage accounts. Click that.

Since we don’t have a storage account yet, let’s create one first. Click either + Add or the Create storage account button.
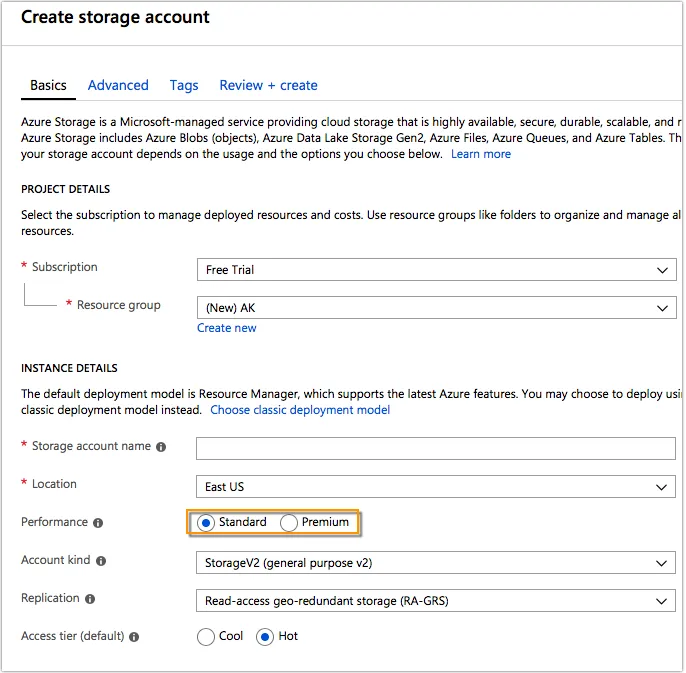
When you create a storage account, the first thing you’ll need to do is select a Subscription and a corresponding Resource group. I availed of the free trial, so that’s what I selected as my subscription. For the resource group, I created one named AK and then selected that. A resource group is simply a logical container for grouping your Azure services.

Next, give the storage account a name (e.g. mystorexyz). The name must be unique across all existing storage account names in Azure. It must be 3 to 24 characters long and can only contain lowercase letters and numbers.
After that, select a Location. Although any location will work, you will sometimes need to choose a specific location for compliance purposes. Some countries and regions (like the EU) have specific mandates as to where data can be stored. For the purpose of this tutorial, we simply selected the default.

Choose a Performance option for this account. Standard storage is cheaper and is best suited for applications where the stored data won’t have to be accessed frequently. Premium, on the other hand, is more suited for high I/O applications that require low latency performance. We’ll just choose Standard for now.
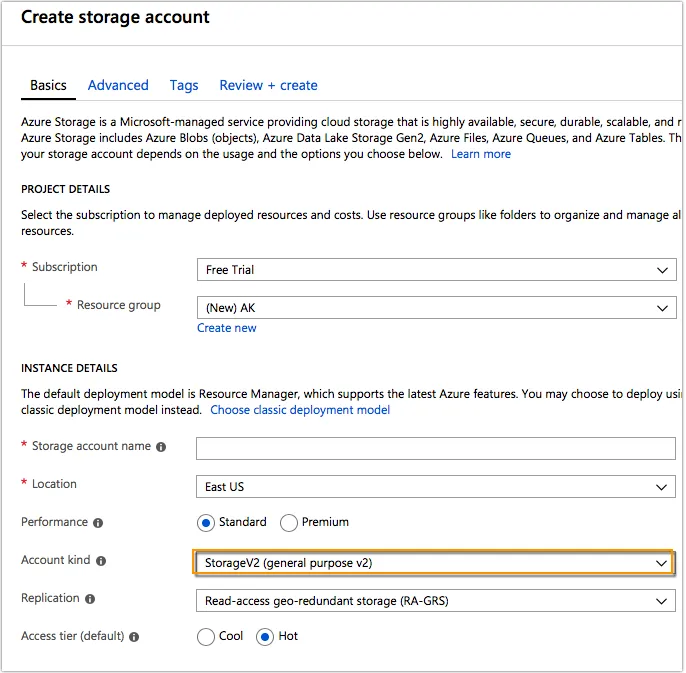
For the Account kind, you have 3 choices:
- General-purpose v2 – This is the basic storage account type for blobs, files, queues, and tables. It’s recommended for most storage scenarios.
- General-purpose v1 – This type is also used for blobs, files, queues, and tables but it’s old and has only been kept for backward compatibility purposes.
- Blob storage – This is only suited for blobs.
As you might have gathered, it’s best to choose general purpose v2.
Every single data stored in your Azure storage account is always replicated. This is great because that means you will always have another copy of your data should something go wrong. All you need to do is select a replication strategy. The choices are the following:
- Locally redundant storage (LRS)
- Zone-redundant storage (ZRS)
- Geo-redundant storage (GRS)
- Read-access geo-redundant storage (RA-GRS)
As each strategy has its own set of advantages, we just grabbed this table from the Azure documentation to give you an idea how each one compares with the others.

The default is RA-GRS, so let’s just choose that for now.

Lastly, you need to choose an access tier, i.e. Cool or Hot. Hot is for data that is accessed frequently, while Cool is for data that is accessed infrequently. Let’s just leave this setting to its default, i.e. Hot.

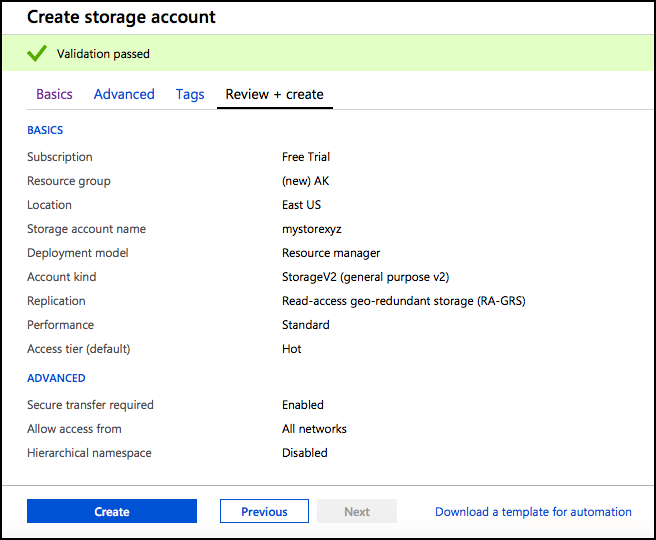
And with that, you should be ready to click Review + create.

It will undergo some validation process, but once you see the Validation passed notice at the top, proceed to click the Create button. Don’t miss this part. When I was playing around with this, I thought the Review + create would automatically create the storage account after the review. It didn’t.
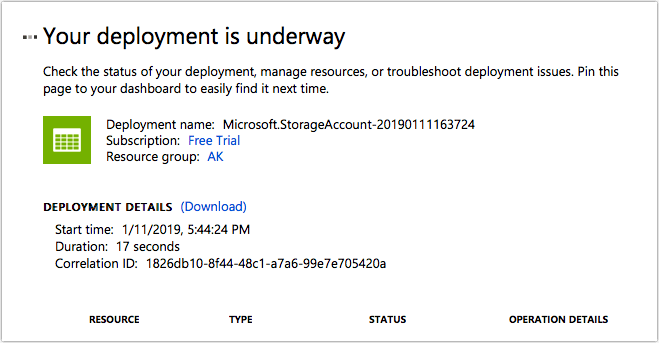
Creation and deployment might take a minute. You’ll know it’s still processing if you still see something like Your deployment is underway.
Once it’s done, that message should be replaced by Your deployment is complete.
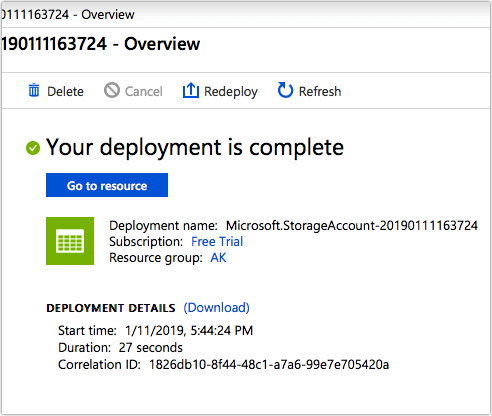
In addition, a link to the resource will pop up at the right corner of your web page. Click the Go to resource button to proceed to the newly created resource.

By the way, we’re not yet done. What we’ve only managed to create at this point is the storage account. We still need to create that share. When you get to your storage account’s blade (it’s just a fancy name they use for ‘panel’), click on Files.

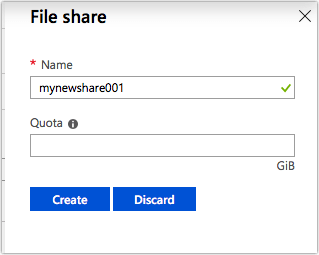
It’s here where you can add your File share. Click + File share to add a new file share.

Give the file share a name and specify a quota (or retain the default) and then click Create.
As soon as the creation process completes, you should then see the newly created file share under your storage account.

That share is now ready to receive uploads. Most large enterprises will likely want to automate their uploads, so they’ll mostly be doing that programmatically, e.g. through a custom application interfacing Azure Files via the File REST protocol.
However, it’s also possible to upload files manually via the Portal. Just click on that share to navigate into it and then click the Upload button.

You can then upload files as you normally would in any GUI. That’s it. Hope you found this useful. Enjoy!