In this article, we’ll be talking about identity management in Windows Server 2016. Specifically, we will be talking about SPNs (Service Principal Names) and how wonderful they are.
First of all, an SPN is like an alias for an AD object, which can be a Service Account, User Account or Computer object, that lets other AD resources know which services are running under which accounts and creates associations between them in Active Directory.
There are several ways to check which SPNs are assigned to an object. One is through Active Directory Users and Computers and the other is using the command line.
View SPNs in Active Directory
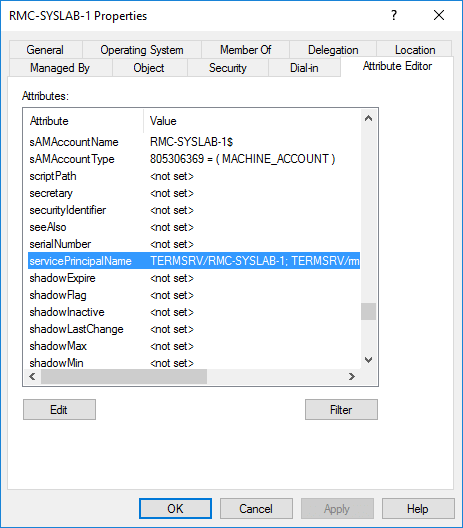
To be able to see the SPNs using Active Directory Users and Computers, you need to have Advanced Features enabled in the console by going to the View menu. After enabling it, go to the desired AD object, choose Properties and go to the Attribute Editor tab:
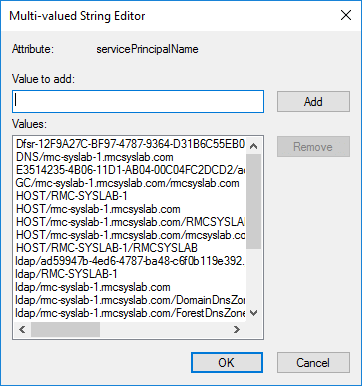
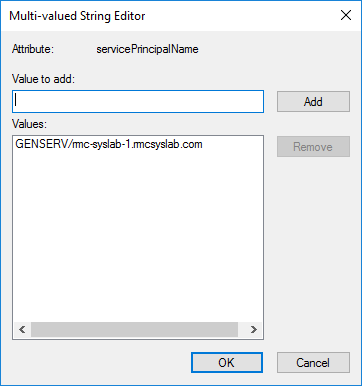
Then look for the attribute servicePrincipalName and click Edit. Here you will see a list of all the SPNs and also the ability to add SPNs.
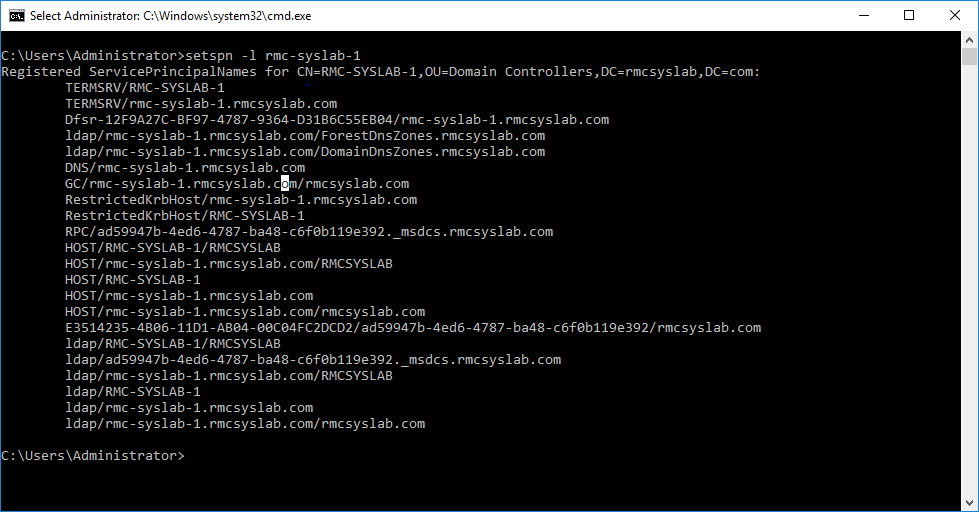
The other way is to use the setspn –l in a command prompt to view the SPNs for that specific object.
We can also add other SPNs to this object, depending on what the object is hosting, which type of service and so forth.
Create SPN in Active Directory
Let’s say we have a new service and we want to add an SPN, so that other AD resources can find out which server is hosting that service and with which user it’s authenticating.
First, let’s create a service account in Active Directory.
New-ADServiceAccount -Name MSA-syslab-1 -RestrictToSingleComputer
Now, we will associate the Managed Service Account to our server.
Add-ADComputerServiceAccount -Identity rmc-syslab-1 -ServiceAccount MSA-syslab-1
Next, let’s install that service account on the server.
Install-ADServiceAccount MSA-syslab-1
Finally let’s create our generic service.
New-Service -Name GENSERV -BinaryPathName C:\Windows\System32\notepad.exe
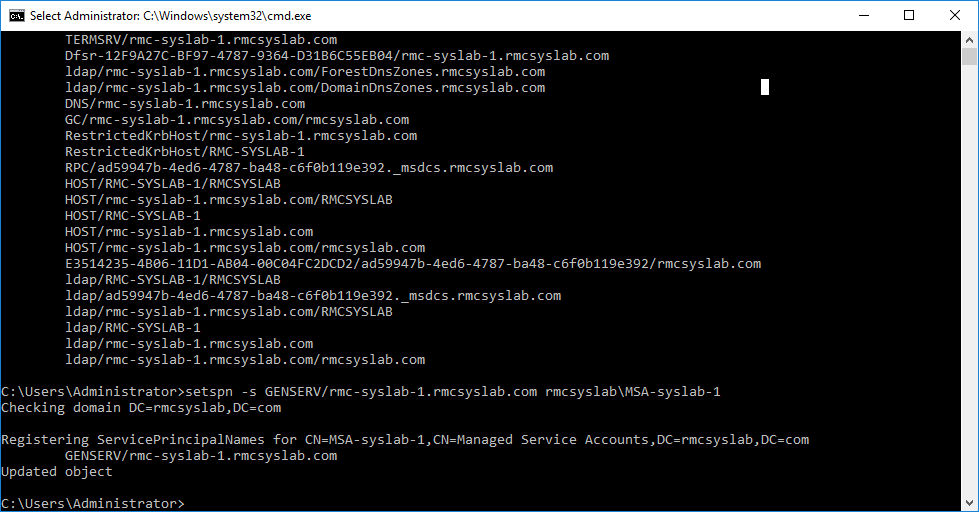
Now we use the setspn –s command that creates and SPN and uses the –s switch to make sure a duplicate SPN does not exist.
setspn -s GENSERV/rmc-syslab-1.rmcsyslab.com rmcsyslab\MSA-syslab-1
The command adds the service GENSERV hosted on rmc-syslab-1 running under the MSA user MSA-syslab-1. Now what’s left is to configure the service to run under the MSA account.
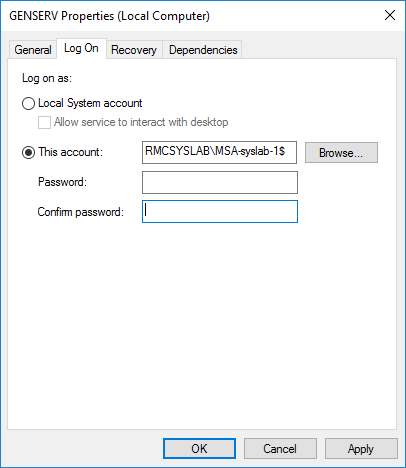
As you can see under the Log On tab in the service properties, I configured the MSA account and left the password blank, since we know that MSA passwords are managed by Windows.
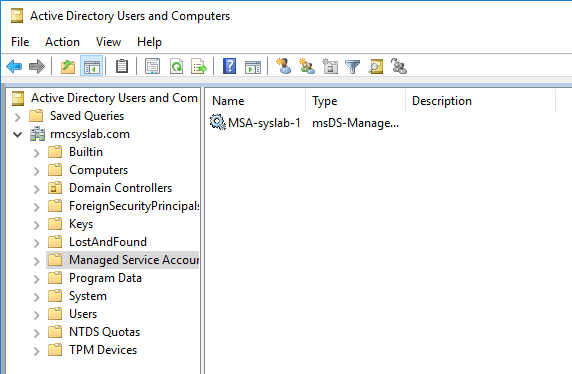
Now let’s check the Service Account and see which SPN has been added to it.
As you can see, it has the SPN of GENSERV/rmc-syslab-1.rmcsyslab.com since this user logs on and authenticates that service.
Well, that is about it on SPNs for now. Please keep in mind that SPNs are very sensitive. You should only dive into this if there is an issue or if you are creating some custom service.
Thank you for your time and I hope this article was interesting to you. Enjoy!

