The following article is a walkthrough on using Microsoft Virtual Machine Converter 3.1 to migrate a physical server to a VM on the Hyper-V platform.
The first step is to go and download the MVMC tool at https://www.microsoft.com/en-us/download/confirmation.aspx?id=42497.
Once downloaded and installed, go to the Start Menu and fire up the tool.
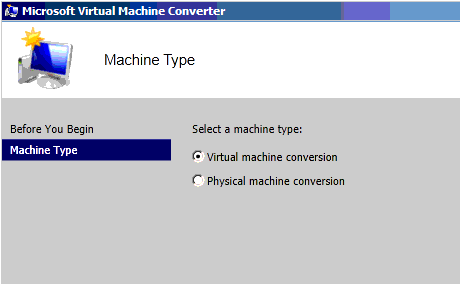
To start, we need to choose which type of machine we are converting. In our case, we are converting a physical server, so we would choose Physical machine conversion.
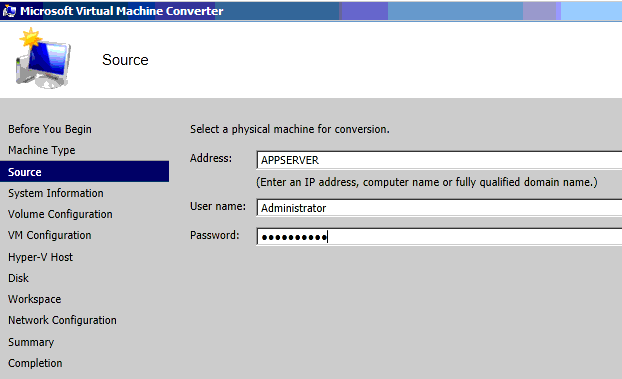
Next, we need to specify the Source machine. You can either enter the IP, Hostname or FQDN of the machine you are converting.
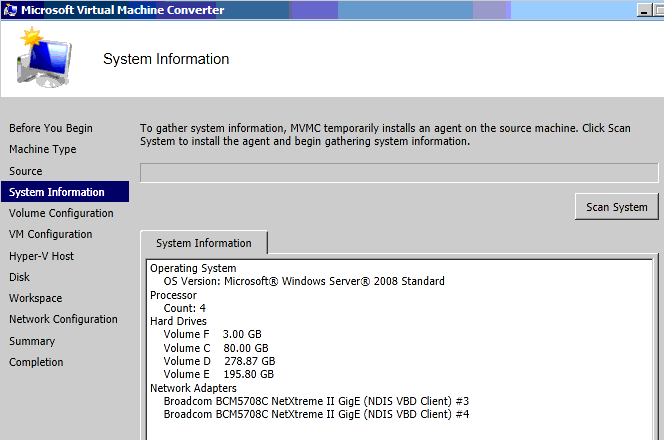
Now, we need to scan the system and gather information for the wizard, so we click the Scan System button in the next prompt. If everything checks out, we click Next.
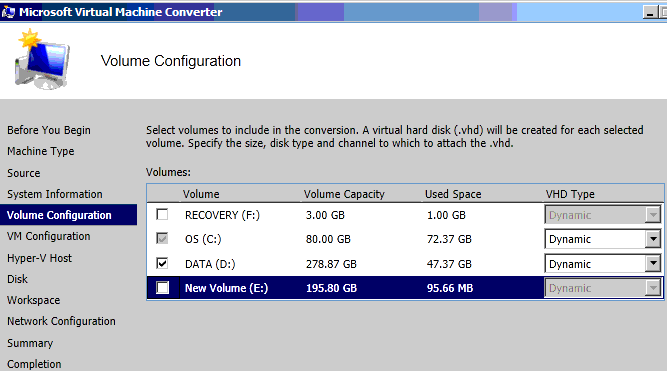
On the next screen, we choose which volumes we want to convert. For example, I removed the Recovery F: and E: drives for the purpose of this tutorial and only left the C: and D: drives. The VHD Type needs to be dynamic to avoid long times in waiting for the tool to create the whole disk, even though we’re not using all of the space allocated.
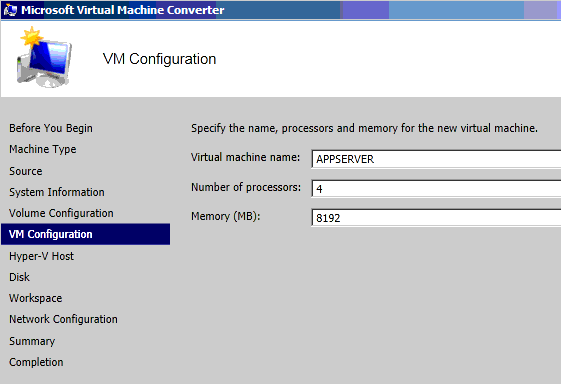
Next, we specify the name of the VM, the number of of CPUs and the amount of RAM.
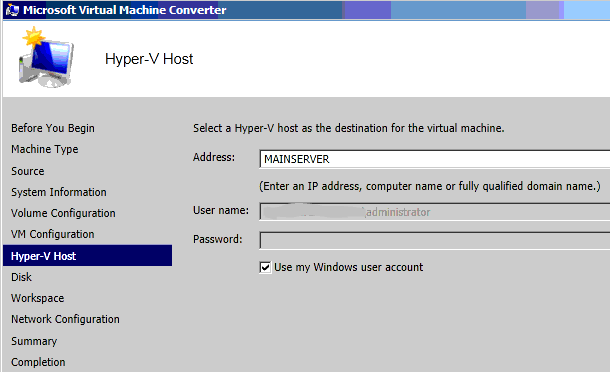
Next, we specify the Hyper-V Host that we are migrating to. The name can be an IP Address, Hostname and FQDN.
On the next screen, we specify the network path that will be used to store the VHDs on the destination Hyper-V Server. I chose to create a new folder VM in the root C: drive.
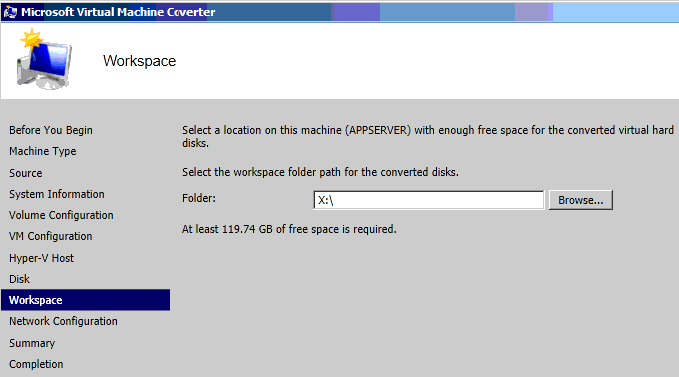
Next, we need to choose the workspace destination. The workspace destination can be a network drive or a local drive. It’s where the disks are converted prior to being copied over the network. It’s like a buffer.
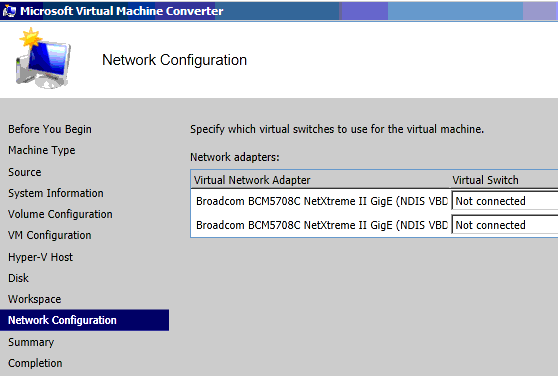
Next, we choose which network we want to connect the server to. To be on the safe side, I opted to leave it as Not Connected. We can always configure that in the VM settings after the migration.
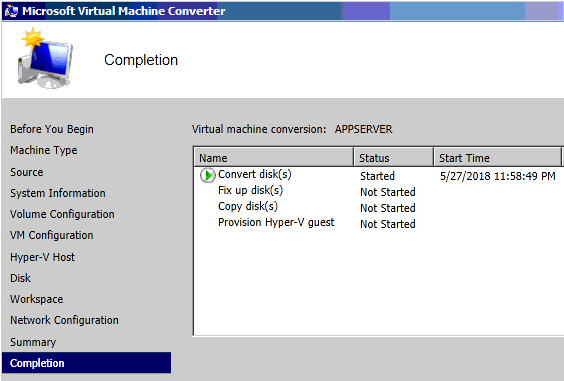
Afterwards, we go through the Summary page and click Finish. Now the migration process has started and all we need to do is wait for it to finish.
Thank you for taking the time in reading this tutorial and I hope it helps you migrate a physical server to Hyper-V the correct way. Enjoy!

