Once you have installed VMware ESXi onto a server, you will probably want to give it a static IP address rather than using DHCP. There are two ways you can configure ESXi with a static IP: either via the web GUI interface or via the server console management screen.
I found it a lot easier to do via the console, but I’ll list out both ways here just in case. Obviously, if you can’t get to the server physically, then you’ll want to use the web interface.
Set Static IP for ESXi via Console
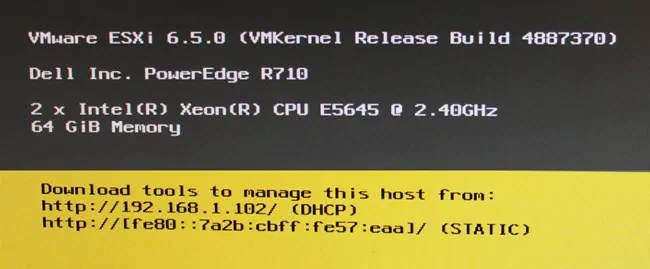
First, you’ll want to get to the main screen on your ESXi server that tells you where to download the tools to manage the host.
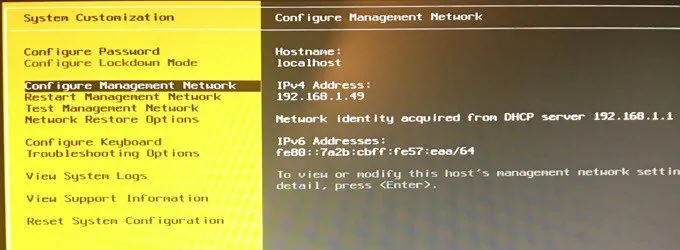
On this screen, you press F2 to bring up the system customization screen.
Here you will want to arrow down to the Configure Management Network option. On the right-hand side, you’ll see information about the hostname and the current IPv4/IPv6 addresses for the server.
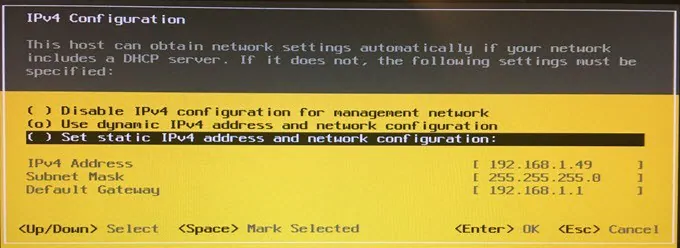
When you press Enter, you’ll get another screen where you can configure the network adapters, VLANs, DNS, etc. We want to change the IPv4 or IPv6 configuration, so highlight the appropriate option and press Enter.
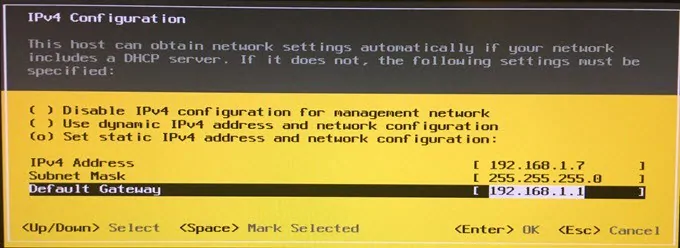
On the IPv4 screen, you’ll want to highlight Set static IPv4 address and network configuration and then press the spacebar. When you do that, all the IPv4 config lines become editable. Arrow down and type in the new IP address, subnet mask and default gateway that you would like to use.
When you are done, press Enter to save the changes. You’ll see another dialog that asks you to apply the changes and restart the management network. You’ll want to press Y to agree.
Now you’ll be back at the main screen and it should now show the new IP address and the words STATIC in parentheses.
Set Static IP for ESXi via Web GUI
If you want to do the same thing over the web GUI, you need to login and then click on Networking in the left-hand menu.
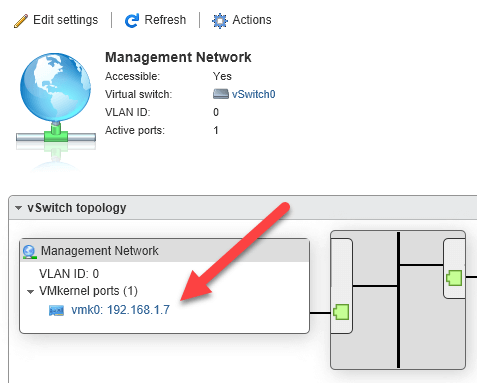
In the right pane, click on Management Network.
Here you will see what virtual switch the management network is on, the VLAN ID and how many active ports are being used. At the bottom, in the vSwitch Topology box, you’ll see the virtual name for the physical port being used on the server. In my case, it’s vmk0. Click on that to edit it.
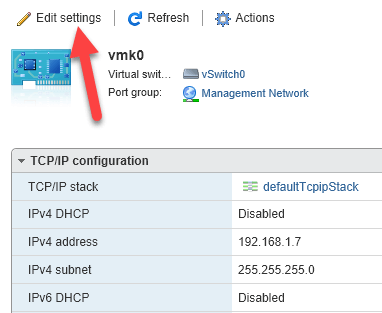
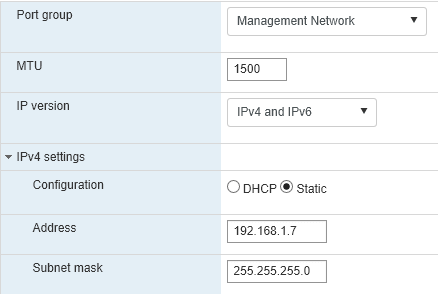
Here you should see all the current TCP/IP configuration, which you can change by clicking Edit settings. Expand the IPv4 section, choose from DHCP or Static, and then type in the new IP address and subnet mask if you chose the latter option.
That’s about it! You’ll be asked to restart the management network, which will update the IP info. Obviously, if you are doing this over the web interface, your connection to the server will disconnected. You’ll need to type in the new IP address to connect. If you have any questions, feel free to comment. Enjoy!

