
With my newly purchased refurbished Dell PowerEdge R710 server, I’ve been playing around with a lot of technical stuff lately. One feature I really wanted to learn how to use was iDRAC, which stands for Integrated Dell Remote Access. It’s software that is embedded directly onto the server and therefore allows you to control it without needing to install an OS or hypervisor.
There are a lot of things iDRAC can do, but in this article, I’ll be talking about how to setup the initial configuration for iDRAC so that you can log into the web interface. This entails setting up a static IP for iDRAC using either the dedicated port or by sharing the other LAN ports.
Configure Static IP for iDRAC
To get started, boot up your server and wait until you see the iDRAC configuration section pop up during the boot process. You’ll need to quickly press CTRL + E as you only have about 5 seconds before the boot process continues.

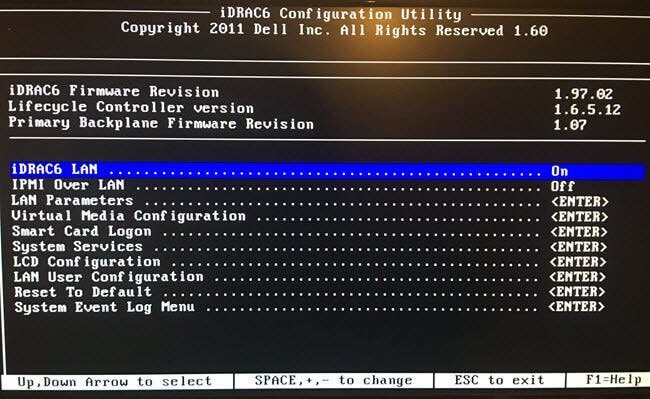
It should say Press CTRL + E for Remote Access Setup within 5 sec. When you enter the iDRAC setup, there are quite a few options.

You’ll definitely want to make sure iDRACx LAN is set to ON. This is an older server, so it’s still on iDRAC 6. Some of the newer servers now run iDRAC 9. To set a static IP for iDRAC, arrow down to LAN Parameters and press Enter.

At the very top, you should see NIC Selection, which I recommend setting to Dedicated. Just about all of the Dell PowerEdge servers have a dedicated port for iDRAC, so may as well use it.

You’ll have to arrow down quite a bit until you get to IPv4 settings. If you are using IPv6 in your environment, then you have to scroll a little lower. Make sure it is set to Enabled and then scroll down to IPv4 Address Source and change the value to Static.
You’ll then need to change the IPv4 Address, Subnet Mask, Default Gateway and DNS Server settings. Once you have all of those in place, go ahead an exit from the iDRAC configuration utility. It’ll ask you whether or not you want to save the changes, so make sure to do that.
The boot process will continue and once the server is up and running, you should be able to access the web interface. Just make sure you have a cable attached the dedicated port on the back of the server.

Open a web browser on another computer connected to the same network as your server and type in https://ipaddress. You should now see the iDRAC login screen.
For iDRAC 6, 7, 8, and 9, it seems like the initial username and password for logging in are root and calvin. Starting in version 7, it gives you a warning after logging in to make sure that you change the default credentials since it’s the same for every Dell server.
That’s about it! Now you can start playing around with iDRAC! I’ll be writing more posts on how to use iDRAC to update your server, repair it, and lots more. Enjoy!