Consumer cloud storage solutions like Google Drive, DropBox, and OneDrive are great for personal or perhaps even SMB (small-to-medium-sized business) use. But if you’re a large enterprise, you’d do better with enterprise-grade solutions like Amazon S3.
Amazon S3 provides several features that can help you meet more stringent corporate security policies as well as regulatory requirements like HIPAA, GDPR, and PCI-DSS. To mention a few benefits, these features will enable you to:
- Preserve the confidentiality of your data through data-at-rest encryption,
- Specify a region to comply with laws and regulations (like GDPR) that have strict guidelines as to where certain types of data should be stored, and
- Record more detailed logs for auditing or digital forensic purposes.
In this article, we’re going to show you how to quickly set up an Amazon S3 bucket and folder to get you started with S3 storage. Let’s begin.
Create Amazon S3 Bucket
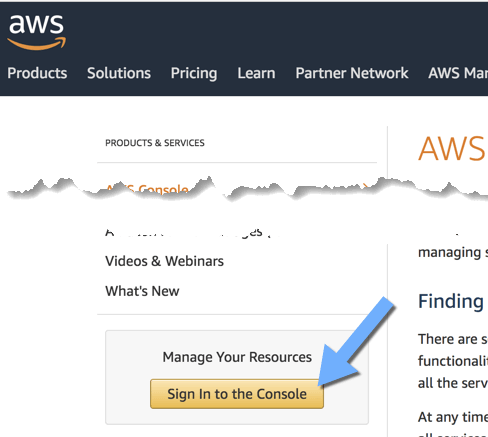
We’re assuming you already have an AWS account. So if you already have that, just login to the AWS console.
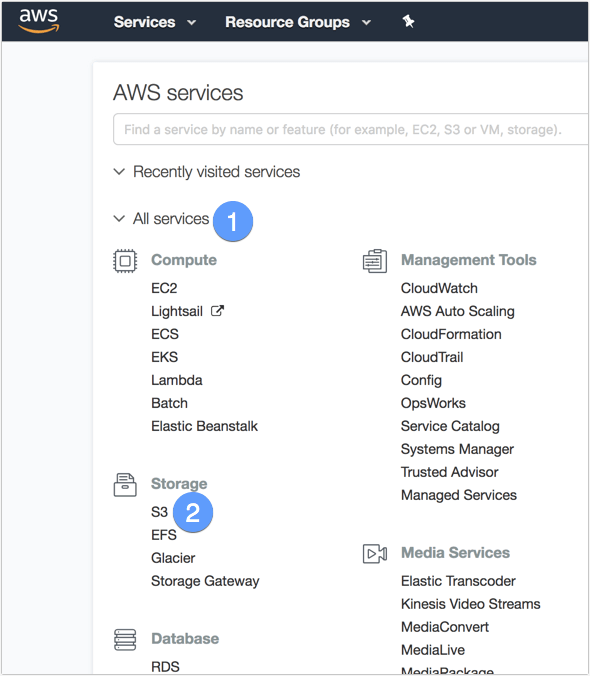
Expand the All Services drop-down and then click S3 under the Storage section.
When the next screen appears, click the Create bucket button.
Give the bucket a name, making sure it’s DNS-compliant. We won’t delve into the details of the specific naming rules for being DNS-compliant, but if you just use a name consisting of 3 to 63 alphanumeric characters, with the alphabet characters all in lowercase, you should be fine.
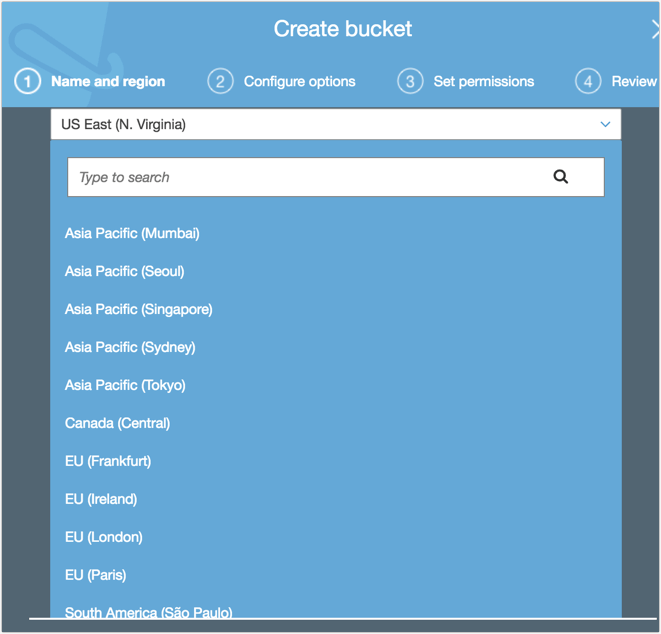
At this point, you can immediately create your first S3 bucket by clicking the Create button shown at the bottom-left corner of the screenshot above. This will create a bucket with all the default settings. The default settings will usually suffice for a start. However, one thing you might want to change first is the Region setting.
You’ll want to choose a region that’s close to your geographical location. Otherwise, if the default region is far from your usual geographical location, you could experience latency issues, which will slow down your upload and download speeds.
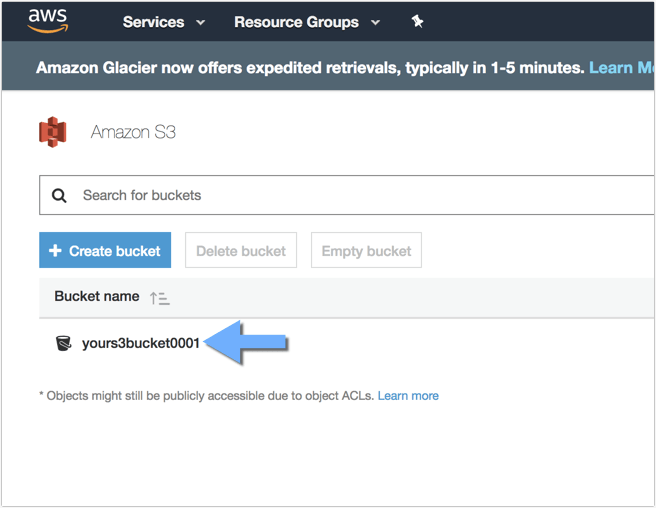
After you click the Create button, you should see your newly created S3 bucket ready for use.
Now, before you start uploading files to your bucket, you might want to create a folder first and then upload files to that folder instead. Just like the folders in your operating system’s file system, S3 bucket folders enable you to segregate files.
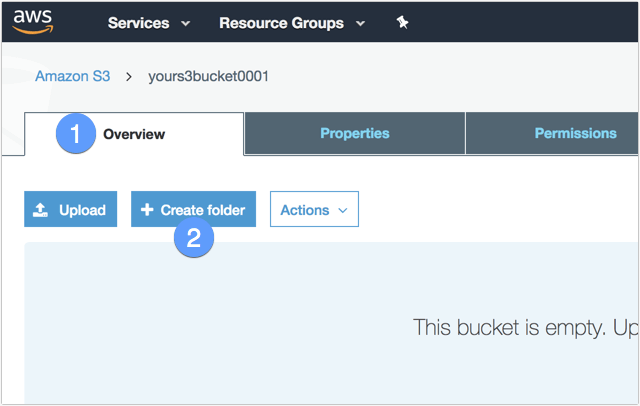
To create a folder, just click the bucket itself, navigate to the Overview tab, and then click the Create folder button.
Give the folder a name and then click the Save button.
Here’s the folder we created for this tutorial.
Now that you have an S3 bucket folder, you can now start uploading files to it. Click the folder to navigate into it.
To upload files onto your folder, you can either:
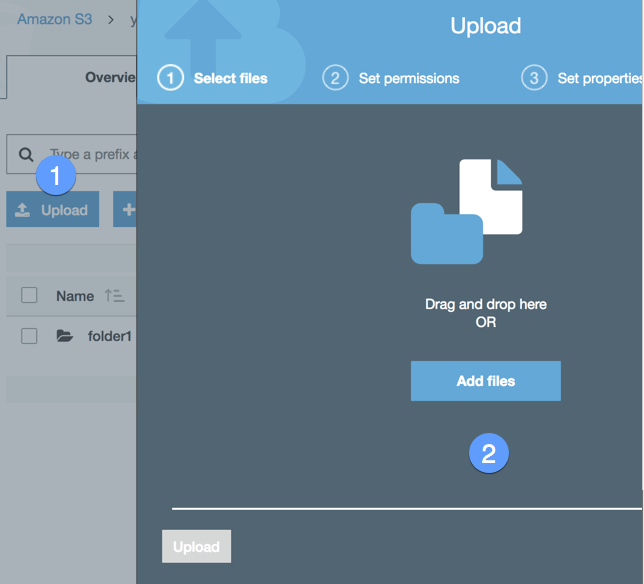
Click the Upload button and then drag and drop files onto the Upload dialog box OR click the Add files button in the Upload dialog box and then select files you want to upload through a browsing tool.
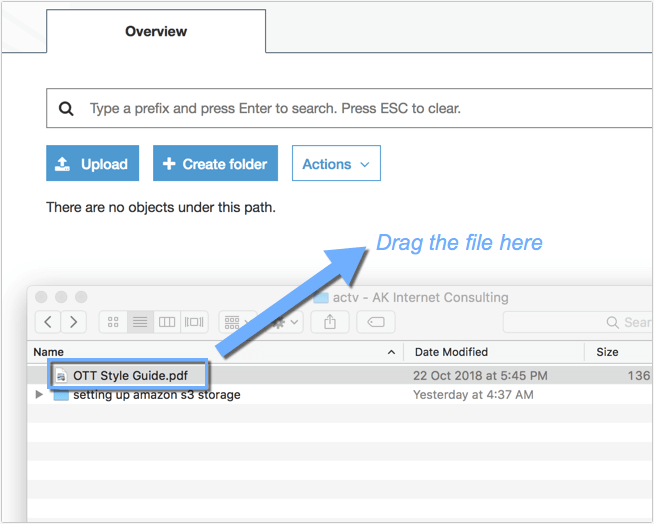
Or you can simply drag files onto the white space like so:
As soon as the file is ready for upload, the Upload dialog should appear. Just click the Upload button to confirm.
That’s all there is to it. Come back next time for more tips like this. Be sure to check out my other posts on how to quickly transfer data to Amazon S3 and how to move data from S3 to Glacier to save money on storage costs. Enjoy!

