
As CTO of my own company, I recently attended a conference that was hyping GPU-powered AI and was annoyed by how far behind Windows is in most of these conversations. Our stack is all Windows Server, but most AI tools still assume Linux. When I looked at the price for a full move to Linux, with new skills, new policies, new everything, it honestly didn’t make any sense. I wanted AI now, but I didn’t want to torch a Windows stack that already runs our business.
What finally gave me hope was a combo that actually works: Windows Server 2025 + Docker + the NVIDIA Container Toolkit. Put together the right way, it lets me run GPU-accelerated containers on our Windows infrastructure in a setup that feels realistic for production. It’s not a neat and clean three-step checklist because, frankly, this stuff is messy. But I’ll walk through what mattered for me: the drivers that count, the Docker settings that tend to cause issues, and the runtime choices that decide whether the GPU shows up at all.
By the end, you’ll have Windows Server 2025 running Docker containers with full NVIDIA GPU support, ready for inference, model serving, or whatever comes next.
What is Windows Server 2025 + Docker + NVIDIA Toolkit?
This infrastructure stack combines Microsoft’s latest Windows Server 2025 with Docker containerization and NVIDIA’s GPU acceleration toolkit to create a platform for running AI workloads on Windows infrastructure. It’s essentially the enterprise Windows answer to the predominantly Linux-based AI deployment ecosystem.
Key Components:
- Windows Server 2025: Latest Windows Server with enhanced container support and security features
- Docker Engine: Container runtime that handles application packaging and deployment
- NVIDIA Container Toolkit: GPU passthrough layer that exposes NVIDIA hardware to containers
- GPU Passthrough: Direct GPU access from containers for compute-intensive AI tasks
- Enterprise Integration: Full Active Directory, Group Policy, and Windows management tooling compatibility
- Hybrid Architecture: Bridge between traditional Windows infrastructure and modern containerized AI workloads
Prerequisites
Before diving into this setup, make sure you have:
- Windows Server 2025 (Standard or Datacenter edition)
- NVIDIA GPU with compute capability 3.5 or higher (RTX 20/30/40 series, Tesla, Quadro)
- Latest NVIDIA GPU drivers (version 470.57.02 or newer)
- Minimum 16GB RAM (32GB recommended for AI workloads)
- Administrative privileges on the Windows Server
- Internet connectivity for downloading components
- At least 100GB free disk space for containers and models
Step-by-Step Installation Guide
Step 1: Verify System Requirements and GPU Detection
First, confirm your system meets the requirements and Windows can see your NVIDIA GPU.
Open Server Manager and navigate to Local Server to verify your Windows Server 2025 installation.

Open Device Manager by right-clicking the Start button and selecting Device Manager. Expand Display adapters to confirm your NVIDIA GPU is detected and has no warning indicators.
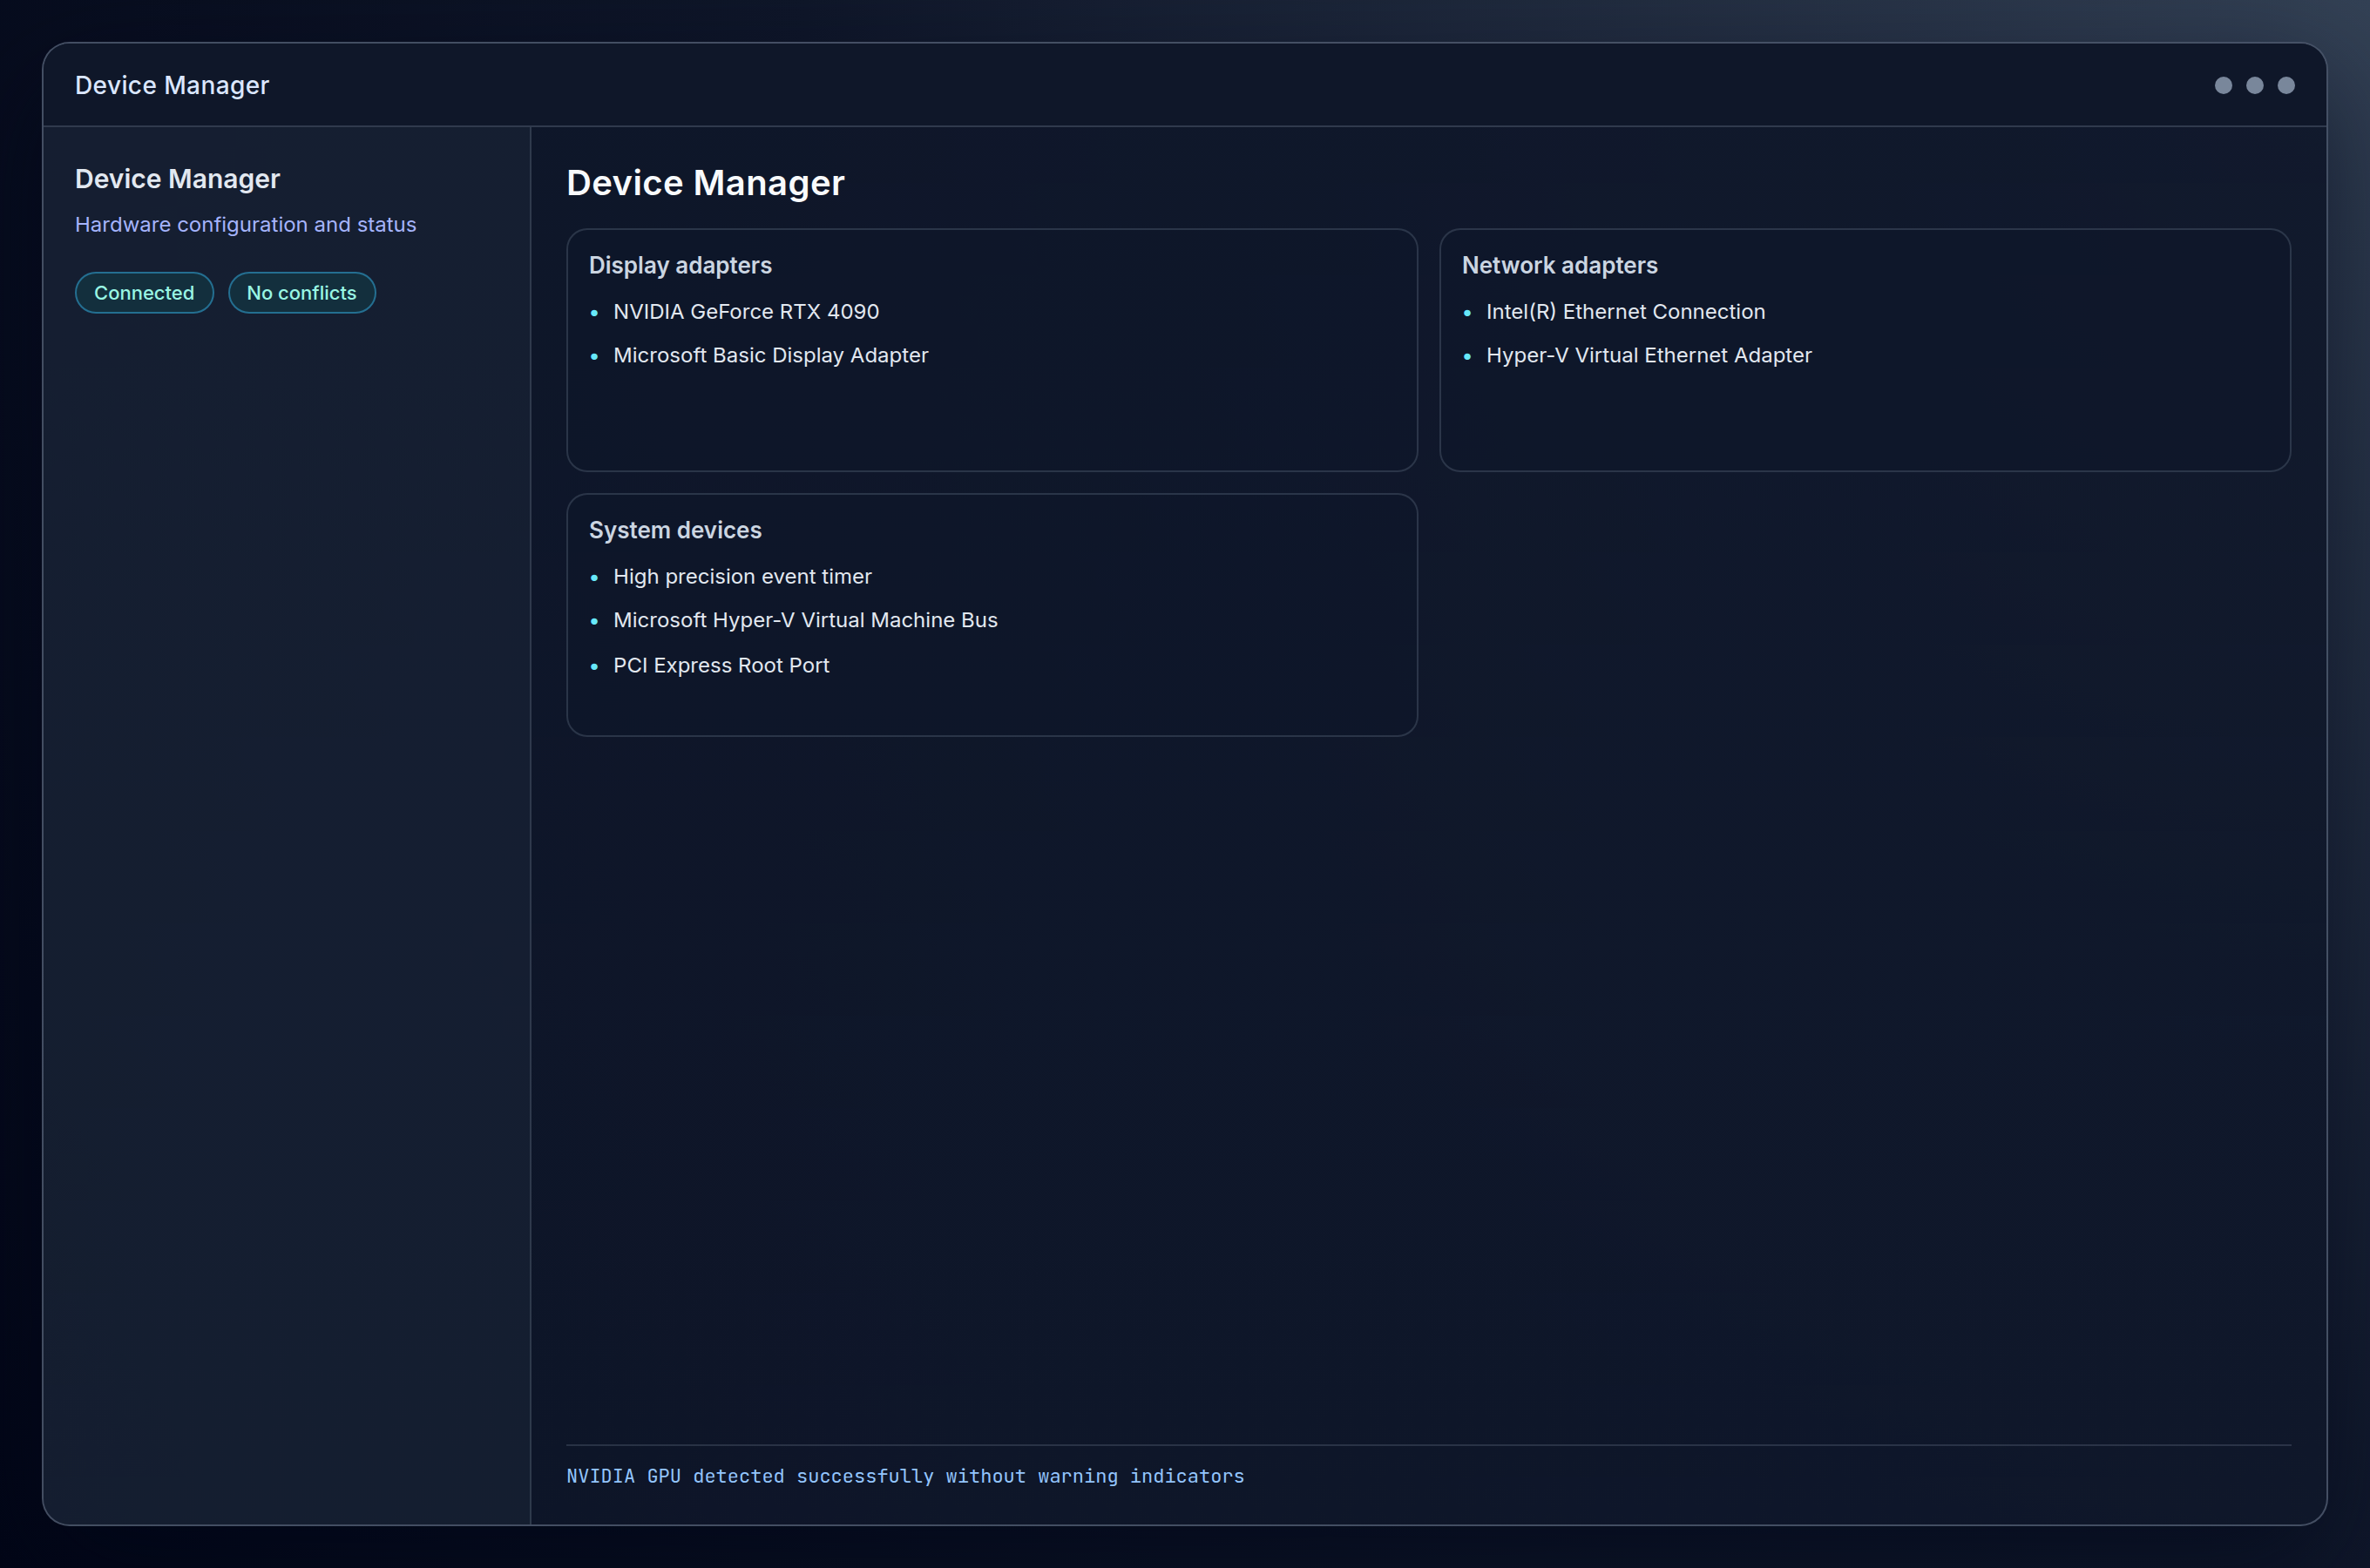
Expected result: You should see your NVIDIA GPU listed without any yellow warning triangles or error indicators.
Step 2: Install Latest NVIDIA GPU Drivers
Download the latest NVIDIA drivers from the NVIDIA Driver Download page. Select Windows Server 2022 as the operating system (Server 2025 drivers use the 2022 branch).
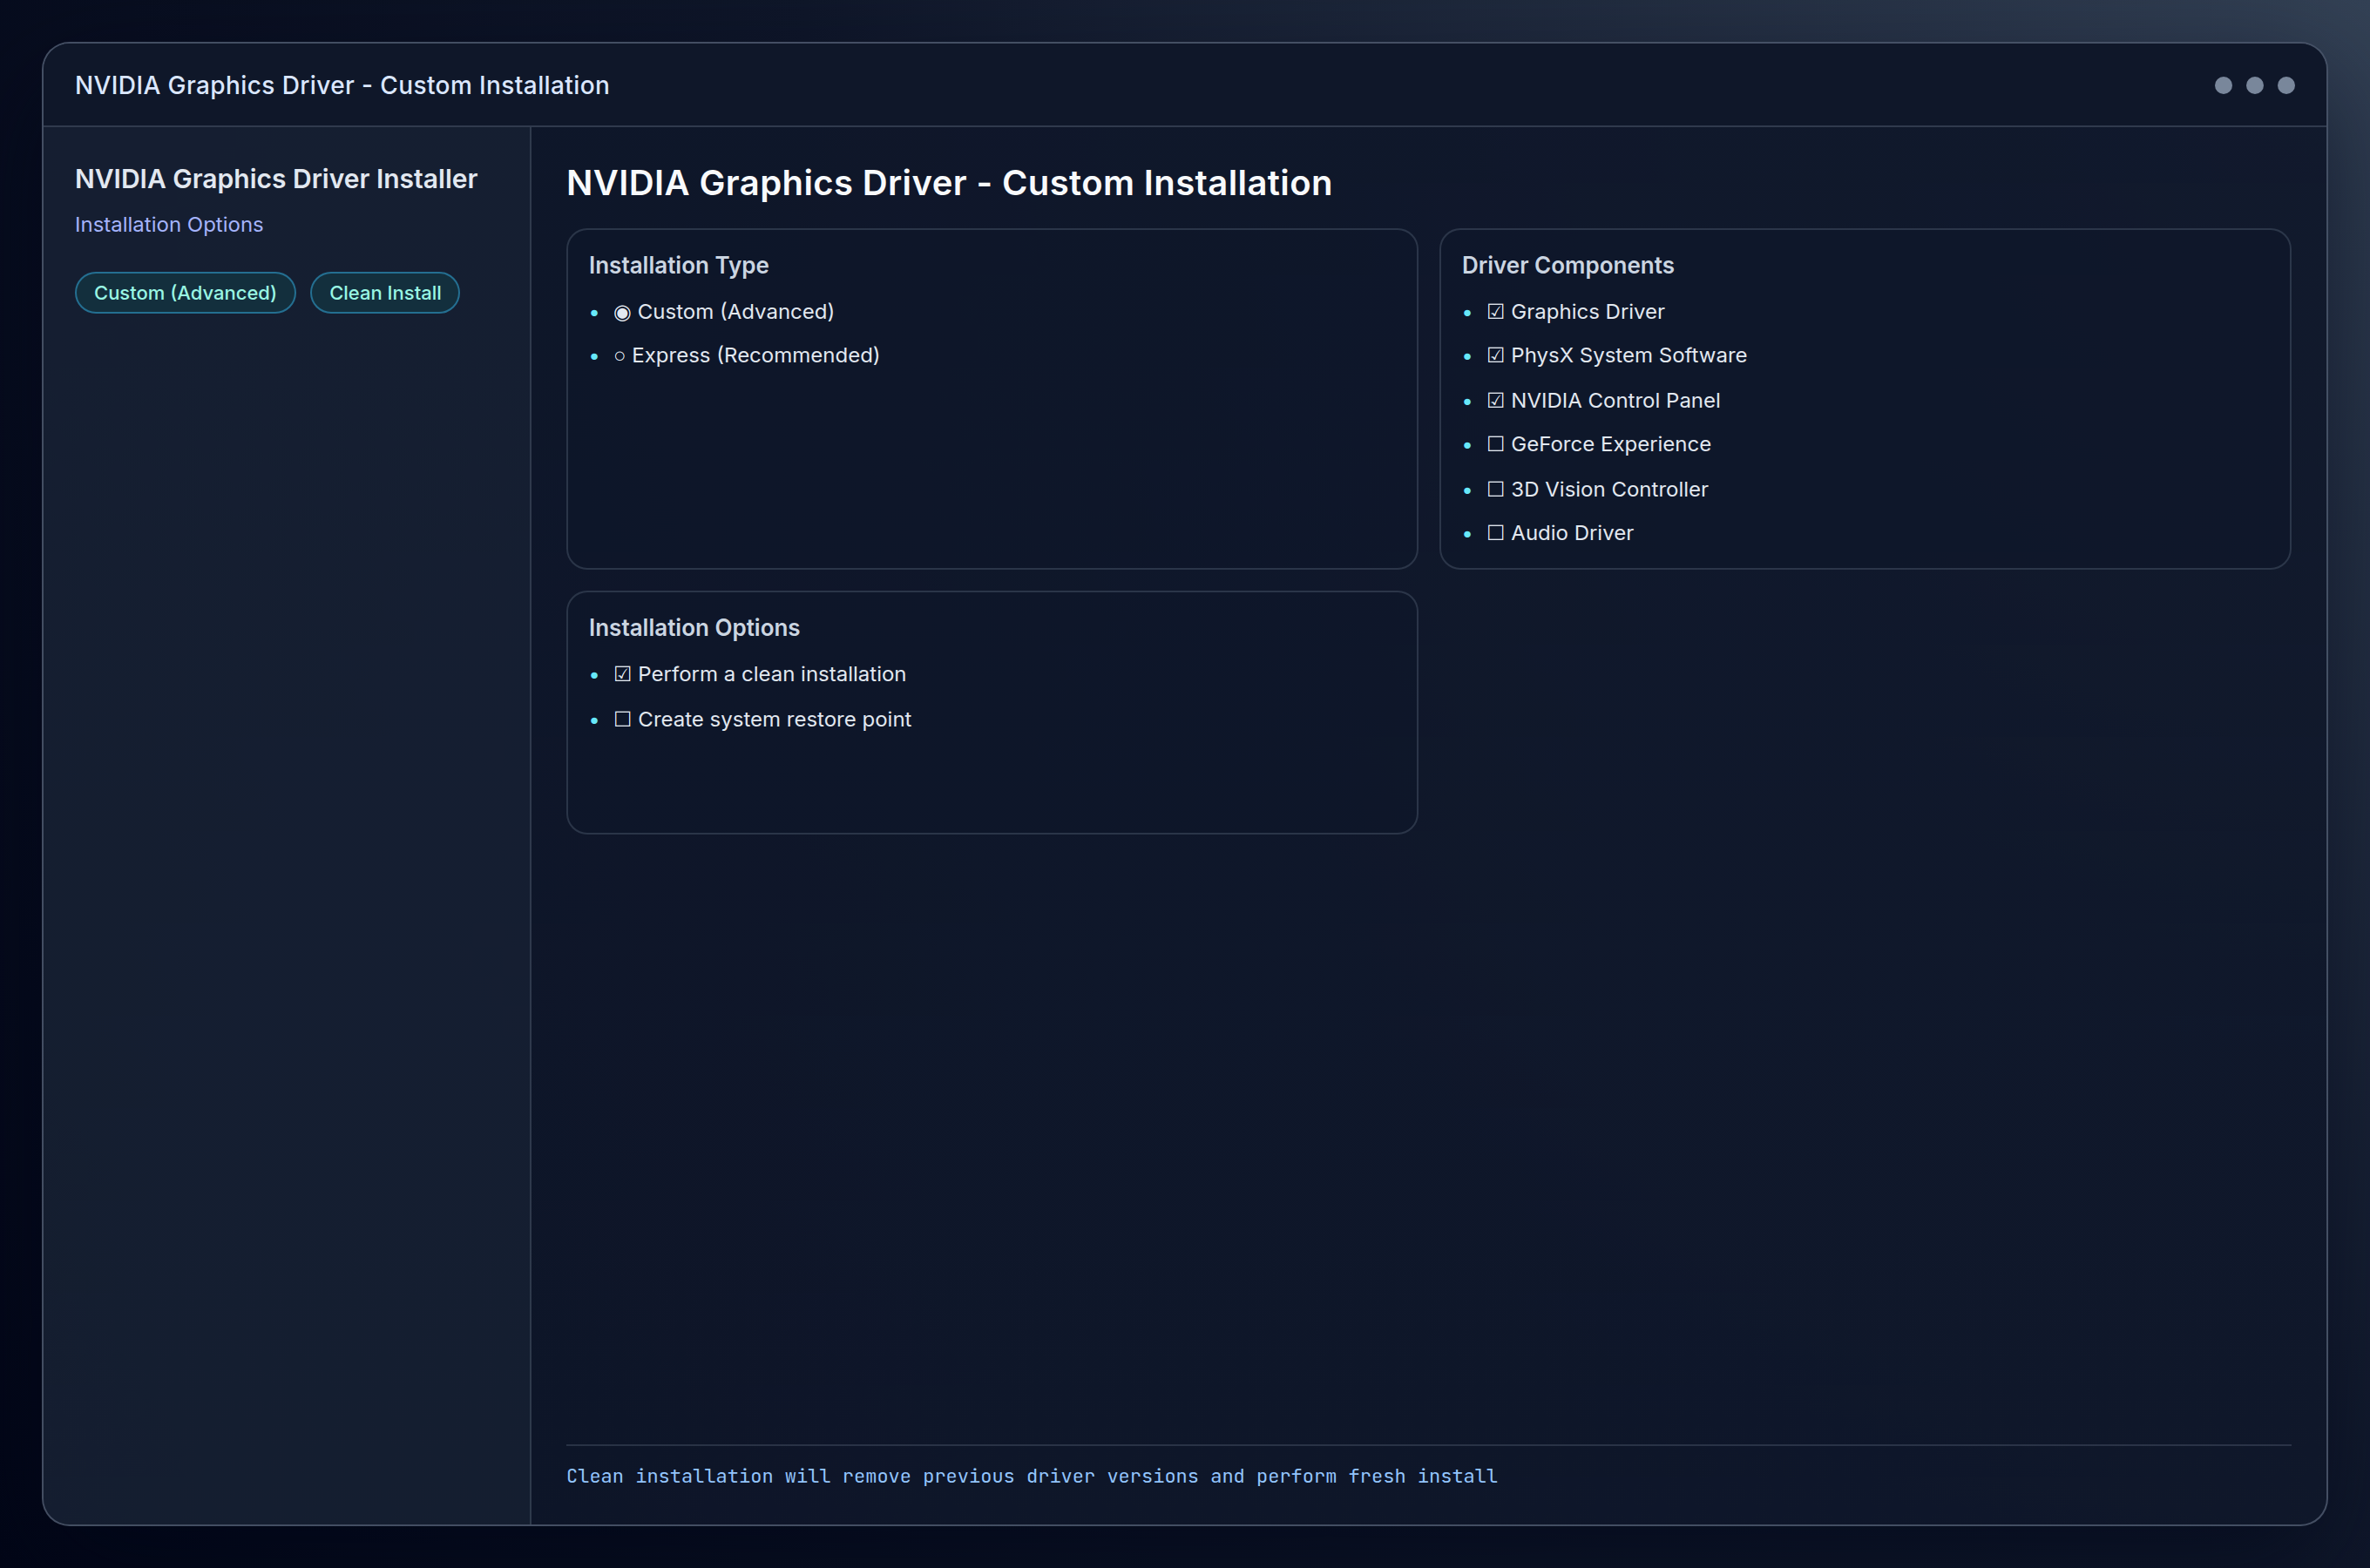
Run the downloaded installer and select Custom (Advanced) installation type. Check Perform a clean installation to ensure no conflicting drivers remain.
After installation, open Command Prompt as Administrator and verify the driver installation:
nvidia-smiExpected result: You should see output displaying your GPU information, driver version, and CUDA version.

Step 3: Enable Windows Container Features
This is where the foundation work starts getting tricky. Windows doesn’t enable container support by default, and you need both Containers and Hyper-V working properly for Docker to behave.
Open PowerShell as Administrator and enable the Containers feature:
Enable-WindowsOptionalFeature -Online -FeatureName Containers -All -NoRestartEnable Hyper-V (required for Docker Desktop):
Enable-WindowsOptionalFeature -Online -FeatureName Microsoft-Hyper-V -All -NoRestartRestart the server to apply these changes:
Restart-Computer -ForceAfter reboot, verify the features are enabled:
Get-WindowsOptionalFeature -Online -FeatureName Containers
Get-WindowsOptionalFeature -Online -FeatureName Microsoft-Hyper-V
Expected result: Both features should show State : Enabled.
Step 4: Install Docker Desktop for Windows
Download Docker Desktop for Windows from the official Docker website. Choose the version that supports Windows containers.
Run the installer and ensure Use Windows containers instead of Linux containers is checked during installation.

After installation, Docker Desktop should start automatically. If not, launch it from the Start menu.
Open Settings in Docker Desktop (gear icon in the top-right) and navigate to General. Verify that Use Windows containers is selected.

Test Docker installation by opening Command Prompt and running:
docker versionExpected result: You should see both client and server version information, confirming Docker is running.
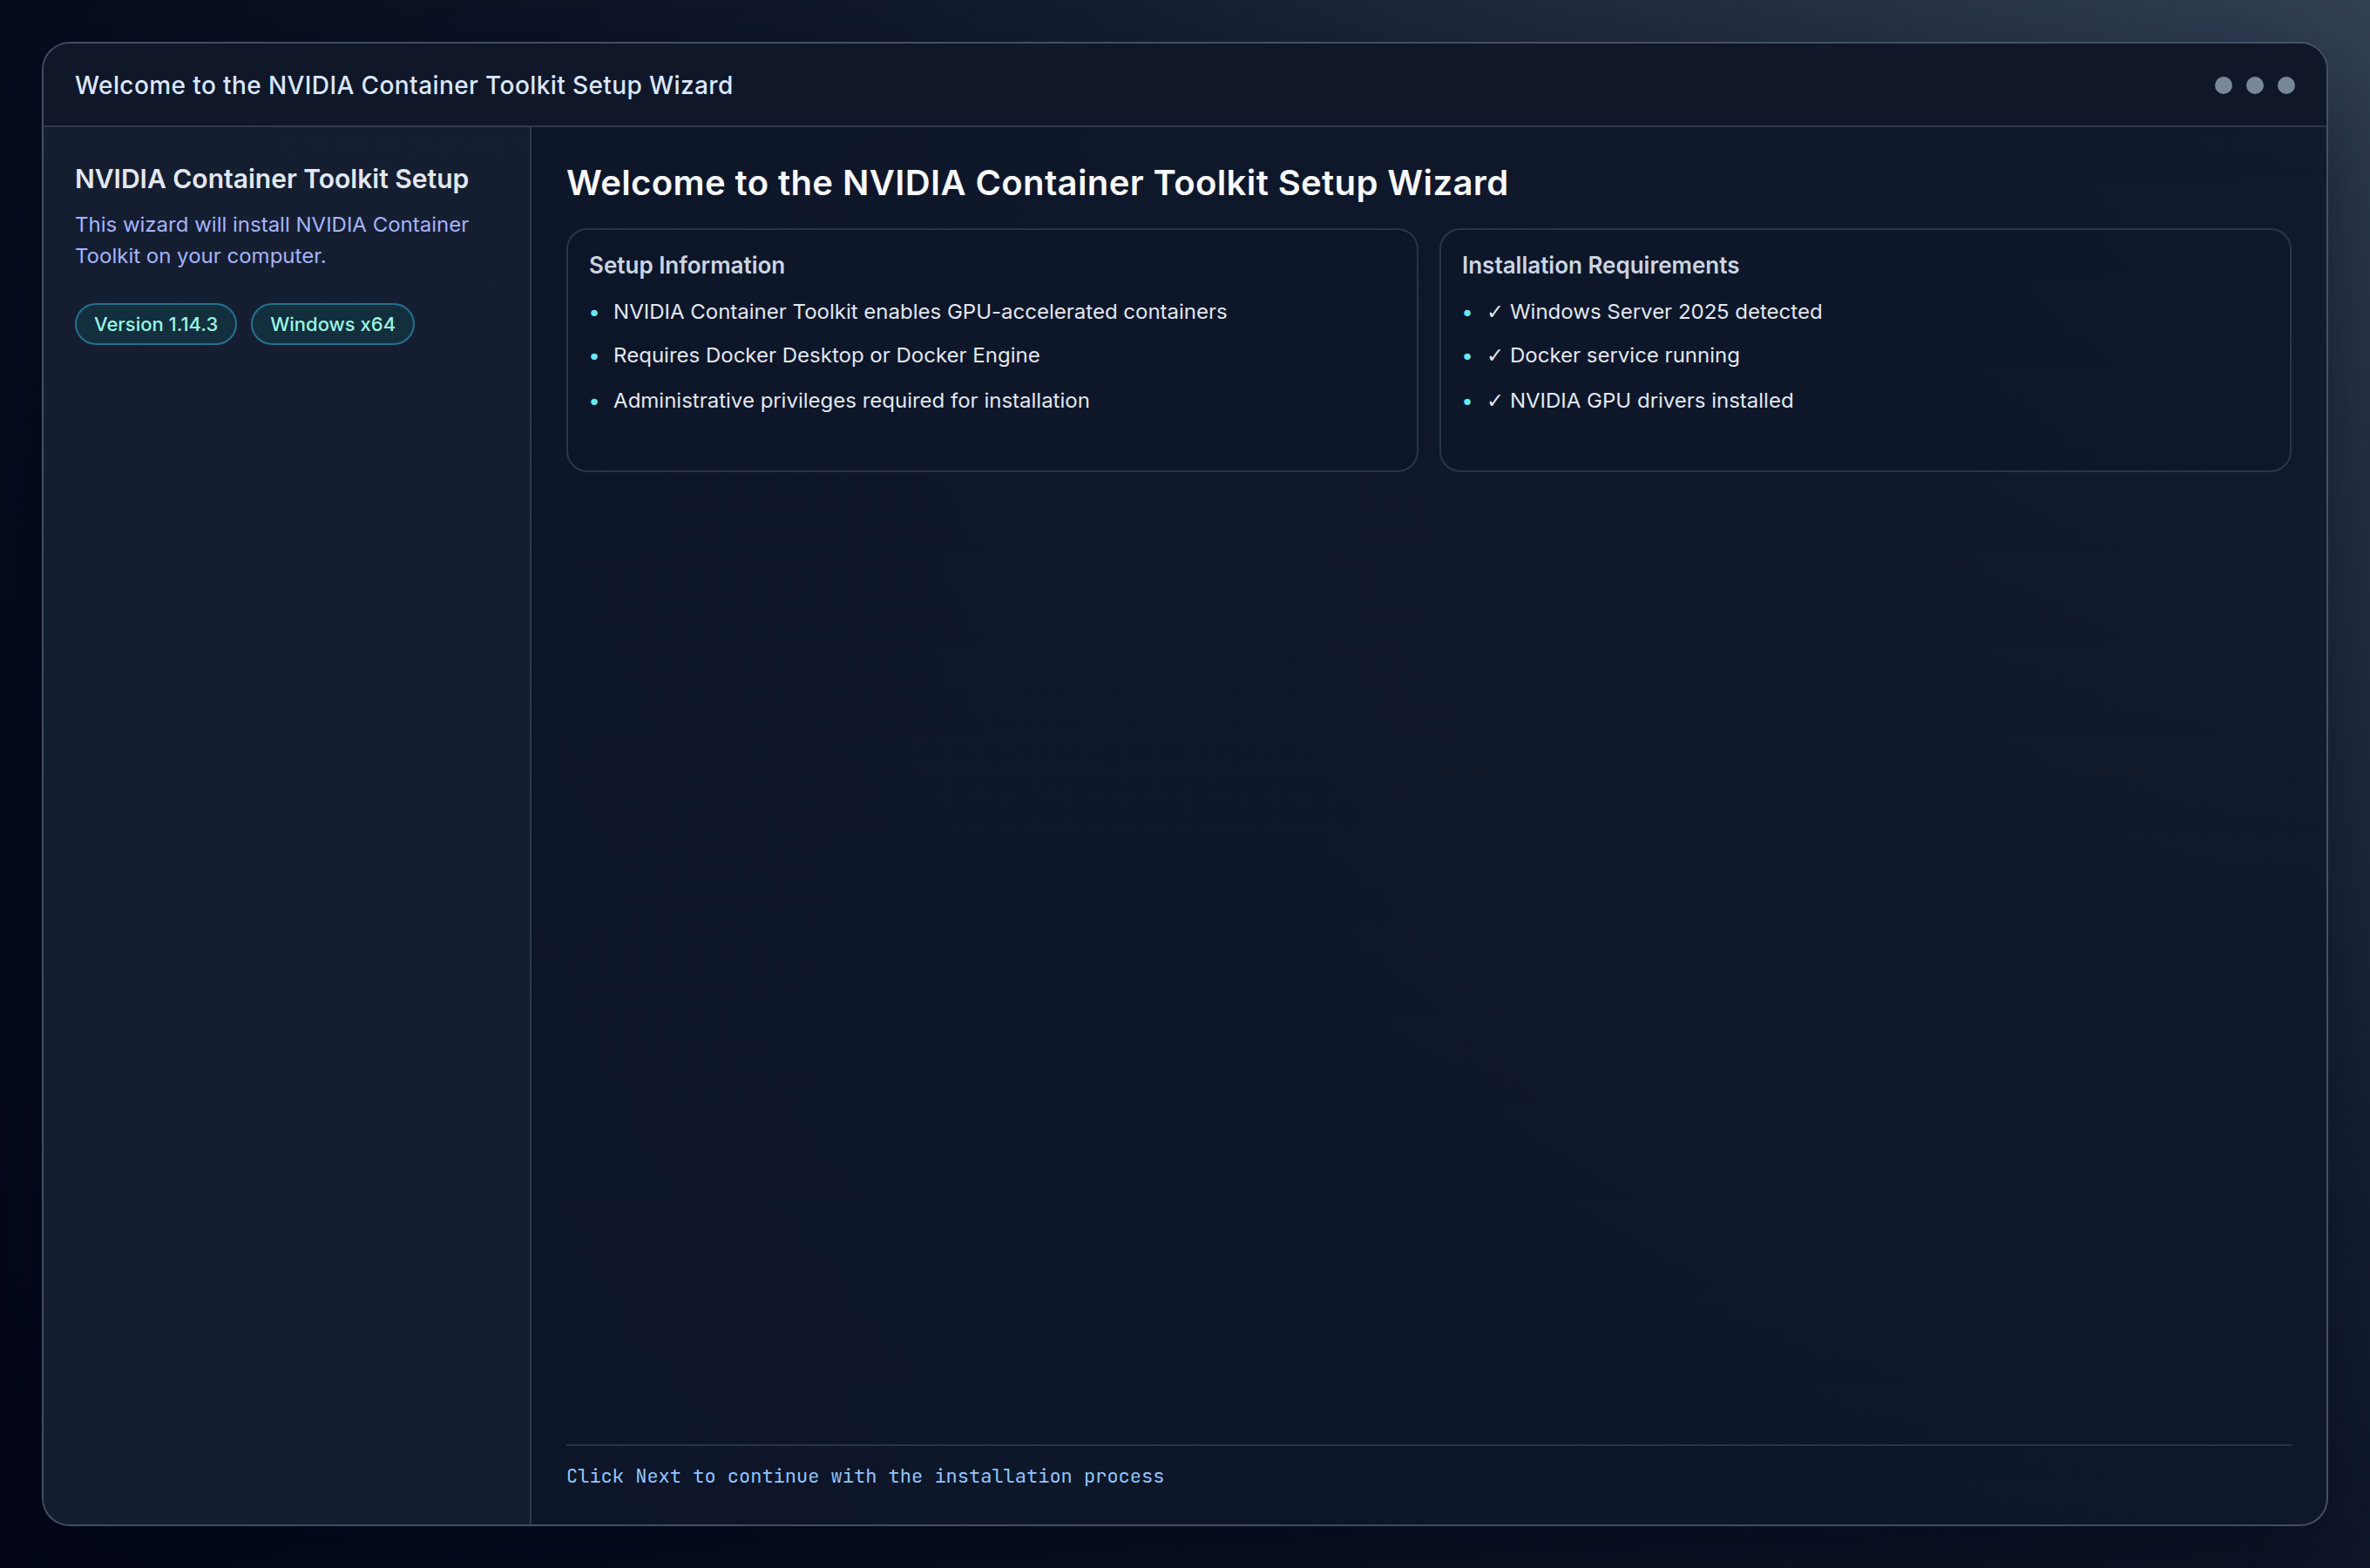
Step 5: Install NVIDIA Container Toolkit
Alright, this is where things start feeling like you’re assembling something with missing instructions. The NVIDIA Container Toolkit needs to be configured specifically for Windows containers, and it’s not as straightforward as the Linux equivalent.
First, download the NVIDIA Container Toolkit for Windows from the NVIDIA Container Toolkit releases page. Look for the Windows installer (.msi file).
Run the installer with administrative privileges. The installer will configure the necessary runtime components automatically.
After installation, restart the Docker service to recognize the new runtime:
Restart-Service dockerVerify the NVIDIA runtime is available:
docker infoLook for nvidia in the Runtimes section of the output.
Expected result: The Docker info output should include nvidia as an available runtime.
Step 6: Configure Docker Daemon for GPU Support
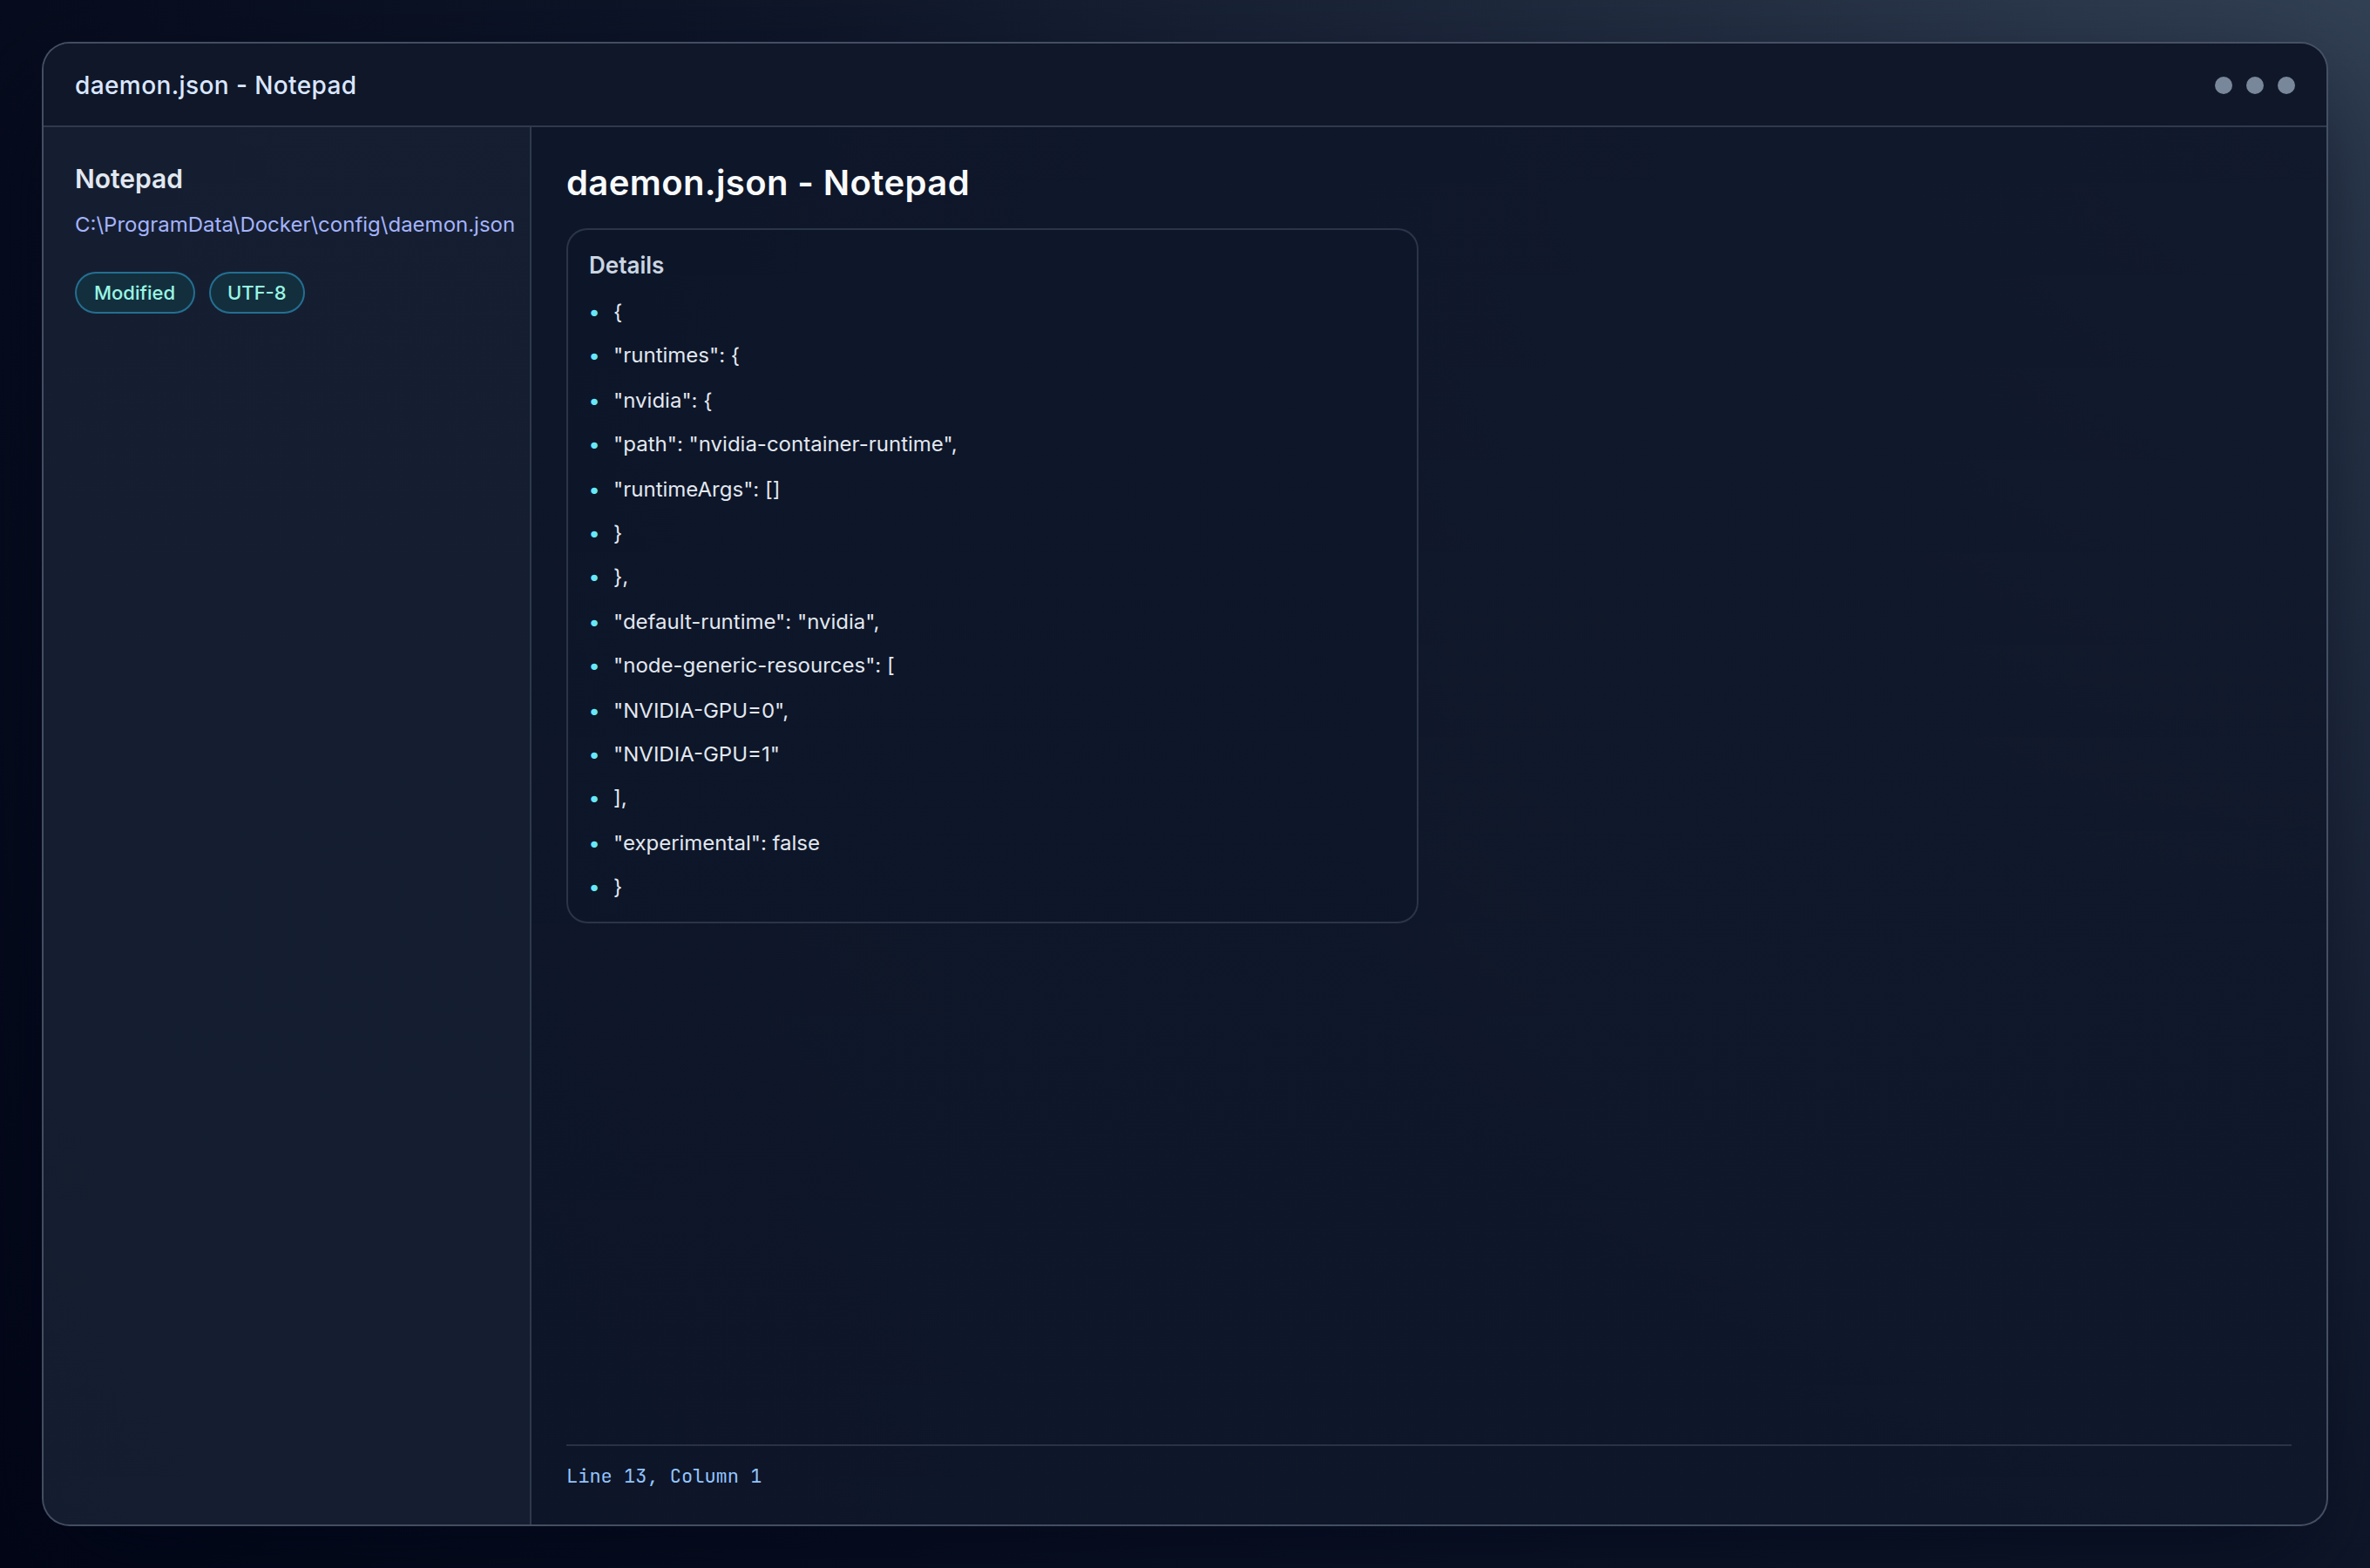
Create or edit the Docker daemon configuration file. Navigate to C:ProgramDataDockerconfig and create or edit daemon.json:
{
  "default-runtime": "nvidia",
  "runtimes": {
    "nvidia": {
      "path": "nvidia-container-runtime",
      "runtimeArgs": []
    }
  },
  "experimental": false
}
Restart Docker Desktop or the Docker service:
Restart-Service dockerWait for Docker to fully restart (check Docker Desktop shows “Engine running”).
Step 7: Test GPU Access in Containers
This is the make-or-break moment. Testing GPU access reveals just how different Windows containers are from their Linux counterparts, and the syntax here is going to feel foreign if you’re used to Linux Docker commands.
Test GPU access with a simple NVIDIA container:
docker run --rm --gpus all mcr.microsoft.com/windows/servercore:ltsc2022 cmd /c "nvidia-smi"This command might fail initially because Windows containers handle GPU access differently than Linux containers. Instead, try:
docker run --rm --isolation=process --device class/5B45201D-F2F2-4F3B-85BB-30FF1F953599 mcr.microsoft.com/windows/servercore:ltsc2022 cmd /c "nvidia-smi"The device class GUID 5B45201D-F2F2-4F3B-85BB-30FF1F953599 represents GPU devices in Windows containers.
Expected result: You should see nvidia-smi output from within the container, showing your GPU is accessible.
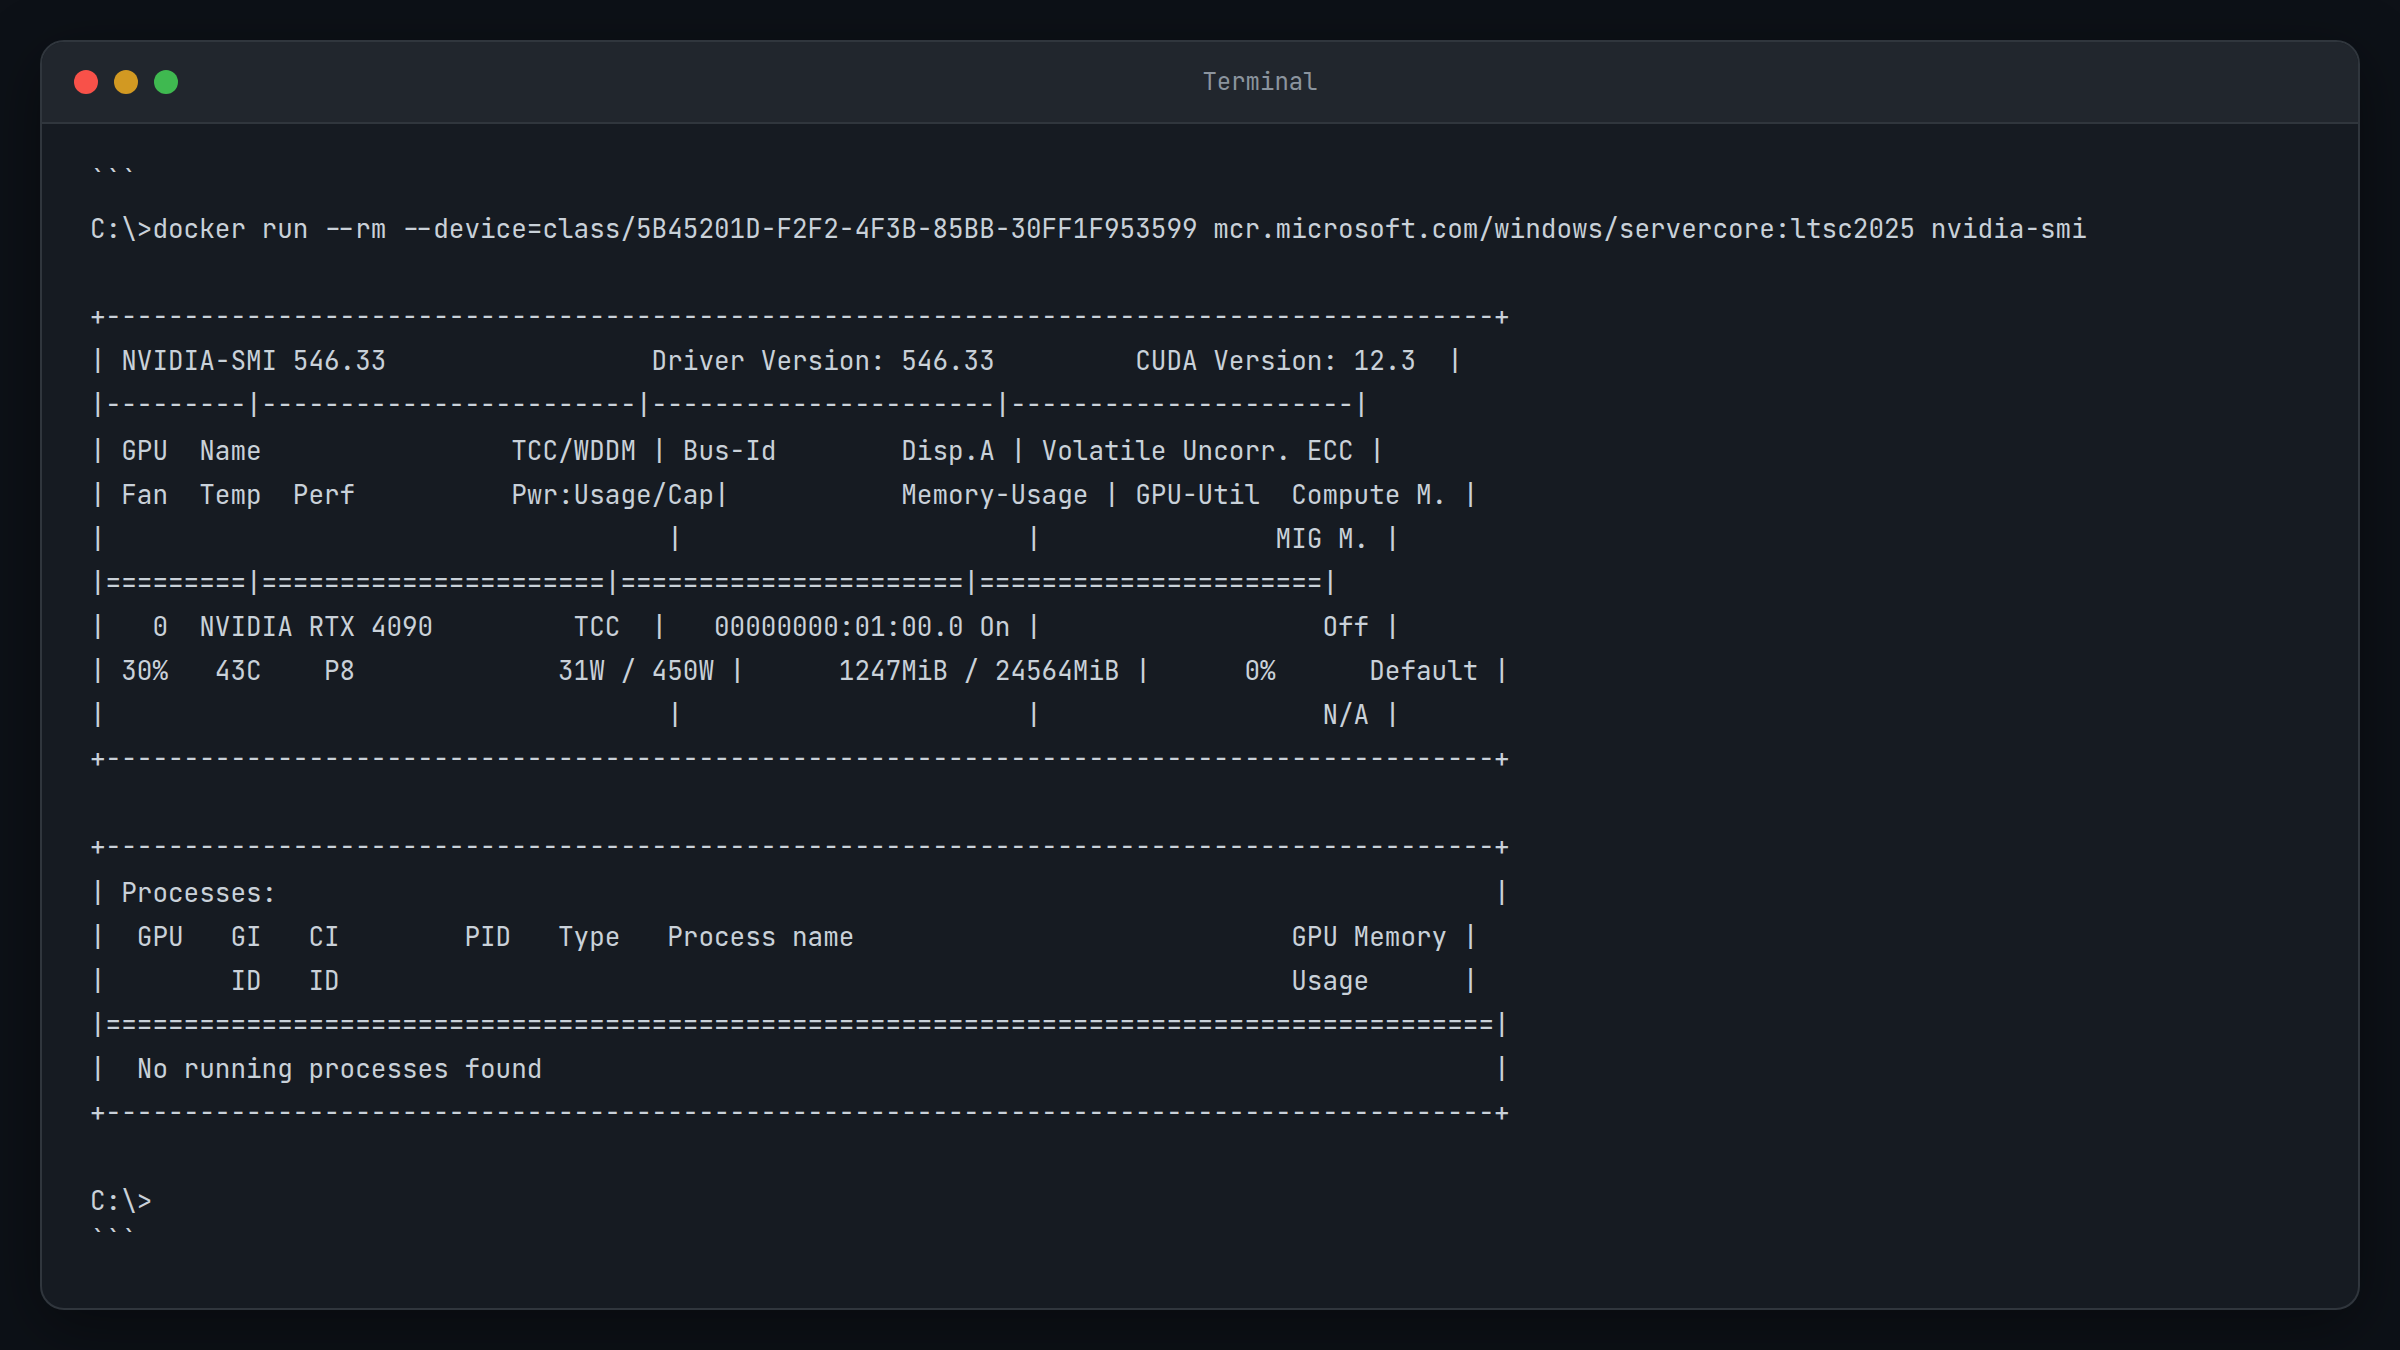
Yeah, that GUID syntax is as awkward as it looks. But when it works, you’ll know you’ve cleared the biggest hurdle.
Step 8: Set Up AI Workload Test Environment
Time to see if all this complexity actually pays off with a real AI workload test.
Create a test directory for your AI workloads:
mkdir C:AIWorkloads
cd C:AIWorkloads
Create a simple Dockerfile to test GPU-accelerated Python workloads:
# Use Windows Server Core as base
FROM mcr.microsoft.com/windows/servercore:ltsc2022

# Install Python (this is simplified - you'd typically use a Python base image)
# For testing, we'll use a pre-built Python Windows container
FROM python:3.11-windowsservercore-ltsc2022

# Install basic GPU testing packages
RUN pip install torch torchvision torchaudio --index-url https://download.pytorch.org/whl/cu118

# Copy test script
COPY test_gpu.py .

# Run test
CMD ["python", "test_gpu.py"]
Create a simple GPU test script (test_gpu.py):
import torch

def test_gpu():
    if torch.cuda.is_available():
        device = torch.cuda.get_device_name(0)
        print(f"GPU detected: {device}")
        print(f"CUDA version: {torch.version.cuda}")

        # Simple tensor operation on GPU
        x = torch.rand(1000, 1000).cuda()
        y = torch.rand(1000, 1000).cuda()
        z = torch.matmul(x, y)

        print("GPU computation successful!")
        return True
    else:
        print("No GPU detected")
        return False

if __name__ == "__main__":
    test_gpu()
Build and run the test container:
docker build -t ai-gpu-test .
docker run --rm --isolation=process --device class/5B45201D-F2F2-4F3B-85BB-30FF1F953599 ai-gpu-test
Expected result: The container should detect your GPU and successfully perform a GPU computation.
Configuration Options
Docker Daemon Configuration
The daemon.json file supports additional GPU-related settings:
{
  "default-runtime": "nvidia",
  "runtimes": {
    "nvidia": {
      "path": "nvidia-container-runtime",
      "runtimeArgs": []
    }
  },
  "experimental": false,
  "log-level": "info",
  "storage-driver": "windowsfilter",
  "registry-mirrors": [],
  "insecure-registries": []
}
Environment Variables for GPU Control
Control GPU visibility and capabilities in containers:
# Make specific GPUs visible
docker run --rm --isolation=process --device class/5B45201D-F2F2-4F3B-85BB-30FF1F953599 -e NVIDIA_VISIBLE_DEVICES=0 your-image

# Specify required capabilities
docker run --rm --isolation=process --device class/5B45201D-F2F2-4F3B-85BB-30FF1F953599 -e NVIDIA_DRIVER_CAPABILITIES=compute,utility your-image
Resource Limits and Allocation
Set memory and CPU limits for AI workloads:
docker run --rm --isolation=process --device class/5B45201D-F2F2-4F3B-85BB-30FF1F953599 --memory=8g --cpus="4.0" your-ai-imageCommon Configuration Patterns
Production AI Inference Server
FROM python:3.11-windowsservercore-ltsc2022

# Install production dependencies
RUN pip install fastapi uvicorn torch torchvision transformers

# Copy application
COPY app/ /app/
WORKDIR /app

# Expose port
EXPOSE 8000

# Run server
CMD ["uvicorn", "main:app", "--host", "0.0.0.0", "--port", "8000"]
Batch Processing Container
FROM python:3.11-windowsservercore-ltsc2022

# Install batch processing tools
RUN pip install pandas numpy torch scikit-learn

# Copy scripts
COPY scripts/ /scripts/
WORKDIR /scripts

# Default to batch processing
CMD ["python", "batch_processor.py"]
Tips and Troubleshooting
Common Issues
Problem: “docker: Error response from daemon: container created but not started”
This usually happens when GPU device access is incorrectly configured. Windows containers require the specific device class GUID rather than the --gpus flag used in Linux.
Solution:
# Instead of --gpus all, use:
docker run --rm --isolation=process --device class/5B45201D-F2F2-4F3B-85BB-30FF1F953599 your-image
Problem: “nvidia-smi: command not found” inside container
The NVIDIA drivers aren’t properly passed through to the container. This often indicates the Container Toolkit isn’t correctly configured.
Solution:
- Verify the Container Toolkit installation
- Check that
daemon.jsonhas the correct runtime configuration - Restart Docker service after any configuration changes
Problem: “CUDA out of memory” errors in containers
Container resource limits may be conflicting with GPU memory allocation.
Solution:
# Increase container memory limits
docker run --rm --isolation=process --device class/5B45201D-F2F2-4F3B-85BB-30FF1F953599 --memory=16g your-image
Problem: Container isolation issues with GPU access
Windows container isolation modes can interfere with GPU passthrough.
Solution:
Always use --isolation=process for GPU-enabled containers:
docker run --rm --isolation=process --device class/5B45201D-F2F2-4F3B-85BB-30FF1F953599 your-imagePro Tips
- Monitor GPU utilization: Use
nvidia-smi -l 1to continuously monitor GPU usage during container operations - Container image optimization: Use multi-stage builds to reduce final image size for AI workloads
- Resource monitoring: Set up Windows Performance Toolkit to monitor container resource usage
- Backup configurations: Always backup your
daemon.jsonbefore making changes - Version compatibility: Keep NVIDIA drivers, Container Toolkit, and Docker versions aligned for best compatibility
- Development workflow: Use Docker Compose for multi-container AI applications with shared GPU access
The reality is that troubleshooting this setup requires patience. When something breaks, it’s usually at the intersection of three different technology stacks, and error messages can be cryptic. But once you get past the initial configuration hurdles, the platform is surprisingly stable.
Conclusion
When the first GPU computation finally ran inside the container, I was quite happy with myself! It’s not the clean, elegant Linux experience with all those device class GUIDs and isolation setting, but the payoff is absolutely worth it for a Windows-first shop like mine.
This approach lets me keep what already works (Active Directory, Group Policy, our monitoring stack, and the team’s Windows instincts) while still running serious AI workloads with full GPU acceleration. The passthrough quirks are annoying, sure, but they’re not deal-breakers. They’re just the cost of bridging two worlds and once you get it to click, the setup becomes a solid foundation for inference, model serving, and batch processing.
What comes next:
- Build your first production inference pipeline on this foundation
- Set up proper monitoring for GPU utilization and container health
- Explore orchestration options with Docker Swarm or Kubernetes for Windows
The hard part is behind you. Now you can focus on the AI workloads themselves instead of fighting the infrastructure.