All of us receive many notifications on our devices via text or email. These notifications are messages that let us know about product offers, shipment statuses, upcoming bills, 2FA codes, etc.
All such notifications make use of a notification service and Amazon SNS (Send Notification Service) is one of them. Amazon SNS is a fast, flexible, and fully managed push notification service that coordinates the delivery of messages to the subscribing endpoints.
Some of the features that make Amazon SNS as a popular notification service are:
- SNS allows sending individual messages as well as fan-out messages to a large number of recipients.
- It follows the publish-subscribe messaging criteria where the notification is delivered to the client through a push mechanism, which eliminates the need for regular checks for new updates.
- To ensure the messages are not lost, messages are published to Amazon SNS and stored redundantly across the multiple zones for availability.
- It allows you to group together multiple recipients using a logical access point to deliver identical message copies to the subscribers.
Setting-up Amazon SNS
Setting up an Amazon SNS service starts with creating an AWS account. The following perks are available after creating an account:
- View usage reports
- View activity reports
- Manage access and authentication
To get started, you will have to assign the IAM roles. IAM roles are assigned to specific users who define the permissions-set to make AWS service requests. To create your IAM (Identity and Access Management) user, you need to have your AWS account credentials.
It’s not a good practice to use an IAM administrator user to operate Amazon SNS. It’s better to create an individual IAM user for each particular person who needs admin access to Amazon SNS.
For using Amazon SNS, you need to have the policy called AmazonSNSFullAccess and the AWS credentials linked to your IAM user. The credential detail will include Key ID and a secret key for access.
Steps to create your AWS account have been illustrated below:
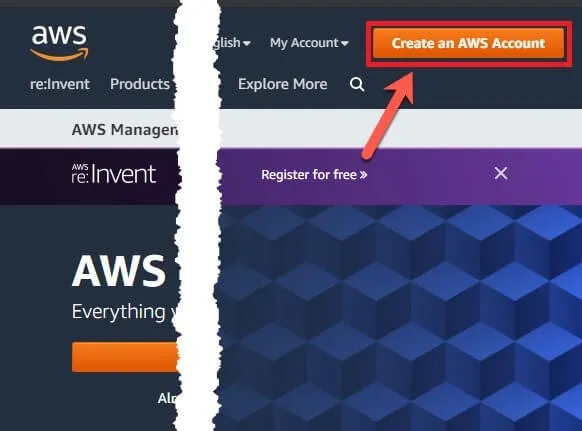
STEP 1: Navigate to the AWS home page, select the Create an AWS Account option, and follow the instructions to complete the sign-up process.
STEP 2: Open the AWS Identity and Access Management console and sign in as a Root user with an email and password to create an IAM account. Root users of AWS account have access to all resources across all AWS services.

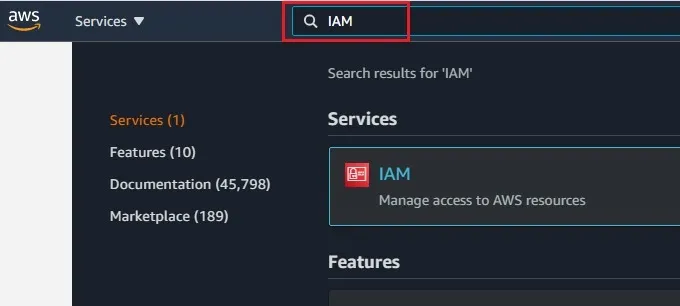
STEP 3: After signing-in to your account, enter ‘IAM’ in the search tab to access the IAM service and then hit enter.
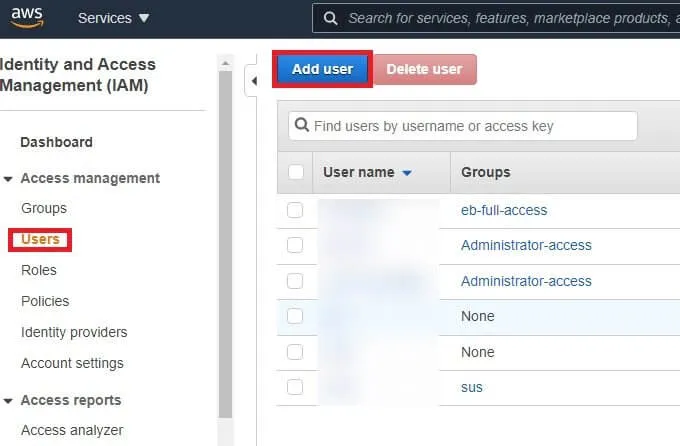
STEP 4: Select the Users option from the left-hand side of the dashboard and then click on the Add user button.
You will be redirected to the next page where you will need to define the User name.
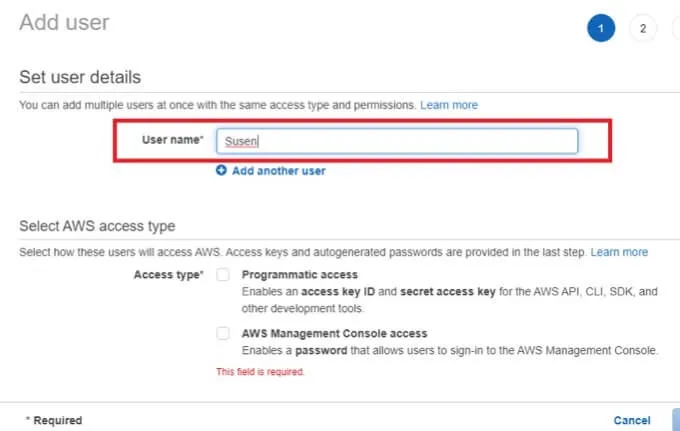
After that, Select the AWS access type i.e. whether you want Programmatic access or AWS Management Console access, or both.
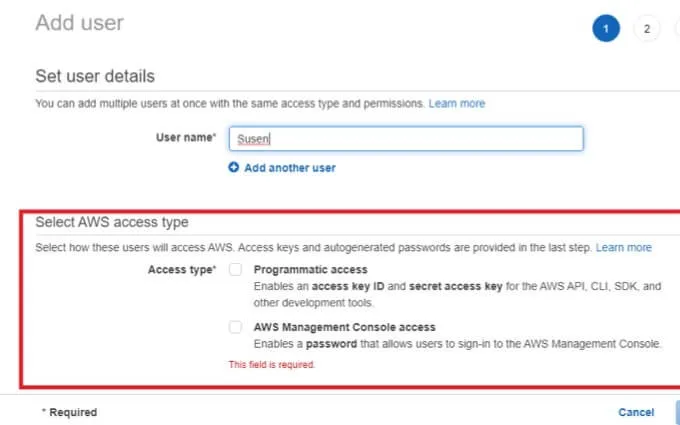
- Programmatic access: It allows you to performs actions on the AWS resources either through a third party tool or through an application.
- AWS Management Console Access: Brings easy to access, secure web-based portal to manage your AWS account services.
Set the auto-generated or custom password for your console. It should be noted that this option will pop-up only if you have selected AWS Management Console Access or both AWS Management Console Access and Programmatic Access.
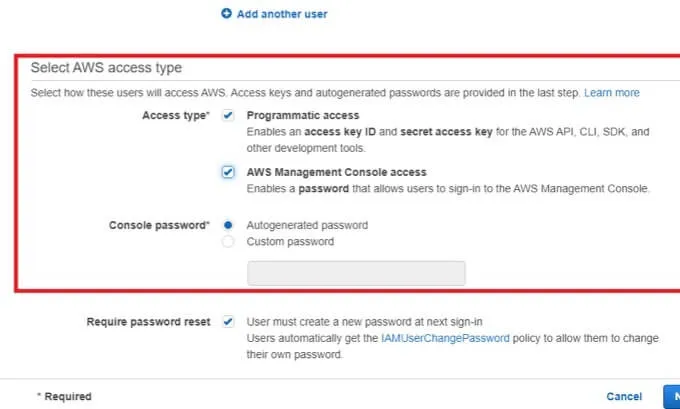
Note: If you have selected only Programmatic access, then access key ID and secret access key shall be generated in the .csv file that can be used in the CLI console.
Select the checkmark of the required password reset option and then click the Next Permission button.
STEP 5: To set permissions, click on the Add user to group option and hit the Create group button.
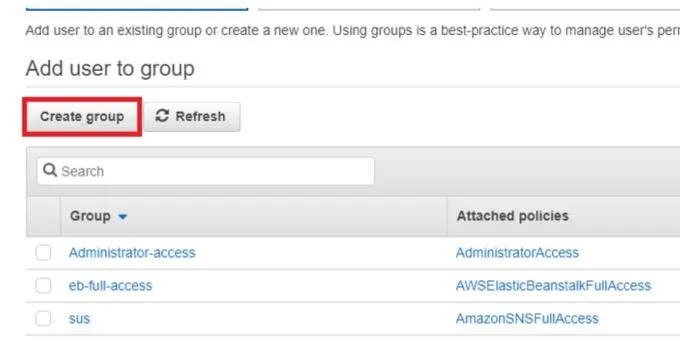
Note: You can also copy and add permissions of the existing user to the other user or simply create and attach new policies to users with the attach existing policies directly option.
The create group panel will open. Enter the Group name, click on the create policy button, and enter SNS in the policy filter search bar. The Policy name is provided with its type, use, and description. Your group with assigned policies will be created. Click on the Next tag.
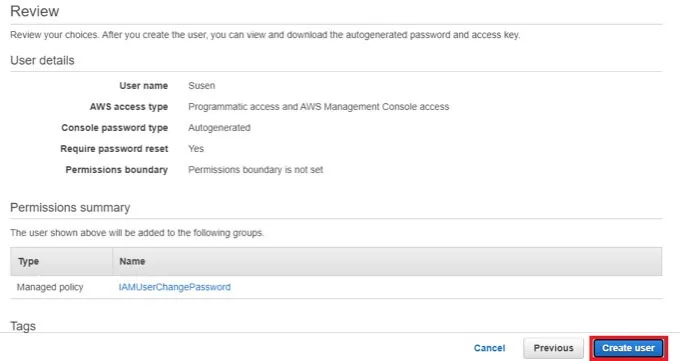
STEP 6: Add tags panel will open where you have to add key and value (optional). Click on the Next tag. Review the ‘to be added’ user detail, permission summary, and its associated tags. Click on the Create user button.
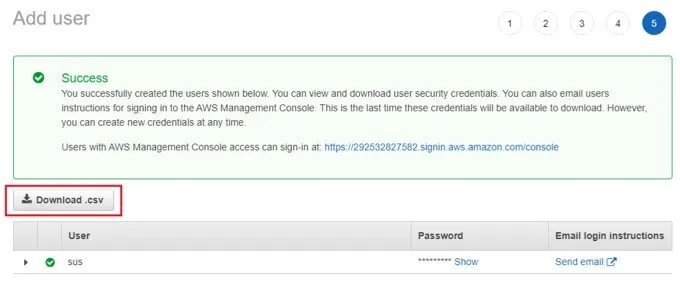
STEP 7: Successfully, a user has been added to the group with the permission policies. Download the .csv to secure your credentials and click on the close button.
Your IAM user has been created at this step. Now let’s prepare to get started with Amazon SNS. Follow the steps below to create a topic, topic subscription, and publish the message.
Step 1: Create a topic
- Sign in to the Amazon SNS console with your IAM credentials. In the ‘Create topic’ panel, write the topic name and click on the Next step button.
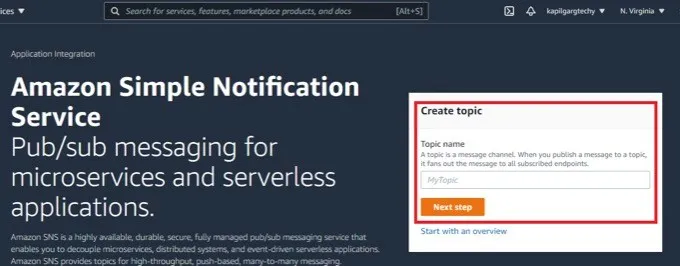
- The create topic console will open and then you will need to enter the details there.
By default, the console creates FIFO (first-in, first-out) type of topic, which delivers exactly one message in strictly preserved order or you can also choose the Standard option as it’s the best message delivery option with the highest throughput. Click on Create a topic.

There are also optional services that you can add to your topic.
Encryption – You can enable server-side topic encryption, although Amazon SNS by default sends messages in encrypted form.
Access Policy – This allows you to define who can access the topic. By default, the topic owner can also subscribe or publish the topic.
Delivery Retry Policy – Sometimes Amazon SNS retries fail to deliver a message to endpoints so to modify the default setting you can enable this service to expand the retry number.
Delivery Status Logging – Through this option, you can have better operation insight. You can easily monitor message delivery and detect the response sent to them from the Amazon SNS endpoint.
Tags – With this option you can add or remove the metadata label of the Amazon SNS topic. The tags are used to track costs, filter, and search topics.
Step 2: Create a subscription of the topic
- In the navigation panel, click on the Subscription button.
- The Create subscription page will open up with details. Select the Topic ARN (application reference number) to check the topic list in your AWS account.
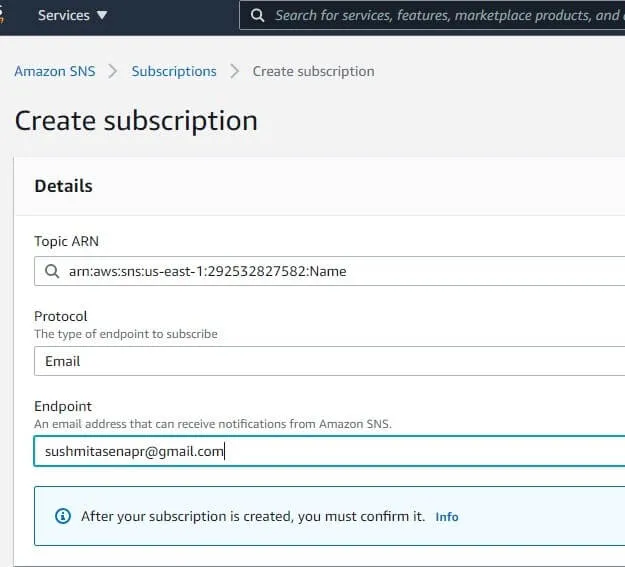
- For Protocol, choose Email, SMS, or any of the options as per your requirement. Define the endpoint by entering the email address (if selected email) to send notifications to such endpoint. Click on Create subscription.
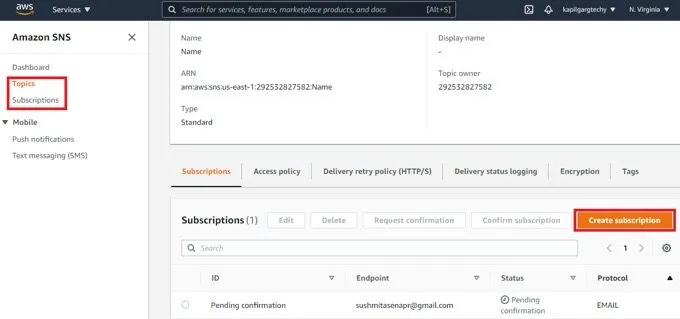
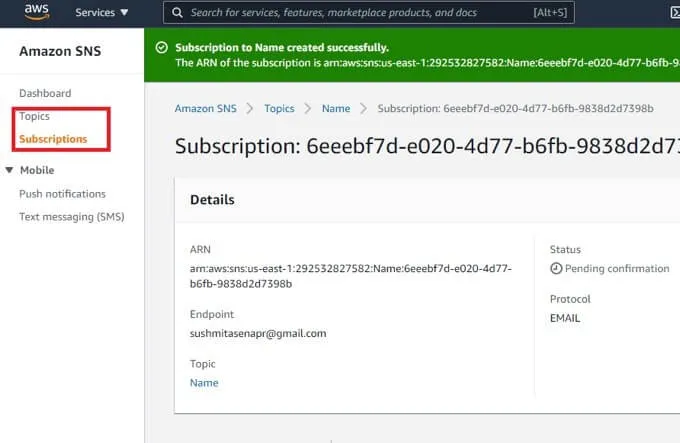
- The subscription created will be open with all details.
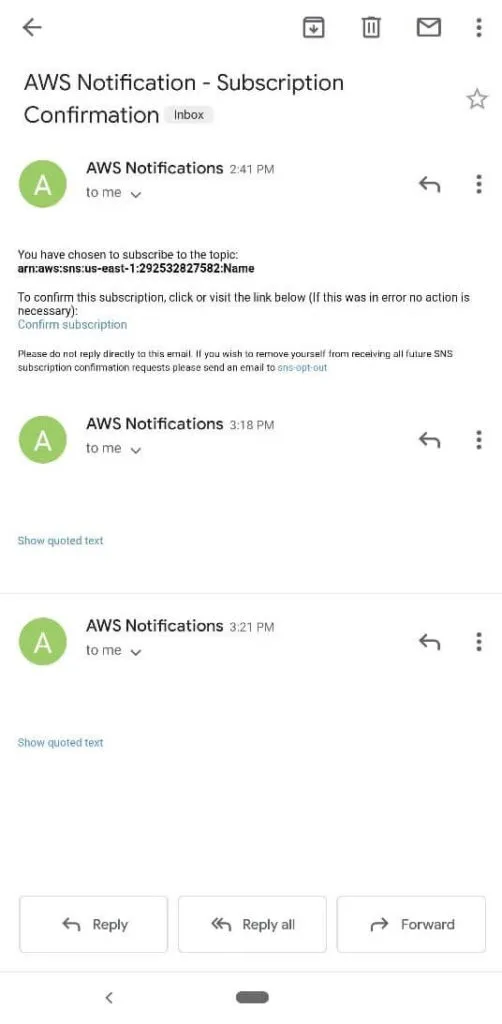
Check the email inbox to confirm the subscription from the AWS SNS. If you open Amazon SNS in the web browser, it will display your subscription ID confirmation.
Step 3: Publish the message of the created topic
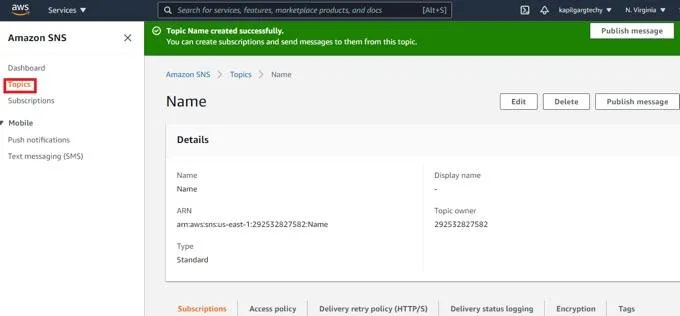
- Select the topic option in the navigation panel.
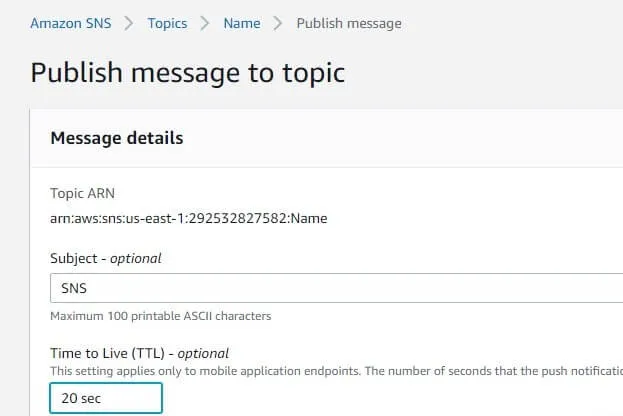
- The topic console will open, choose the topic created, and click on the Publish Message button. Enter the message details and mention the subject.
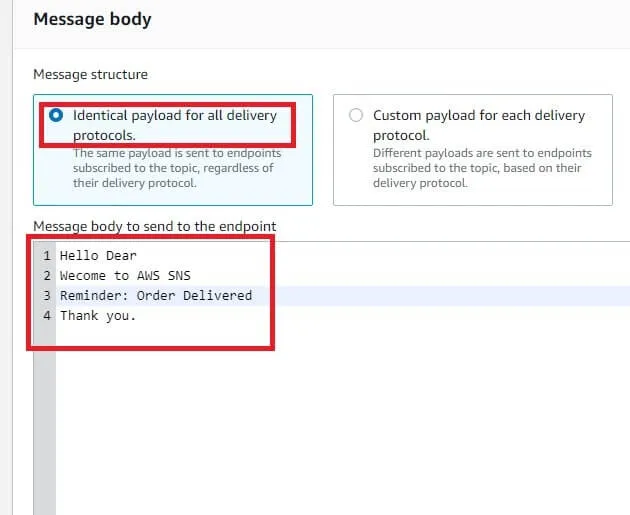
- For the message body, select the same payload for all delivery protocols and enter the message to be published.
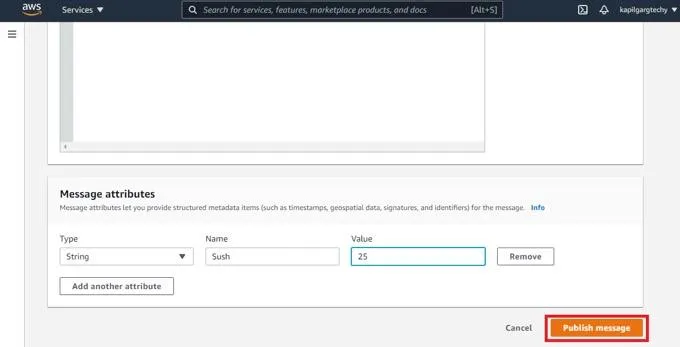
- Click on the Publish Message button. The message will be published and the topic details page will appear on the screen.
Check the email inbox to confirm the message published from Amazon SNS is received.
Conclusion
SNS is the best choice if you are looking for an easy to use pub/sub system and low maintenance. Its use cases focus on streaming high volumes of data to a huge number of users.
In this tutorial, with easy steps you learned to leverage the features of Amazon Simple Notification Service (SNS). Simply create an IAM user, create a topic, subscription and publish the identical message to endpoints. The messages are kept secure in the private network. Publish a message with AWS SNS in a few minutes!