

C: drive creeping toward full again. Or maybe you just pushed a cumulative update and you’re not sure it landed clean. Either way, you don’t need a third-party utility. Windows Server 2025 already ships with everything you need: System File Checker (SFC), the Deployment Image Servicing and Management tool (DISM), Disk Cleanup, and Disk Management. This is a repeatable maintenance runbook, not an emergency boot-recovery procedure.
If your server won’t boot, or you’re staring down a damaged Windows Recovery Environment, that’s a different article. Check the post on fixing Windows Server 2025 boot issues with DISM, BCDEdit, WinRE, and ReAgentC instead. This one assumes the server is up and reachable. It’s just tight on space or overdue for a health check.
What Are These Tools?
SFC scans protected system files against a known-good manifest. It repairs corrupted ones from a local cache.
DISM works one layer deeper. It manages the WinSxS (Windows side-by-side) component store, the repository behind all OS servicing. DISM can tell you how much of that store is reclaimable. It can also remove superseded update payloads. If you ask it to, it can strip out the ability to roll back the current patch baseline entirely.
Disk Cleanup (cleanmgr.exe) and Disk Management (diskmgmt.msc) round things out. They’re low-risk, GUI-driven ways to clear temp files and Windows Update leftovers. Then you confirm the results actually landed on the volume.
Before You Begin
Make sure you have:
- Windows Server 2025, fully booted and reachable (this is not a WinRE/offline procedure)
- Local Administrator rights on the target server
- At least 2-3 GB of free space headroom before running repairs (DISM needs working room even when reclaiming space)
- A recent backup or VM snapshot, especially before running
/ResetBaseor touchingC:\Windows\Installer - Remote access set up if you’re administering from macOS or iOS (covered in Step 8)
| Requirement | Details |
|---|---|
| OS version | Windows Server 2025 (Standard or Datacenter) |
| Access | Elevated Command Prompt or PowerShell (“Run as administrator”) |
| Disk headroom | 2-3 GB minimum free before starting |
| Backup | Recent snapshot/backup recommended before /ResetBase or Installer cache deletion |
Step-by-Step Guide
Step 1: Recognize When You Actually Need This
Run this routine when you see any of the following:
- The system volume (usually
C:) is below 10-15% free space - A scheduled task, service, or update install is failing with vague disk-space or file-corruption errors
- You’re about to install a cumulative update or feature update and want pre-flight confidence
- You just installed a cumulative update and want to confirm nothing broke
- Event Viewer shows
SideBySideorTrustedInstallererrors
Low disk space and file corruption show up together more often than you’d expect. A nearly full C: drive can cause Windows Update to fail mid-install. That leaves partially-applied components behind. Those show up later as SFC or DISM errors. Treat this as one workflow, not two separate problems.
Step 2: Diagnose What’s Actually Eating Disk Space
Before you clean anything, find out where the space is going. Open Settings > System > Storage for a quick visual breakdown.
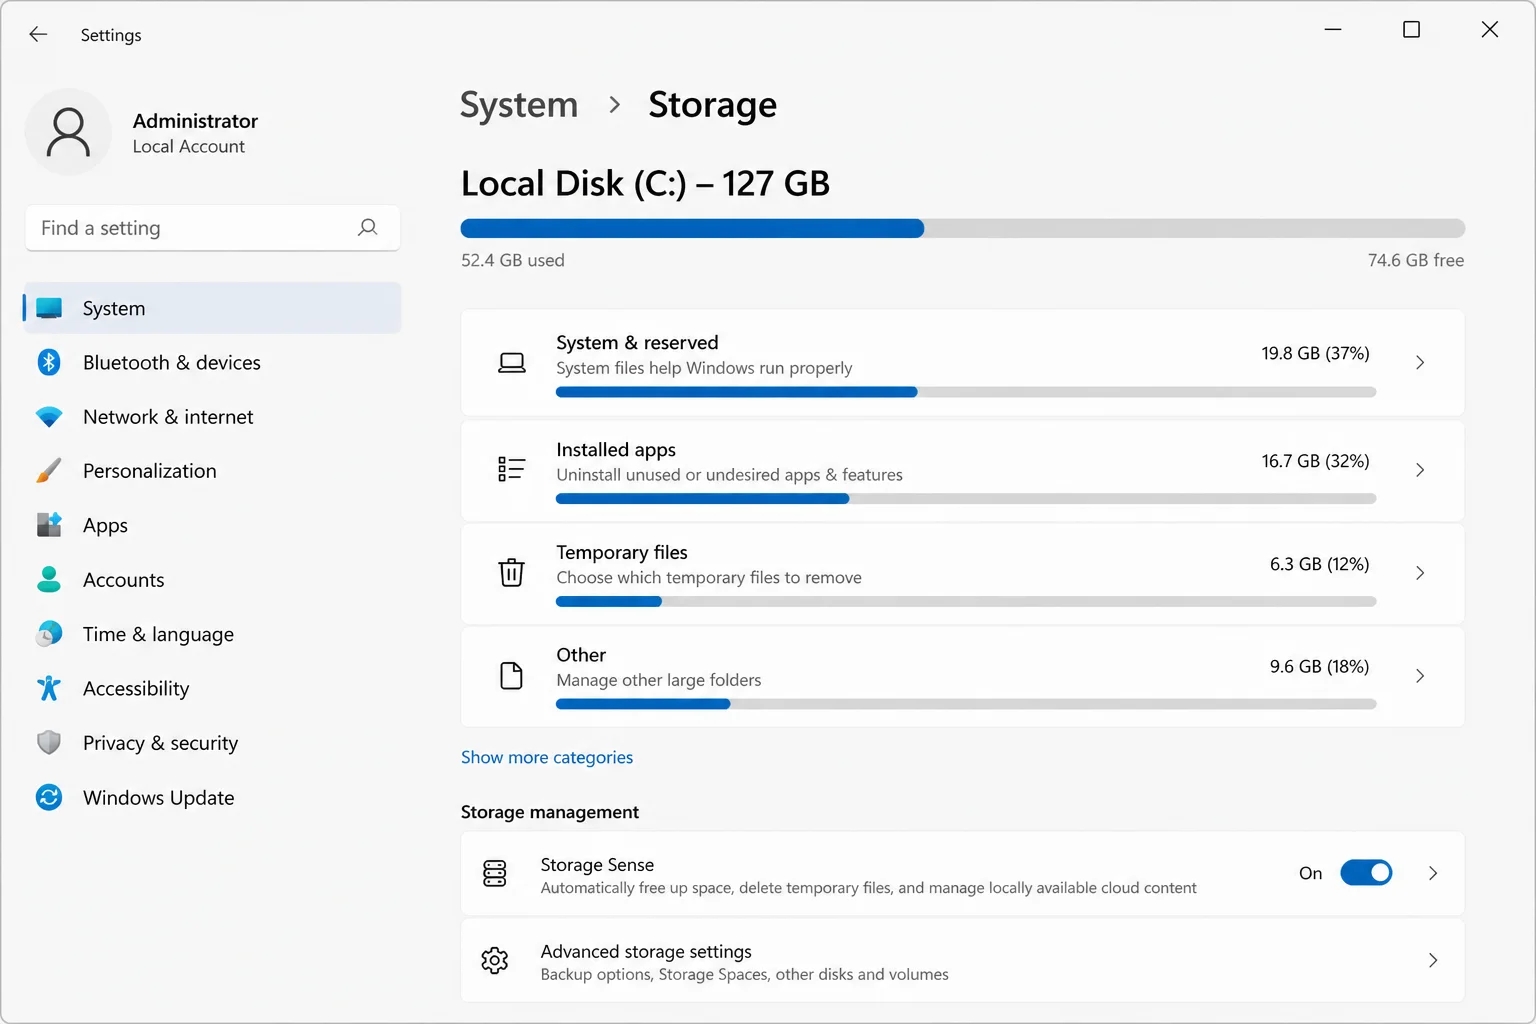
For exact numbers on the two biggest space users, the WinSxS component store and the Windows Installer cache, use PowerShell:
# Total size of the WinSxS folder (can take a minute on a large store)
Get-ChildItem -Path "C:\Windows\WinSxS" -Recurse -Force -ErrorAction SilentlyContinue |
    Measure-Object -Property Length -Sum |
    Select-Object @{N='SizeGB';E={[math]::Round($_.Sum / 1GB, 2)}}
# Total size of the Windows Installer cache
Get-ChildItem -Path "C:\Windows\Installer" -Recurse -Force -ErrorAction SilentlyContinue |
Measure-Object -Property Length -Sum |
Select-Object @{N='SizeGB';E={[math]::Round($_.Sum / 1GB, 2)}}Expected output:
SizeGB
——
14.82
WinSxS numbers in the 8-20 GB range are normal on a server that’s taken several cumulative updates. Don’t panic at the raw folder size. A large chunk of it is hard-linked to files your currently installed components still use, so only part of it can be reclaimed. Step 4 handles that part.
Confirm the volume-level picture in Disk Management too:
diskmgmt.msc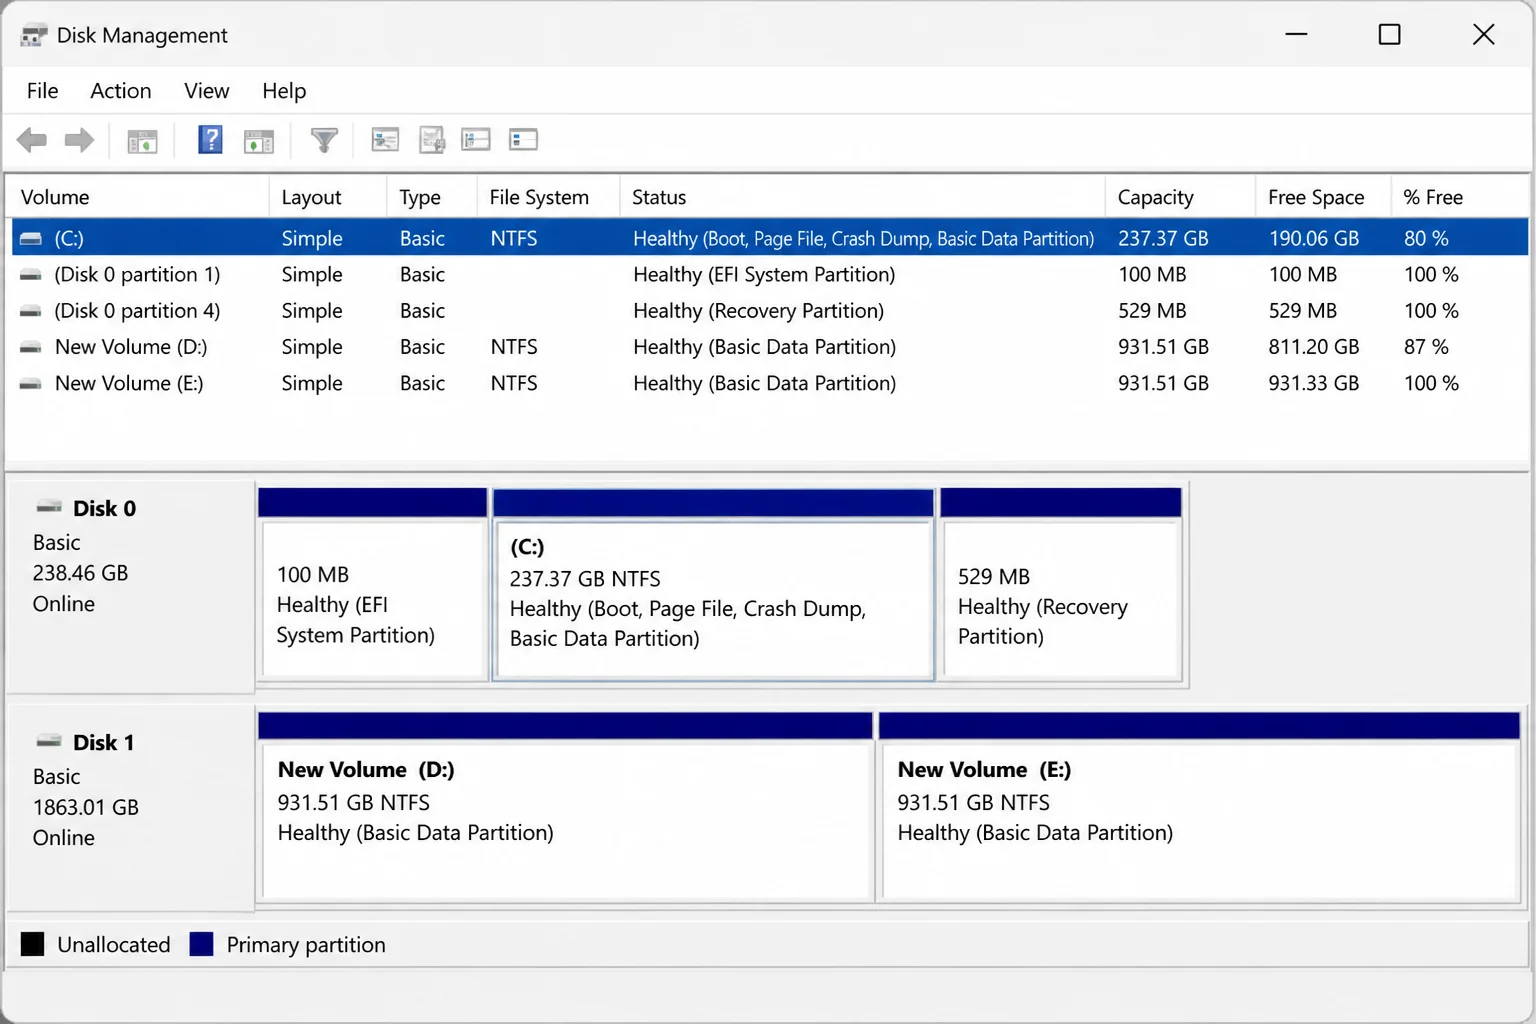
Step 3: Verify System File Integrity with SFC
Open an elevated PowerShell or Command Prompt window and run:
sfc /scannowExpected output:
Beginning system scan. This process will take some time.
Beginning verification phase of system scan.
Verification 100% complete.
Windows Resource Protection did not find any integrity violations.
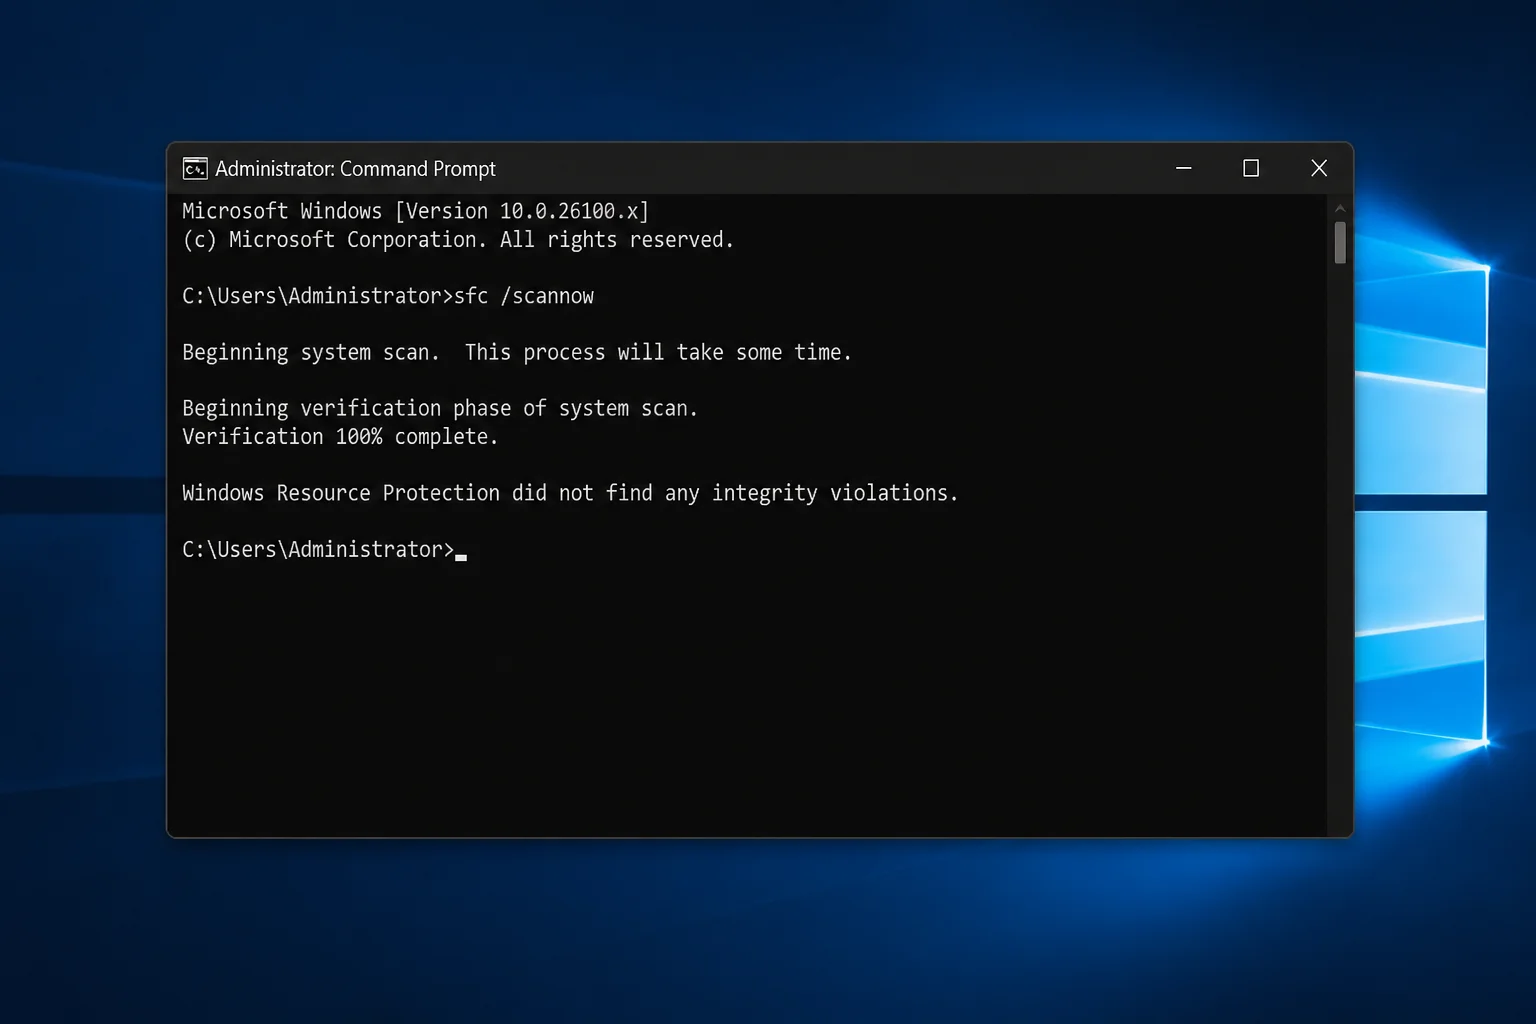
That message is the good outcome. If instead you see Windows Resource Protection found corrupt files and successfully repaired them, SFC already fixed the problem using its local cache. No further action needed beyond a reboot if a repaired file was in use.
If you see found corrupt files but was unable to fix some of them, check %WinDir%\Logs\CBS\CBS.log:
findstr /C:"[SR]" "%WinDir%\Logs\CBS\CBS.log" > "$env:USERPROFILE\Desktop\sfc-results.txt"
notepad "$env:USERPROFILE\Desktop\sfc-results.txt"
Lines tagged [SR] are System Resource Checker entries. They show which files failed verification and whether a repair source was found. A common pattern is Cannot repair member file ... source could not be found. That means the local component store doesn’t have a clean copy. It’s your cue to move to Step 4/5 and run a /RestoreHealth pass before re-running SFC.
Step 4: Analyze the Component Store Before Touching It
Don’t run cleanup blind. DISM can tell you exactly how much of WinSxS is reclaimable before you commit to anything:
DISM /Online /Cleanup-Image /AnalyzeComponentStoreExpected output:
Component Store (WinSxS) information:
Windows Explorer Reported Size of Component Store : 14.82 GB
Actual Size of Component Store : 14.55 GB
Shared with Windows : 9.20 GB
Backups and Disabled Features : 1.10 GB
Cache and Temporary Data : 0.85 GB
Date of Last Cleanup : 2026-06-12
Number of Reclaimable Packages : 6
Component Store Cleanup Recommended : Yes
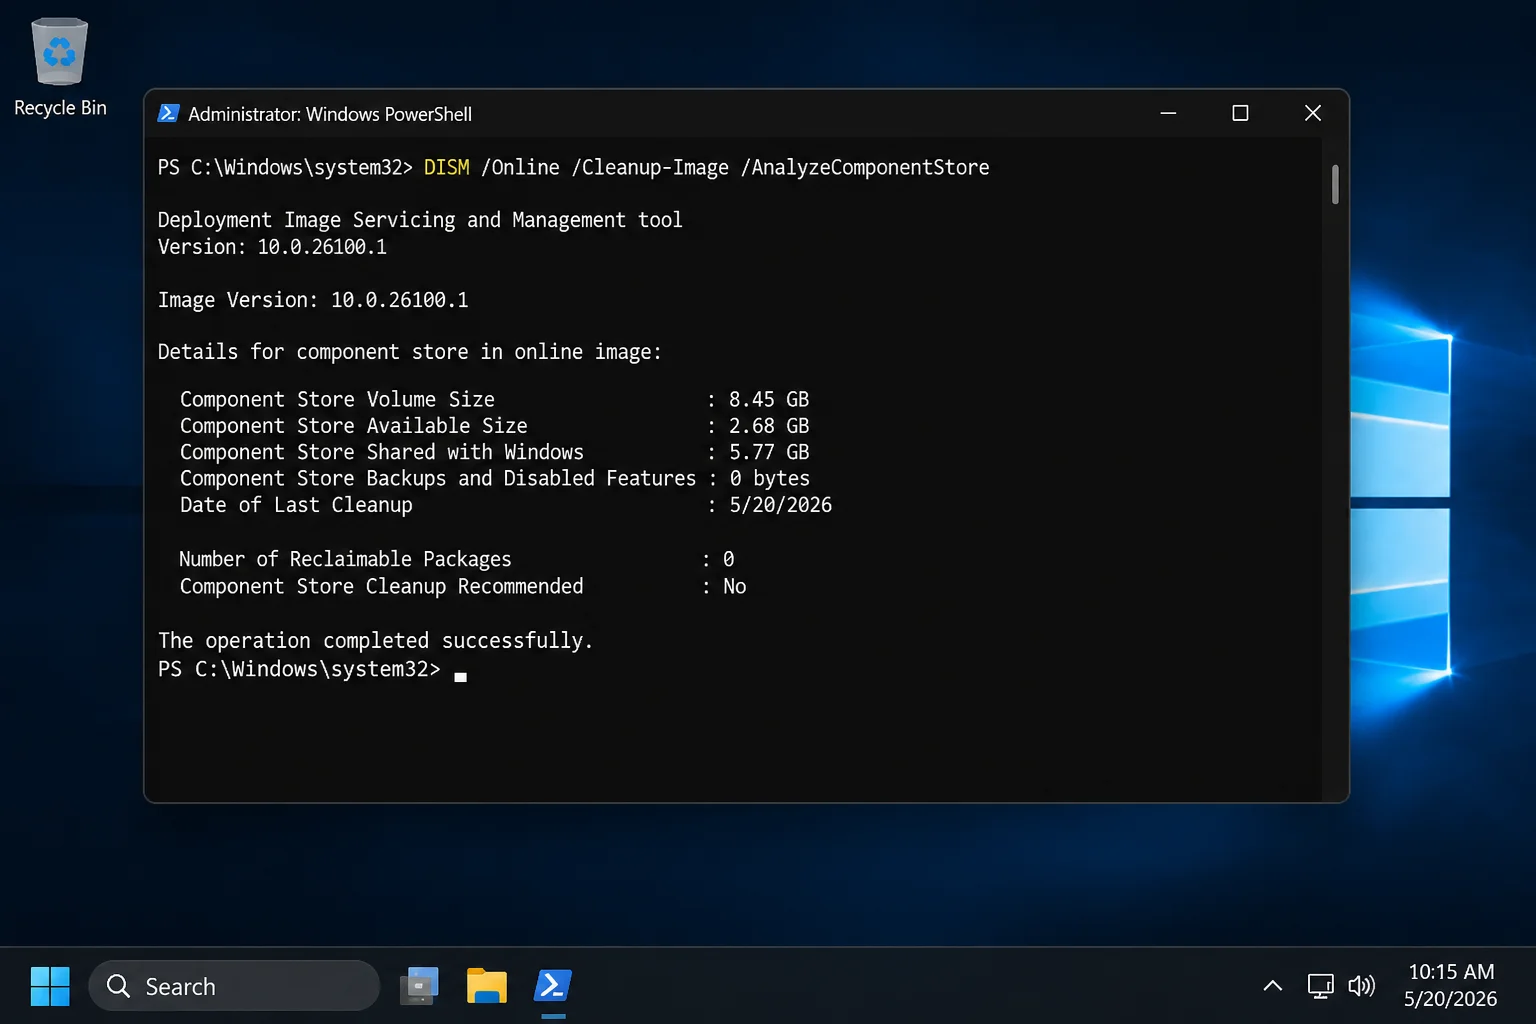
The line that matters most is Component Store Cleanup Recommended. If it says No, running /StartComponentCleanup will free almost nothing. Skip it. It’s not worth burning a maintenance window on a production server for zero payoff.
Step 5: Reclaim Space with DISM Component Cleanup
If cleanup is recommended, run:
DISM /Online /Cleanup-Image /StartComponentCleanupExpected output:
Deployment Image Servicing and Management tool
Version: 10.0.26100.1Image Version: 10.0.26100.1
[==========================100.0%==========================]
The operation completed successfully.
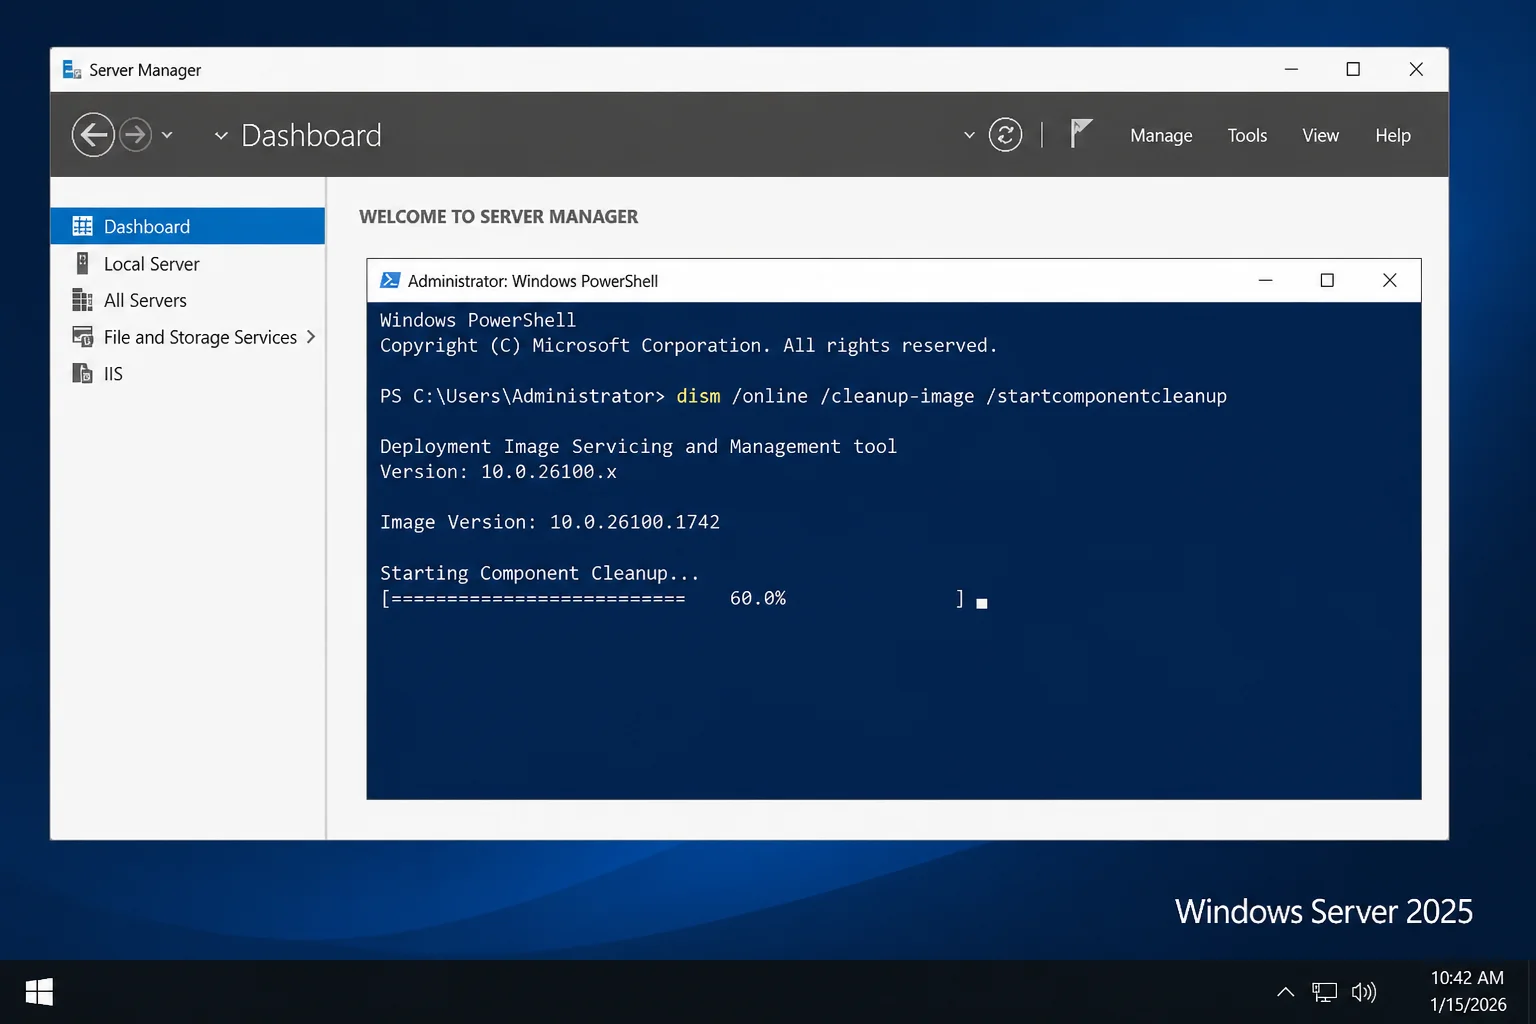
This removes superseded component versions, old copies of files already replaced by an update. It doesn’t touch your ability to uninstall recently installed updates. It’s the safe default. Run this one first, every time.
Warning: Do not run
/StartComponentCleanup /ResetBasecasually./ResetBasepermanently removes the ability to uninstall any currently installed service pack or cumulative update. It collapses everything into the new baseline. It’s irreversible. There’s no command to undo it short of restoring from backup.
Use /ResetBase only when:
- The server has been stable on its current update baseline for at least one full patch cycle (30+ days is a reasonable rule of thumb)
- You have no plan to roll back a recent update
- You’ve confirmed via
/AnalyzeComponentStorethat a meaningful amount of space is still tied up in old baseline data
# Only run this after confirming the criteria above
DISM /Online /Cleanup-Image /StartComponentCleanup /ResetBase
Skip it if you patched within the last few weeks. Also skip it if the server is still in a validation window, or if compliance/change-control policy requires update rollback capability.
Step 6: Clean the Windows Installer Cache, Carefully
C:\Windows\Installer holds cached .msi and .msp files that Windows Installer uses for repairs and uninstalls. It grows over time as software gets patched or removed without cleaning up its cache entry. It’s tempting to just delete the biggest files sitting in there. Don’t. This is the one step in this whole runbook where impatience actually costs you.
Warning: Deleting the wrong file from
C:\Windows\Installercan break future uninstalls or repairs of software that’s still installed. Never delete directly; always snapshot, cross-reference, and quarantine first.
1. Snapshot the current state:
Get-ChildItem "C:\Windows\Installer" -Filter *.msi -Force |
    Select-Object Name, Length, LastWriteTime |
    Export-Csv "$env:USERPROFILE\Desktop\installer-cache-snapshot.csv" -NoTypeInformation
2. Identify orphans by cross-referencing against installed products. Windows tracks which cached files are still referenced by installed applications in the registry under HKEY_CLASSES_ROOT\Installer\Products. Rather than parsing that by hand, use the built-in Windows Installer cleanup logic exposed via msiexec:
# Lists products and their associated cached package paths for cross-reference
Get-WmiObject -Class Win32_Product | Select-Object Name, PackageCache | Format-List
Any .msi/.msp file in the cache folder that doesn’t appear in that output for any installed product is a candidate orphan. It’s not a guaranteed one, some patches reference base packages indirectly.
3. Move suspected orphans to a quarantine folder instead of deleting:
New-Item -ItemType Directory -Path "D:\InstallerQuarantine" -Force
Move-Item -Path "C:\Windows\Installer\<suspected-orphan-file>.msi" -Destination "D:\InstallerQuarantine\"
4. Validate before permanent deletion. Let the server run normally for at least a week, patch cycles, app repairs, and uninstalls included. If nothing breaks and no application complains about a missing installer source, it’s safe to permanently delete the quarantined files. If something does break, moving the file back resolves it immediately. That’s the entire point of quarantining instead of deleting outright.
Step 7: Automate Windows Update Cleanup with Disk Cleanup
Disk Cleanup’s default view hides the categories that actually reclaim meaningful space. You need the elevated “system files” mode:
cleanmgr /d C:In the dialog, click Clean up system files (this re-launches Disk Cleanup elevated), then check Windows Update Cleanup, Temporary Files, and Delivery Optimization Files.
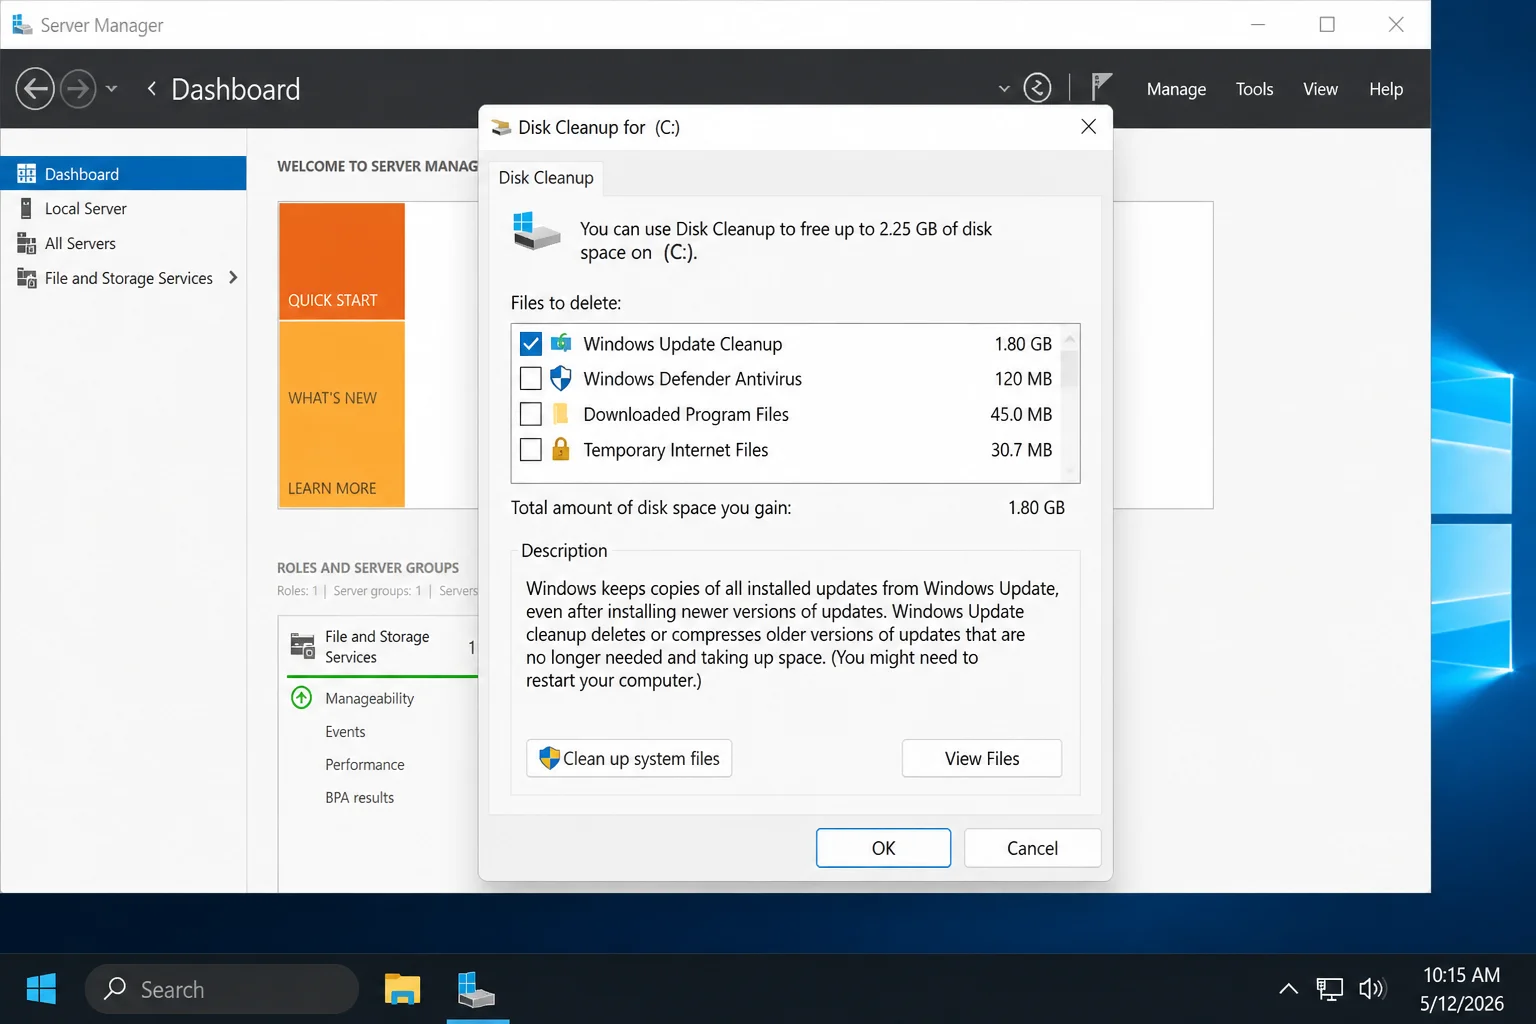
For low-disk scenarios, cleanmgr has switches that mirror what Windows does automatically when free space drops below internal thresholds:
# Runs cleanup with settings tuned for moderately low disk space
cleanmgr /lowdisk

# Runs more aggressive cleanup for critically low disk space
cleanmgr /verylowdisk
For a repeatable, scriptable cleanup across multiple servers, pre-configure a profile once with /sageset, then run it unattended with /sagerun:
# Opens the category picker and saves your selections under profile ID 1
cleanmgr /sageset:1
# Runs the saved profile 1 with no dialog — safe to schedule as a task
cleanmgr /sagerun:1/sageset writes the selected categories to the registry under HKLM\SOFTWARE\Microsoft\Windows\CurrentVersion\Explorer\VolumeCaches. Once you’ve built profile 1 on your reference server, export that registry key and import it on the rest of the fleet before running /sagerun:1. That’s how you standardize cleanup across a dozen servers without touching the GUI on any of them.
Step 8: Managing All of This Remotely from macOS or iOS
None of these tools run natively on macOS or iOS. SFC, DISM, and Disk Cleanup are Windows-only, full stop. What you can do from a Mac or iPhone/iPad is drive the same elevated session on the server remotely. That covers every command above identically.
macOS
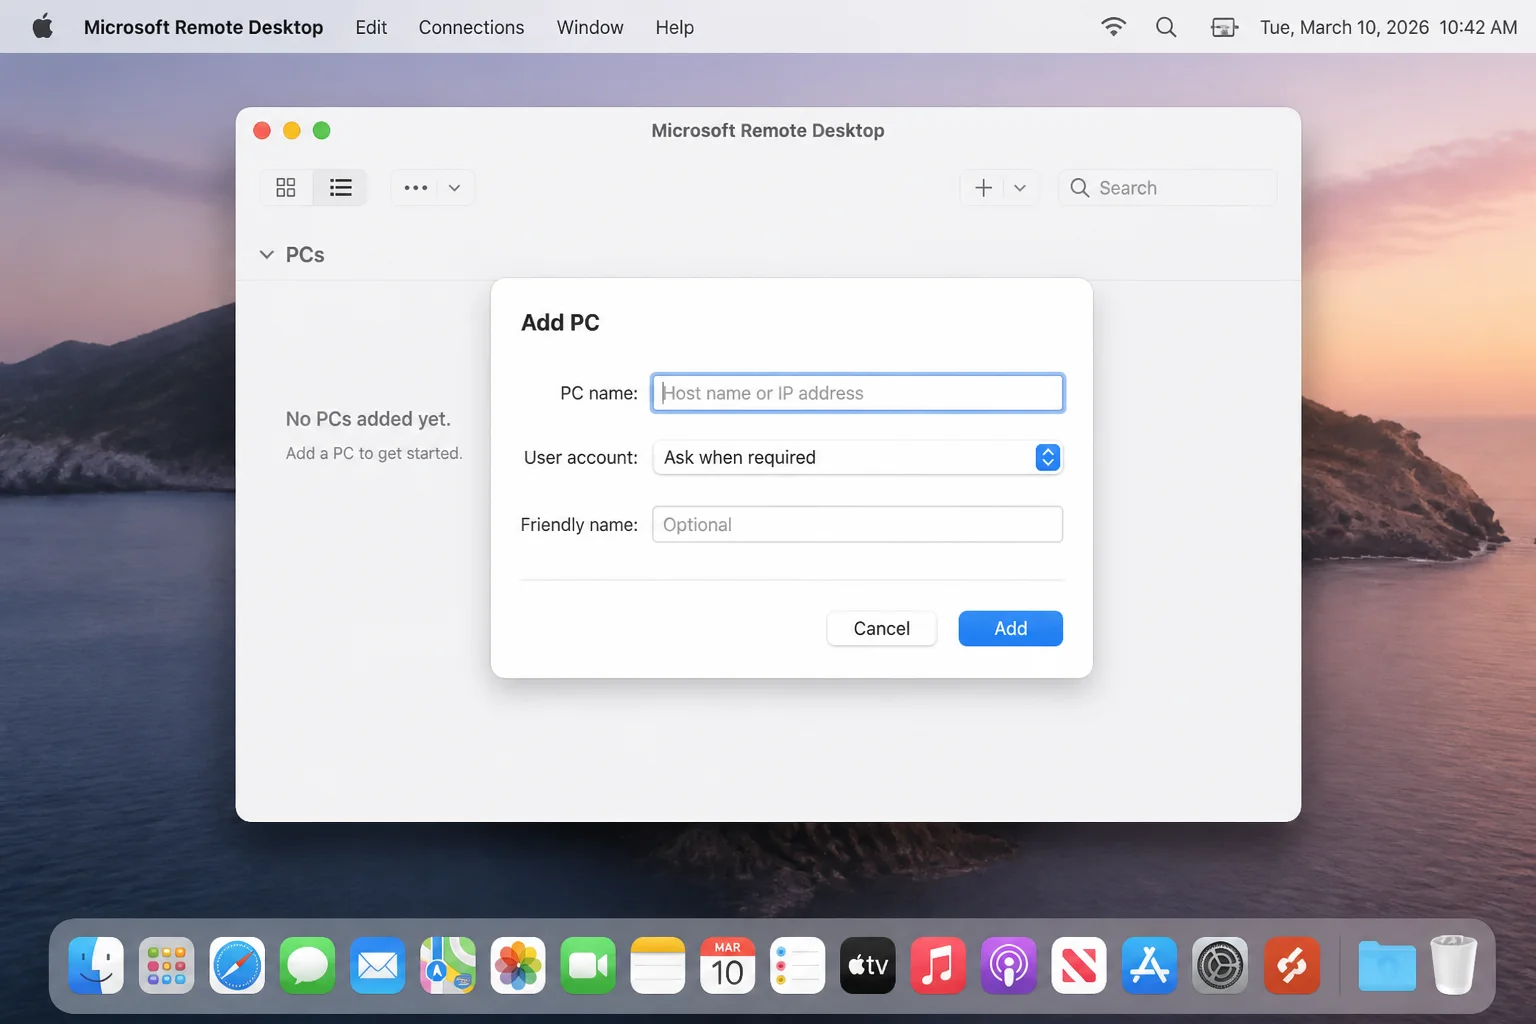
Install Microsoft Remote Desktop from the Mac App Store. Then confirm your Mac has network or VPN reachability to the server before connecting.
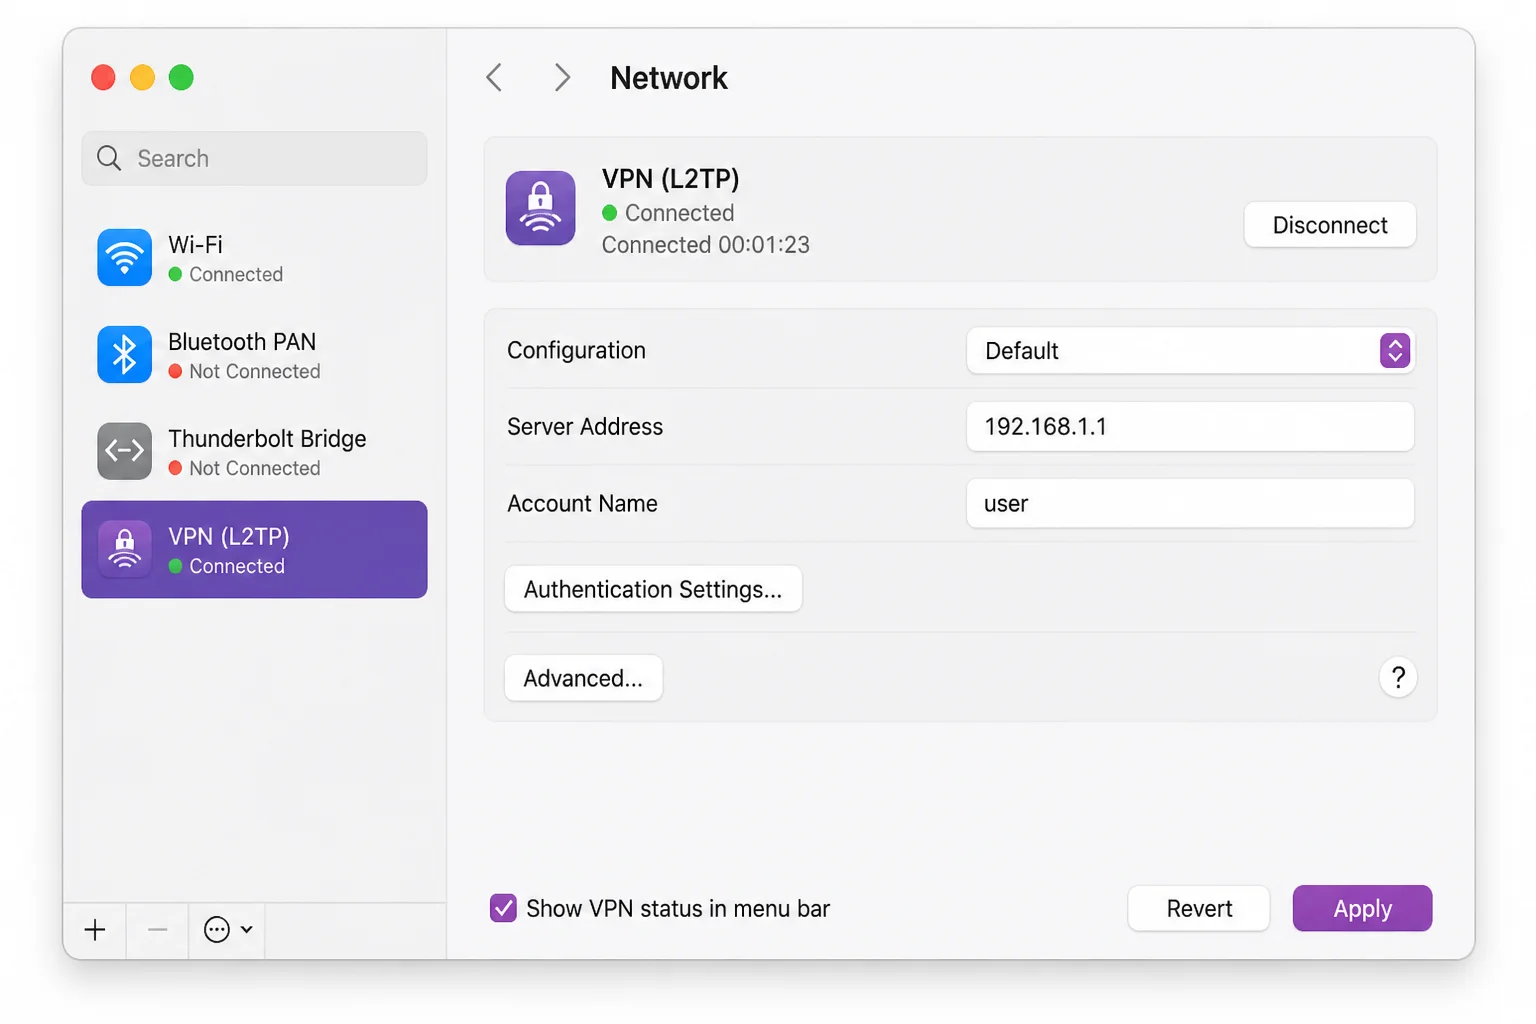
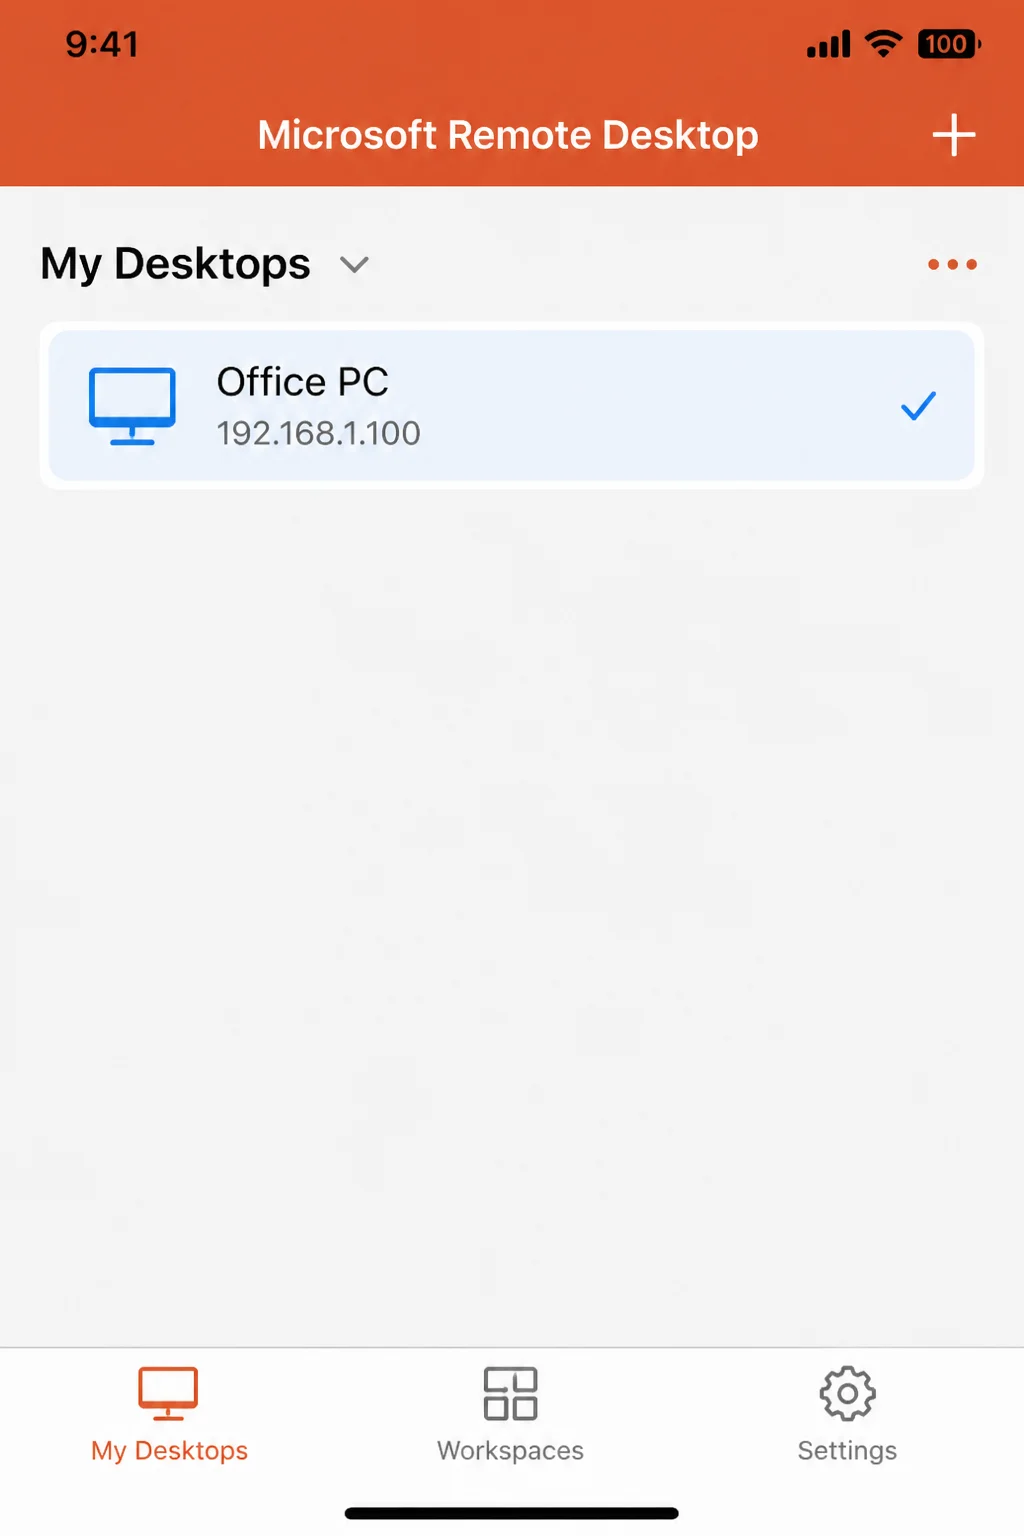
Add a new PC connection pointing at the server’s hostname or IP. Launch the session and open PowerShell as Administrator once connected. Every command in Steps 3 through 7 runs exactly as shown.
iOS
Install Microsoft Remote Desktop from the App Store. Before connecting, verify your VPN profile is active under Settings > VPN. Most production servers are only RDP-reachable through the VPN, not over the open internet. That’s a good thing.
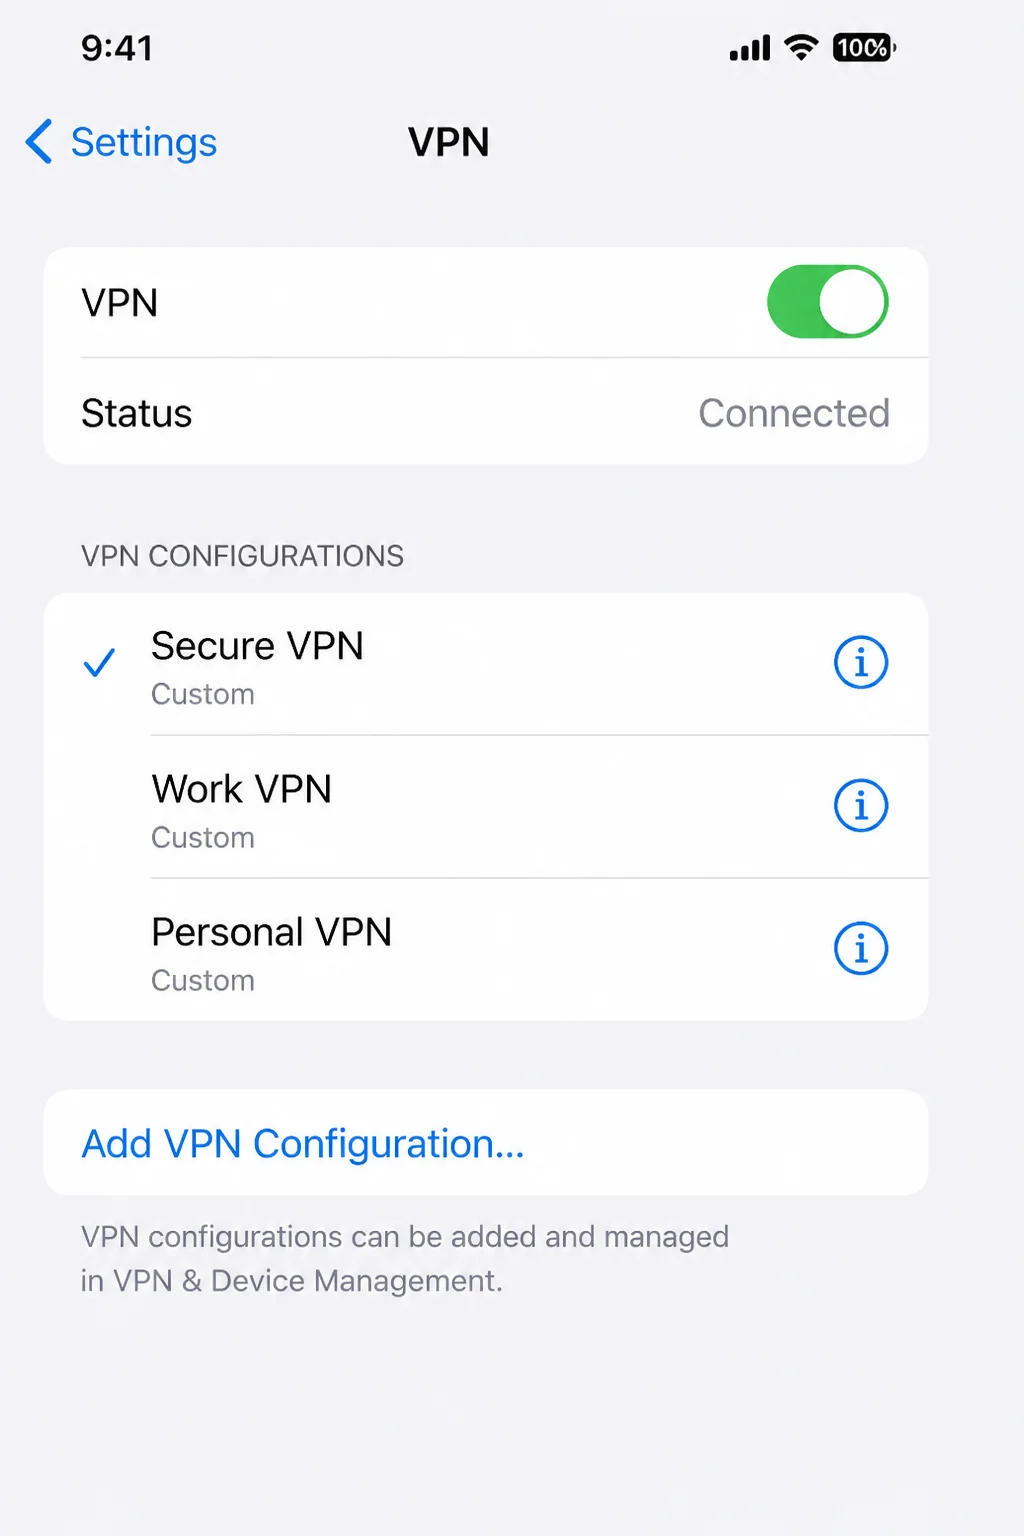
Add the same PC connection details, connect, and open an elevated PowerShell window on the server. The on-screen keyboard makes long commands tedious. For anything beyond a quick sfc /scannow check, pair a Bluetooth keyboard to the iPad or iPhone. It turns an on-call fix from a chore into something genuinely usable.
Configuration Reference
| Setting / Flag | Purpose | Notes |
|---|---|---|
%WinDir%\Logs\CBS\CBS.log | SFC and servicing operation log | Filter with findstr /C:"[SR]" for SFC-specific entries |
%WinDir%\Logs\DISM\dism.log | DISM operation log | Useful when /AnalyzeComponentStore or cleanup fails silently |
/AnalyzeComponentStore | Reports reclaimable WinSxS space | Always run before /StartComponentCleanup |
/StartComponentCleanup | Removes superseded components | Safe default; doesn’t affect update rollback |
/StartComponentCleanup /ResetBase | Removes update rollback capability | Irreversible: see Step 5 criteria |
cleanmgr /lowdisk | Moderate automatic cleanup | Mirrors low-disk-space automatic behavior |
cleanmgr /verylowdisk | Aggressive automatic cleanup | Use when free space is critical |
cleanmgr /sageset:n | Save a category profile | Profile stored in the registry under VolumeCaches |
cleanmgr /sagerun:n | Run a saved profile unattended | Good for scheduled tasks/fleet-wide scripts |
Verification Checklist and Rollback Guidance
Before you consider the maintenance pass done, confirm all of the following:
sfc /scannowcompletes with “did not find any integrity violations” (or repaired files, with no unresolved entries inCBS.log)DISM /Online /Cleanup-Image /AnalyzeComponentStoreshowsComponent Store Cleanup Recommended: Noafter running/StartComponentCleanup- Free space on
C:has increased by an amount consistent with what/AnalyzeComponentStorereported as reclaimable - Disk Management shows the expected free space on the system volume
- Quarantined Installer cache files have sat untouched for at least a week with no application errors before permanent deletion
- If you ran
/ResetBase, you’ve documented that update rollback is no longer available for this server in your change record
Rollback guidance:
- SFC repairs: There’s no “undo” for SFC repairs. It’s replacing corrupted files with known-good ones, a fix, not a change worth reverting.
- DISM
/StartComponentCleanup(without/ResetBase): No practical rollback needed; superseded components you’d need for update rollback are still intact if you skipped/ResetBase. - DISM
/ResetBase: No rollback path other than restoring from a pre-cleanup backup or snapshot. This is why the backup checkbox in Prerequisites isn’t optional if you’re going to use this flag. - Installer cache cleanup: Move quarantined files back to
C:\Windows\Installerif any application reports a missing source during a repair or uninstall. - Disk Cleanup categories: All standard categories (temp files, Windows Update Cleanup, Recycle Bin) are safe and don’t require rollback planning.
Tips and Troubleshooting
SFC finds corruption it can’t fix. This usually means the local component store DISM/SFC relies on for repair copies is itself damaged. Run DISM /Online /Cleanup-Image /RestoreHealth first. It can pull replacement files from Windows Update or a specified source. Then re-run sfc /scannow and check CBS.log again.
/StartComponentCleanup frees almost no space. Most of WinSxS consists of files hard-linked to components you still have installed. Only superseded versions are reclaimable. If /AnalyzeComponentStore already said No for cleanup recommended, there’s nothing more to gain without /ResetBase.
Free space doesn’t increase after Disk Cleanup. You likely ran the standard, non-elevated Disk Cleanup dialog, which hides the system file categories. Reopen it and click Clean up system files before selecting Windows Update Cleanup.
Unsure if /ResetBase is safe right now. If you can’t confidently say “yes” to all three criteria in Step 5, don’t run it. Stick with plain /StartComponentCleanup. It gets you most of the space savings without giving up rollback capability.
Wrapping Up
You’ve now got a repeatable way to check whether a Windows Server 2025 box is healthy, and claw back disk space without guessing. SFC handles integrity, DISM handles the component store, Disk Cleanup gets the easy wins, and Disk Management confirms the results landed. Run this before and after every patch cycle. You’ll catch corruption and space creep long before either one turns into an outage.
/AnalyzeComponentStore before /StartComponentCleanup is the step people skip most often, and it’s the one that saves you from wasting a maintenance window on a cleanup that won’t free anything. Do that one every time. Save /ResetBase for servers you’re confident you won’t need to roll back.
| Step | Action | Applies To |
|---|---|---|
| 1-2 | Identify symptoms, check Storage/WinSxS/Installer sizes | All servers |
| 3 | sfc /scannow, review CBS.log | Suspected corruption, pre/post-patch |
| 4-5 | /AnalyzeComponentStore, then /StartComponentCleanup (/ResetBase only if criteria met) | Low disk space |
| 6 | Snapshot, quarantine, validate Installer cache | Large C:\Windows\Installer |
| 7 | cleanmgr with system files, /sageset + /sagerun for automation | Fleet-wide maintenance |
| 8 | Remote Desktop from macOS/iOS to run all of the above | Remote administration |
Resources
- DISM overview
- Clean up the WinSxS folder
- SFC command-line reference
- DISM command-line reference
- Cleanmgr command-line reference
- How to migrate from Windows Server 2019/2022 to 2025 safely
- Advanced Windows System Cleanup Commands – SFC and DISM
- How to Install Docker on Windows Server 2025 (Docker Engine Setup Guide)
- AD CS Troubleshooting: Common Certificate Service Failures
- Disk Cleanup for more information on disk cleanup best practices.