The following tutorial will show us how to deploy a Domain Controller using the Install from Media option (IFM). This tutorial will also help you prepare for the 70-742 certification exam.
Before we dive into the step-by-step part of this article, let’s look at the reasons why we would do an IFM install in the first place.
The reason itself is pretty simple. In a case where we have branch offices with very low WAN links or a very big AD forests, we would need a lot of time to replicate that data from the HQ domain controllers to the Branch Office ones.
Because of this IFM, helps us download all of the AD database and registry settings from our Primary Domain Controller (PDC) to flat files that we can then copy onto a flash drive or a DVD and bring to the branch office. We can start the DC installation locally, which will pull all the data from those files instead of replicating it over the network.
Of course, if any changes have been done in AD since you did a dump of the AD database, the installation will replicate those changes from any domain controller in the forest.
Now let’s dive into the step-by-step guide. To create a dump of the AD Forest we will use ntdsutil. Did you know that originally Active Directory Domain Services was called New Technology Directory Services? Thus the ntds in ntdsutil. Interesting heh?
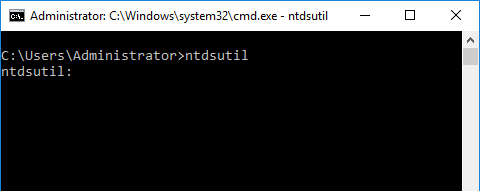
First step is to go on the Primary Domain Controller and fire up the command prompt. Inside the command prompt, we type ntdsutil.
Next step is to type ifm to launch the ifm prompt. You will get a small error that says Active Instance not set. To fix that, just type the following command:
activate instance ntds

Now that we fixed that little pesky error, let’s type ifm again and then type create full C:\ifm, which will export all of the AD forest to that folder in root of the C drive.
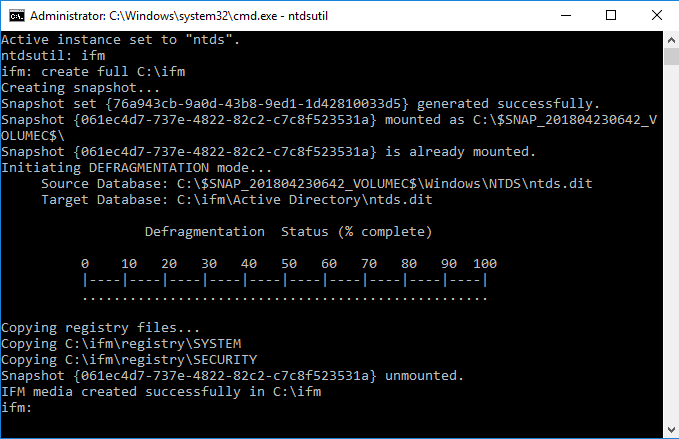
As you can see above, the procedure is automatic and you should get a nice successful message at the end.
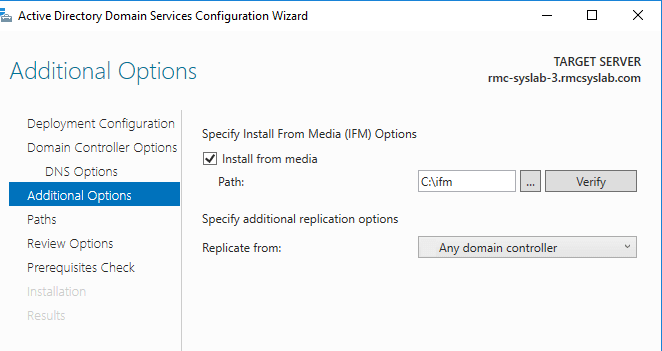
Next, we copy the ifm folder to our new Domain Controller and start the Active Directory Directory Services installation. We covered the installation in a previous tutorial.
During the promotion of the server to a Domain Controller on the Additional options prompt, we will check the Install from media option and provide the full path to the ifm folder. For example C:\IFM.
Once that is done, just continue with the regular installation and you are done. Thank you for taking the time reading this tutorial and hope it helped. Enjoy!