I’ve been using VMware Workstation on my personal PC for quite a few years, but I was having one big issue: the virtual machines were simply taking up too much space. I use an SSD on my personal computer, but the drive isn’t that large.
With only three VMs on my local machine, it was eating up more than three-fourths of my SSD drive. Instead, I purchased a refurbished Dell PowerEdge server, installed VMware ESXI and then transferred my Workstation virtual machines to the server.
In this article, I’m going to walk you through the steps for uploading a virtual machine from a Workstation machine to an ESXi server. There are other ways to transfer a VM, like exporting the VM to an OVF file, but I like the upload method the best.
Step 1: Connect to ESXi Server
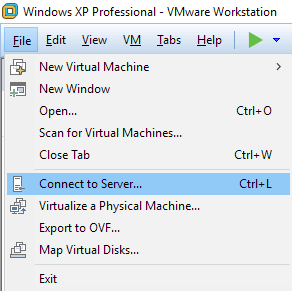
The first thing we will do is connect Workstation to the local ESXi server. To do this, just click on File and then Connect to Server.
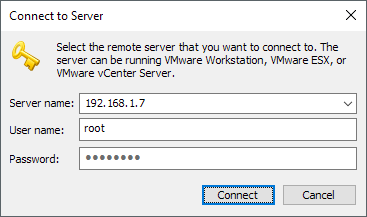
A window will popup where you will need to enter the ESXi server hostname or IP address and the login info.
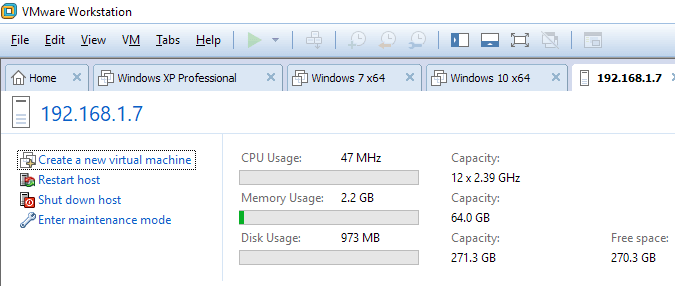
Click Connect and you should see some basic info about the ESXi server at the top and a list of any virtual machines at the bottom.
Step 2: Change Hardware Compatibility
Before we upload the virtual machine, we first need to change the hardware compatibility. You only need to do this if you are running the latest VMware Workstation 14 and have already upgraded the hardware compatibility to 14.
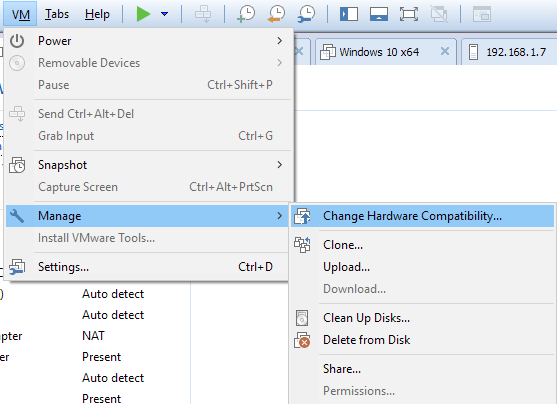
In my case, I’m running ESXi 6.5, but it doesn’t support Workstation 14 hardware compatibility yet. So I had to change it to either ESXi 6.5 or to Workstation 12 or earlier. You can do this by clicking on the VM tab and then clicking on VM in the menu, Manage and Change Hardware Compatibility.
I would choose the latest version that works, such as 12.x or ESXi 6.5 from the list.
When you click Next, you’ll be asked whether you want to clone the virtual machine before upgrading or if you would rather just adjust the current virtual machine. It’s up to you, but just know that sometimes things can go wrong, so if the VM is very important, you should probably clone it first.
Step 3: Upload the VM to ESXi
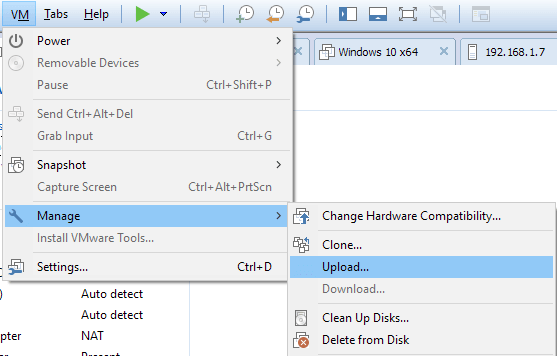
Now we are ready to upload the VM. To do this, again click on VM, then Manage and now click on Upload.
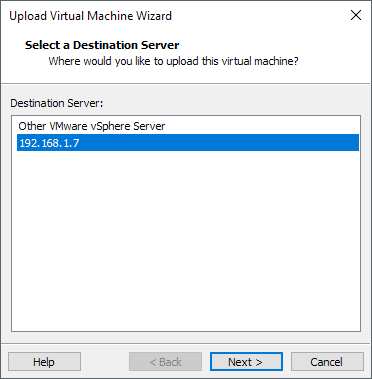
If you connected to the ESXi server in step 1, then you should see the IP address or hostname listed in the Upload Virtual Machine Wizard.
Click Next and then choose which Datastore you want to use for storing the new VM. It should tell you the amount of free space left on that datastore also.
Click Finish and the upload process will begin. Note that it can take a significant amount of time to upload the VM, especially if it is very large.
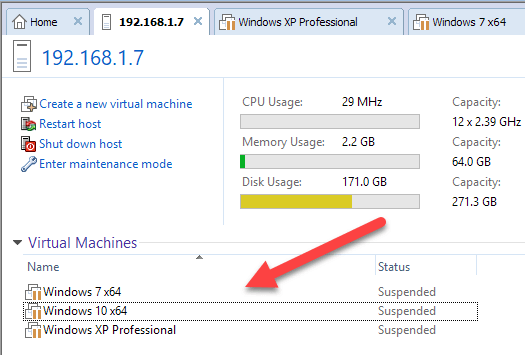
Once it has been uploaded, you should see it listed when you click on the tab for the ESXi server you are connected to.
That’s about it! You can now delete the local virtual machines if you like. Note that if you want to open the uploaded virtual machines from Workstation, you need to right click on them and choose Open. Then they will appear as normal VMs running in Workstation and you can power them on using the green play button.
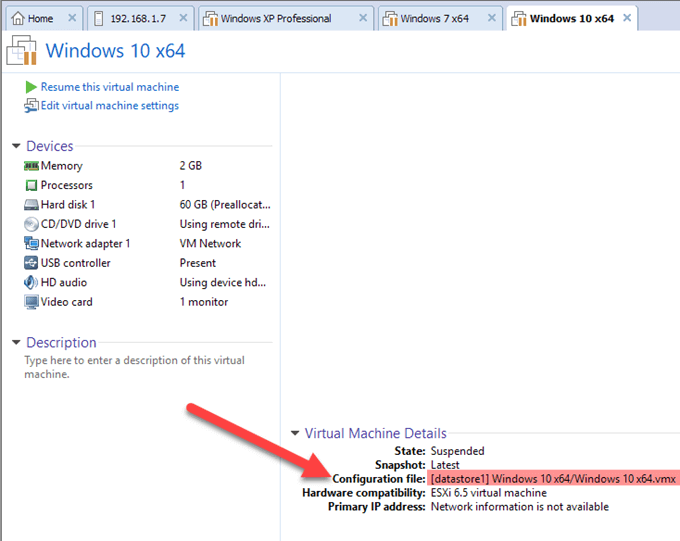
You can also tell the difference between a local VM and the remote VM by looking at the Virtual Machine Details section and noting where the configuration file is saved. As you can see above, this Windows 10 VM is located on datastore1, which is on the ESXi server. If it’s local, it’ll say something like C:\. If you have any questions, post a comment. Enjoy!

