

If you’re still RDPing into every server to run one-line scripts, you’re burning time you don’t have. PowerShell remoting lets you run commands on a Windows Server target from your own workstation, whether Windows, Mac, or Linux, without opening a full desktop session. This guide covers both remoting transports on Windows Server 2022 and 2025. WinRM is the traditional Windows-only method. OpenSSH-based PowerShell 7 remoting is the cross-platform option. We’ll harden both. Leaving either one on factory defaults is basically an open door into your infrastructure.
By the end, you’ll have a working, encrypted remoting setup on at least one transport. You’ll also get firewall rules scoped to your management subnet, and a way to audit who connected and when.
What is PowerShell Remoting?
PowerShell remoting lets you run commands or full scripts on a remote machine as if you were sitting at its console. You do this with cmdlets like Invoke-Command, Enter-PSSession, and New-PSSession. Windows has supported this since PowerShell 2.0 through WinRM (Windows Remote Management). WinRM is Microsoft’s implementation of the WS-Management protocol. It’s been the default transport for over a decade. It integrates tightly with Active Directory and Kerberos, and needs zero extra software on domain-joined machines.
Starting with PowerShell 7, Microsoft added a second transport: SSH-based remoting. Instead of WS-Management over HTTP/HTTPS, your session travels over standard SSH. That’s the same protocol Linux and macOS admins have used for decades. This matters because WinRM’s client tooling is built primarily around Windows. If you’re managing Windows Server from a MacBook or an Ubuntu jump box, PowerShell 7 SSH remoting is the native cross-platform option, though WinRM can still be reached from non-Windows clients through compatible tooling or PowerShell remoting support in some scenarios. SSH remoting is generally the choice that avoids pulling in a third-party client tool.
Before You Begin
Make sure you have:
- A Windows Server 2022 or Windows Server 2025 instance (physical, VM, or cloud) you can log into with local Administrator rights
- PowerShell 7+ installed on the server for SSH-based remoting (Windows PowerShell 5.1 works fine for WinRM-only setups)
- A management workstation running Windows, macOS, or Linux with either PowerShell 7+ or a native SSH client
- Administrative access to Windows Defender Firewall with Advanced Security on the target server
- Network connectivity between client and server (same LAN, VPN, or routed network, not through NAT without port forwarding)
- A basic understanding of Active Directory group membership if the server is domain-joined
| Requirement | Details |
|---|---|
| Target OS | Windows Server 2022 (21H2+) or Windows Server 2025 |
| PowerShell version | PowerShell 7 or later (5.1 supported for WinRM only) |
| Client OS | Windows 10/11, macOS 13+, or Linux (Ubuntu 22.04/24.04 tested) |
| Privileges | Local Administrator on target; sudo/admin on client for install steps |
| Network | Direct or VPN-routed access to ports 5985/5986 (WinRM) or 22 (SSH) |
WinRM is enabled by default on many Windows Server installations, but the HTTPS listener, firewall scoping, and authentication hardening covered here are not. Those are manual steps you have to take on purpose, nobody ships them turned on for you.
WinRM vs SSH: Which Transport Should You Use?
Before you touch a config file, it’s worth knowing what you’re actually choosing between. These two transports behave very differently on the wire.
| Factor | WinRM (WS-Management) | SSH (PowerShell 7) |
|---|---|---|
| Default ports | 5985 (HTTP), 5986 (HTTPS) | 22 |
| Cross-platform clients | Windows only | Windows, macOS, Linux |
| Domain auth | Native Kerberos support | Key-based or password |
| Encryption without HTTPS | Yes, by default (Negotiate/Kerberos encrypts the payload), but server identity isn’t verified | Yes, always (SSH transport encryption is built in) |
| Firewall/NAT friendliness | Less common outbound allow-lists for 5985/5986 | Port 22 is widely permitted outbound |
| Setup complexity | Low for domain, higher for HTTPS + certs | Low; key management is the main overhead |
| JEA (Just Enough Administration) support | Yes | Yes, on PowerShell 7.2+ |
Is WinRM traffic actually encrypted? Yes. Even over plain HTTP on port 5985, WinRM’s default authentication (Kerberos or NTLM via “Negotiate”) encrypts the message payload at the application layer. What you don’t get without HTTPS is server identity verification. That means a man-in-the-middle on your network segment could still intercept or redirect the initial negotiation. That’s why this guide treats HTTPS as mandatory for anything beyond an isolated lab.
When to use WinRM: an all-Windows, domain-joined fleet where Kerberos authentication and Group Policy already manage trust. It needs no extra software and plays nicely with existing AD security groups.
When to use SSH: anything involving a Mac or Linux admin workstation, a mixed OS environment, or a homelab. It’s the right call if you’d rather manage one SSH key set across every machine you touch, Windows or otherwise. Check our related guide on PowerShell 7 cross-platform automation basics if you’re standardizing scripts across OSes.
Most shops running a mixed fleet end up using both. WinRM handles domain-to-domain admin tasks. SSH covers anything crossing OS boundaries or reaching servers from outside the Windows ecosystem.
Part 1: Setting Up and Hardening WinRM
Step 1: Enable PowerShell Remoting
On the target Windows Server, open PowerShell as Administrator and run:
Enable-PSRemoting -ForceThis one command does four things:
- Starts the WinRM service and sets it to auto-start
- Creates a default HTTP listener on port 5985
- Registers the
Microsoft.PowerShellsession configuration - Opens the inbound firewall rule group
Windows Remote Management
Four birds, one command. Expected output looks like this:
WinRM has been updated to receive requests.
WinRM service type changed successfully.
WinRM service started.
WinRM has been updated for remote management.
WinRM firewall exception enabled.

Verify the service is running:
Get-Service WinRM | Select-Object Name, Status, StartTypeName Status StartType
—- —— ———
WinRM Running Automatic
Step 2: Test a Local WinRM Connection
From the same server (or another domain-joined machine), confirm remoting actually works before you add certificates into the mix:
Test-WSMan -ComputerName localhostYou should see the wsmid namespace and a product version come back. That means the listener is responding. If it fails, check that the WinRM service is actually running and that no third-party firewall is eating loopback traffic.
Step 3: Generate or Import a Certificate for HTTPS
Plain HTTP WinRM is fine for a closed lab. For anything touching production, use an HTTPS listener so clients can verify the server’s identity and encrypt the payload. If you have an internal Certificate Authority (typical in an AD environment with AD CS), request a certificate. The Subject Name or Subject Alternative Name must match the exact hostname clients will use to connect. Mismatched hostnames are the single most common cause of HTTPS listener failures.
For a lab or workgroup server without a CA, generate a self-signed certificate:
$cert = New-SelfSignedCertificate -DnsName "winsrv01.homelab.local" -CertStoreLocation Cert:\LocalMachine\My -KeySpec KeyExchange
$cert.Thumbprint
Thumbprint
———-
A1B2C3D4E5F60718293A4B5C6D7E8F9012345678
Note the thumbprint; you’ll need it in the next step. Yes, it’s exactly as ugly as it looks. You’re not memorizing it, just pasting it. Self-signed certs work fine for testing. Clients get a trust warning though, unless you also import the cert into their trusted root store. For production, use your internal CA, or a public cert if the server is internet-facing.
Step 4: Create the HTTPS Listener
With the certificate thumbprint from Step 3, create the listener:
New-Item -Path WSMan:\localhost\Listener -Transport HTTPS -Address * -CertificateThumbPrint "A1B2C3D4E5F60718293A4B5C6D7E8F9012345678" -ForceConfirm it’s listed:
Get-ChildItem WSMan:\localhost\ListenerWSManConfig: Microsoft.WSMan.Management\WSMan::localhost\Listener
Type Keys Name
—- —- —-
Container {Transport=HTTP, Address=*} Listener_1069841212
Container {Transport=HTTPS, Address=*} Listener_1487225836
Then open the firewall for port 5986:
New-NetFirewallRule -DisplayName "WinRM-HTTPS-In" -Direction Inbound -Protocol TCP -LocalPort 5986 -Action AllowStep 5: Test the HTTPS Connection
From a client machine (or the same server for a quick sanity check):
$opt = New-PSSessionOption -SkipCACheck -SkipCNCheck   # only for self-signed certs in testing
Test-WSMan -ComputerName winsrv01.homelab.local -UseSSL -SessionOption $opt
Once this returns cleanly, drop the -SkipCACheck/-SkipCNCheck flags for any connection using a properly trusted certificate. Those flags exist for lab testing only. Leaving them on permanently defeats the entire point of running HTTPS.
Step 6: Harden WinRM
This is the part most tutorials skip. It’s where you actually reduce your attack surface.
Disable the unencrypted HTTP listener once HTTPS is confirmed working:
Get-ChildItem WSMan:\localhost\Listener | Where-Object {$_.Keys -like "*Transport=HTTP*" -and $_.Keys -notlike "*HTTPS*"} | Remove-Item -RecurseDisable Basic authentication. It sends credentials with minimal protection. Never use it outside tightly controlled, HTTPS-encrypted scenarios:
Set-Item WSMan:\localhost\Service\Auth\Basic -Value $false
Set-Item WSMan:\localhost\Service\AllowUnencrypted -Value $false
Restrict the firewall rule to your management subnet instead of Any IP. Open Windows Defender Firewall with Advanced Security and edit the WinRM-HTTPS-In rule. Under Scope, set Remote IP address to your admin VLAN or jump-box range, for example 10.50.0.0/24.
Set-NetFirewallRule -DisplayName "WinRM-HTTPS-In" -RemoteAddress 10.50.0.0/24Limit who can connect. Control membership of the local Remote Management Users group instead of handing out full local Administrator access for remoting:
Add-LocalGroupMember -Group "Remote Management Users" -Member "HOMELAB\svc-remoting-admin"Anyone connecting for read/execute-only tasks should land in this group, not in local Administrators. For fine-grained command restrictions, pair this with Just Enough Administration (JEA) role capabilities. See Microsoft’s JEA prerequisites documentation for the setup. This is the same principle covered in our Active Directory least-privilege hardening guide: give accounts only the access they need, nothing more.
Set TrustedHosts only when necessary. If you’re connecting to a workgroup (non-domain) server, the client needs an explicit trust entry. Kerberos mutual authentication isn’t available there:
Set-Item WSMan:\localhost\Client\TrustedHosts -Value "winsrv01.homelab.local" -ForceAvoid a wildcard (*) here in anything but a fully isolated lab. It tells the client to trust any WinRM host, no questions asked.
Part 2: Setting Up OpenSSH Server for PowerShell 7 Remoting
Step 7: Install OpenSSH Server
On Windows Server 2025, OpenSSH Server is preinstalled as an optional component in most images. The service may be disabled by default though. Check first:
Get-WindowsCapability -Online | Where-Object Name -like "OpenSSH.Server*"Name : OpenSSH.Server~~~~0.0.1.0
State : Installed
Already installed, just switched off, which is a typical Microsoft move. Available, but not exactly advertised.
On Windows Server 2022, it’s usually not installed and needs to be added:
Add-WindowsCapability -Online -Name OpenSSH.Server~~~~0.0.1.0You can also install it through the GUI: Settings > Apps > Optional Features > Add a feature, search for “OpenSSH Server,” and click Install. On Server Core or when using Server Manager, go to Manage > Add Roles and Features > Features and check OpenSSH Server.
Once installed, start the service and set it to auto-start:
Start-Service sshd
Set-Service -Name sshd -StartupType Automatic
Verify:
Get-Service sshd, ssh-agent | Select-Object Name, Status, StartTypeName Status StartType
—- —— ———
sshd Running Automatic
ssh-agent Running Automatic
Step 8: Open the Firewall for SSH
Add-WindowsCapability typically creates the inbound rule automatically, but confirm it exists:
Get-NetFirewallRule -Name *ssh* | Select-Object Name, Enabled, Direction, ActionIf it’s missing, create it manually and scope it to your management network right away:
New-NetFirewallRule -Name "OpenSSH-Server-In-TCP" -DisplayName "OpenSSH Server (sshd)" -Enabled True -Direction Inbound -Protocol TCP -Action Allow -LocalPort 22 -RemoteAddress 10.50.0.0/24Step 9: Install PowerShell 7 on the Server
OpenSSH remoting for PowerShell requires PowerShell 7+. Windows PowerShell 5.1 doesn’t support the SSH transport at all. Install via winget:
winget install --id Microsoft.PowerShell --source wingetConfirm the install path; you’ll need it for the subsystem config:
Get-Command pwsh.exe | Select-Object SourceSource
——
C:\Program Files\PowerShell\7\pwsh.exe
Step 10: Configure the PowerShell Subsystem in sshd_config
Edit C:\ProgramData\ssh\sshd_config with your preferred editor. Notepad works fine for a quick edit, but VS Code or nano via Git for Windows is more comfortable for multi-line edits:
notepad C:\ProgramData\ssh\sshd_configAdd this line (adjust the path if you installed PowerShell somewhere else):
# C:\ProgramData\ssh\sshd_config
Subsystem powershell "C:\Program Files\PowerShell\7\pwsh.exe" -sshs -NoLogo -NoProfile
Restart the service to apply:
Restart-Service sshdStep 11: Harden SSH (Key-Based Auth Only)
Generate a key pair on your client machine if you don’t already have one (see the platform-specific sections below), then copy the public key to the server.
For a local administrator account, keys go in a shared file:
# On the Windows Server, as Administrator
notepad "C:\ProgramData\ssh\administrators_authorized_keys"
Paste the client’s public key (the contents of id_ed25519.pub, not the private key) on its own line, save, then lock down permissions. This file is silently ignored by sshd if permissions are too open. No error, no warning; it just won’t work:
icacls.exe "C:\ProgramData\ssh\administrators_authorized_keys" /inheritance:r
icacls.exe "C:\ProgramData\ssh\administrators_authorized_keys" /grant "Administrators:F" "SYSTEM:F"
For a non-administrator account, the key goes in that user’s own profile instead: C:\Users\username\.ssh\authorized_keys.
Disable password authentication once key-based login is confirmed working. Add or edit these lines in sshd_config:
# C:\ProgramData\ssh\sshd_config
PubkeyAuthentication yes
PasswordAuthentication no
PermitEmptyPasswords no
Restart sshd again:
Restart-Service sshdWarning: Test your key-based login in a second terminal window before disabling password auth and closing your current session. If the key setup is wrong, disabling passwords locks you out of SSH access entirely. You’ll need console or RDP access to fix it. Ask me how I know.
Connecting from Client Machines
Windows Client
From a Windows 11 or Windows Server workstation with PowerShell 7 installed, connect using the built-in SSH transport parameters:
Enter-PSSession -HostName winsrv01.homelab.local -UserName AdministratorThe first connection prompts you to confirm the host key fingerprint. Verify it matches what’s shown in the server’s C:\ProgramData\ssh\ssh_host_ed25519_key.pub before accepting, don’t just hit yes out of habit.
macOS Client
Install PowerShell 7 via Homebrew if you haven’t already:
brew install --cask powershell==> Installing Cask powershell
? powershell was successfully installed!
Generate an SSH key pair if you don’t have one:
ssh-keygen -t ed25519 -C "your-username@yourmac"Generating public/private ed25519 key pair.
Enter file in which to save the key (/Users/your-username/.ssh/id_ed25519):
Your identification has been saved in /Users/your-username/.ssh/id_ed25519
Your public key has been saved in /Users/your-username/.ssh/id_ed25519.pub
Copy the public key content and add it to the server’s administrators_authorized_keys (or the target user’s authorized_keys) as covered in Step 11. Then connect with the native ssh client for a direct PowerShell shell:
ssh Administrator@winsrv01.homelab.localThe authenticity of host ‘winsrv01.homelab.local’ can’t be established.
ED25519 key fingerprint is SHA256:AbCdEfGhIjKlMnOpQrStUvWxYz1234567890abcd.
Are you sure you want to continue connecting (yes/no)?
Or use PowerShell’s remoting cmdlets from pwsh for a full PSSession object you can script against:
pwsh -Command "Enter-PSSession -HostName winsrv01.homelab.local -UserName Administrator"[winsrv01.homelab.local]: PS C:\Users\Administrator\Documents>
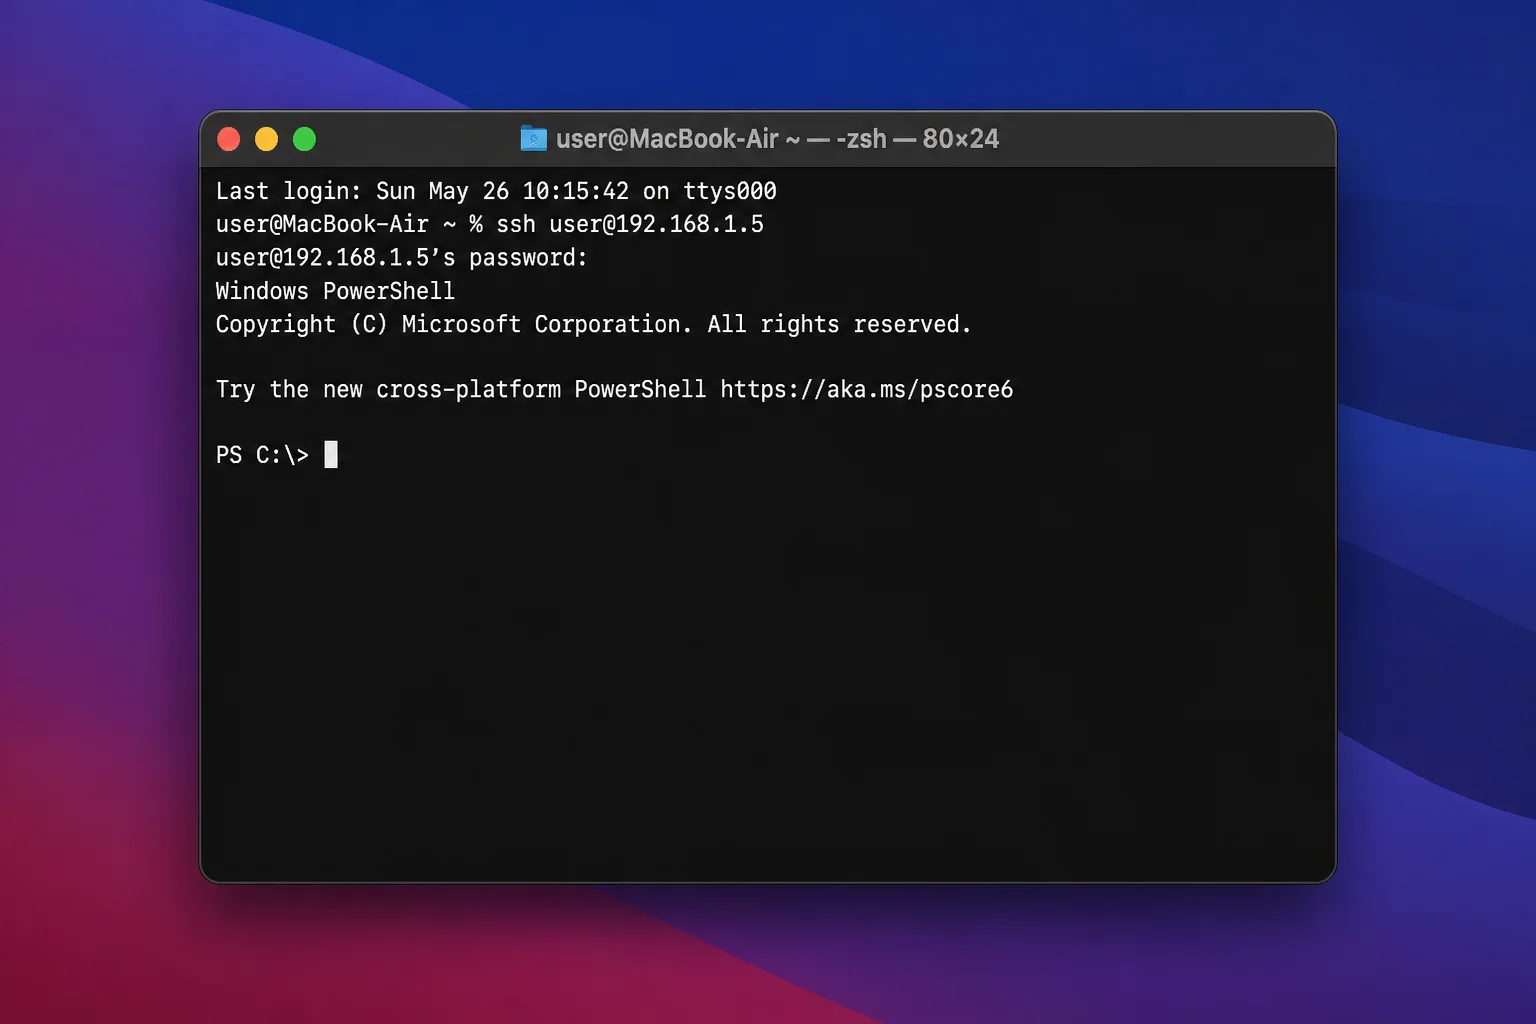
Always confirm the host key fingerprint matches what’s on the server the first time you connect. This step is your only protection against connecting to an impersonated host on an untrusted network.
Linux Client
The steps mirror macOS closely. On Ubuntu 24.04:
sudo apt update
sudo apt install -y powershell
Or if the package isn’t in your repo, follow Microsoft’s .deb package install instructions for your distro. Key generation and connection commands are identical to the macOS steps above. Run ssh-keygen -t ed25519, copy the public key to the server, then connect with ssh Administrator@winsrv01.homelab.local or pwsh -Command "Enter-PSSession -HostName ...".
Auditing and Monitoring Remote Access
WinRM / PowerShell Logs (Event Viewer)
Open Event Viewer and navigate to:
Applications and Services Logs > Microsoft > Windows > Windows Remote Management > Operational
and
Applications and Services Logs > Microsoft > Windows > PowerShell > Operational
Look for Event ID 6 (WinRM session created) and Event ID 91/168 (PowerShell remote session opened) to see connection timestamps and the authenticated user. Filter by source IP under the event’s Details tab.
For centralized auditing, forward these logs to a SIEM or a Windows Event Collector. Manually checking each server one by one doesn’t scale past a handful of machines; you’ll stop doing it within a month, guaranteed.
SSH Logs
OpenSSH Server on Windows writes logs to the Windows Event Log under Applications and Services Logs > OpenSSH > Operational by default. It can also log to a plain-text file if you set LogLevel VERBOSE and configure file logging in sshd_config. Check recent connection attempts:
Get-WinEvent -LogName "OpenSSH/Operational" -MaxEvents 20 | Select-Object TimeCreated, MessageTimeCreated Message
———– ——-
8/9/2026 2:14:03 PM sshd: Accepted publickey for Administrator from 10.50.0.22 port 51922
That single log line tells you the account, the auth method, and the source IP. Publickey confirms password auth is truly disabled. If you ever see Accepted password in this log after hardening, PasswordAuthentication no didn’t take. Go recheck the config and restart the service.
Decision Guide: WinRM or SSH?
| Scenario | Recommended Transport |
|---|---|
| All-Windows, domain-joined fleet | WinRM with HTTPS + Kerberos |
| Managing servers from a Mac or Linux workstation | SSH-based PowerShell remoting |
| Homelab with mixed OSes | Standardize on SSH remoting |
| Servers reachable through a restrictive corporate firewall | SSH (port 22 is almost always allow-listed already) |
| Existing AD Group Policy managing WinRM centrally | Keep WinRM, layer on HTTPS + firewall scoping |
| Automation from CI/CD runners on Linux | SSH remoting or PowerShell 7 with SSH transport |
| Need JEA-restricted command sets | Either, both support JEA on PowerShell 7.2+ |
If you’re not sure, running both isn’t unreasonable. Use WinRM for domain-internal automation that already benefits from Kerberos. Use SSH for anything crossing OS boundaries or reaching servers from outside your Windows management plane. Just harden both, don’t leave either one sitting on defaults.
Tips and Troubleshooting
Error: Connecting to remote server winsrv01 failed with the following error message: WinRM cannot process the request. The following error occurred while using Kerberos authentication: Cannot find the computer.
Cause: DNS resolution failure or the client is trying Kerberos against a non-domain host.
Fix: Confirm nslookup winsrv01.homelab.local resolves correctly, or add the host to TrustedHosts if it’s a workgroup machine.
Error: The SSH client could not establish a connection. Permission denied (publickey).
Cause: The public key wasn’t added correctly, or file permissions on administrators_authorized_keys are too permissive (sshd silently ignores the file!).
Fix: Re-run the icacls.exe commands from Step 11, confirm the key was pasted without line breaks, and check C:\ProgramData\ssh\logs\sshd.log for the specific rejection reason.
Error: WinRM HTTPS listener creation fails with The client cannot connect to the destination specified in the request.
Cause: Certificate thumbprint doesn’t match an installed cert, or the cert’s CN/SAN doesn’t match the hostname used to connect.
Fix: Re-run Get-ChildItem Cert:\LocalMachine\My to confirm the thumbprint, and reissue the cert with the exact FQDN in the SAN field if it was mistyped.
Issue: SSH remoting works fine locally but fails from an external network. Cause: Port 22 isn’t forwarded through your edge firewall/NAT, or the corporate network blocks outbound 22. Fix: Route through a VPN instead of exposing port 22 directly to the internet; see our Windows Firewall Advanced Security rules guide for scoping inbound rules safely.
Tip: Just Enough Administration (JEA): If you’re granting remoting access to junior staff or a service account, don’t just add them to Remote Management Users with full shell access. Set up a JEA endpoint that exposes only specific cmdlets. It takes an hour to configure and eliminates most of the blast radius if a credential leaks.
Tip: rotate host keys after cloning VM templates: If you clone a Windows Server VM template that already has OpenSSH configured, the new instance inherits the same host key. That breaks client fingerprint verification. It also creates a shared-identity risk you won’t notice until something goes wrong. Regenerate with ssh-keygen -A after first boot from a template.
Wrapping Up
You’ve now got at least one hardened, working remoting path into your Windows Server. That’s HTTPS-only WinRM for domain-internal work, key-based SSH for anything crossing OS boundaries, or both running side by side and scoped to your management subnet.
If you’re running a mixed environment, set up SSH remoting even on an all-Windows shop. The tooling matches what your Linux team already uses. You end up managing one set of keys instead of two.
| Step | Action | Applies To |
|---|---|---|
| 1-2 | Enable WinRM, test local connection | WinRM |
| 3-5 | Generate cert, create HTTPS listener, test | WinRM |
| 6 | Disable HTTP/Basic auth, scope firewall, limit group membership | WinRM |
| 7-8 | Install OpenSSH Server, open firewall | SSH |
| 9-10 | Install PowerShell 7, configure subsystem | SSH |
| 11 | Key-based auth, disable password auth | SSH |
| N/A | Connect from Windows/macOS/Linux clients | Both |
| N/A | Review Event Viewer / OpenSSH logs | Both |