This is the first of a series of step-by-step tutorials on Microsoft Active Directory. These tutorials are also geared towards the 70-742 exam and they can get you ready for the MCSA or MCSE Certification.
So let us jump right in. Before we start installing the Active Directory Domain Services role on our server, we need to configure a static IP address. To do that, we can either configure a static IP via PowerShell or via the Network Connections dialog.
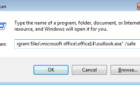
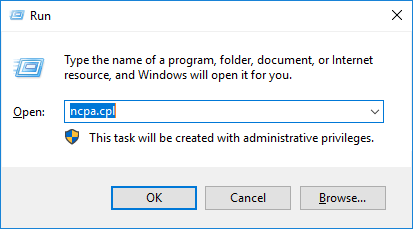
First of all, we go to the Run prompt, type in ncpa.cpl to open the control panel.
Then we right click on our Network Adapter, choose Properties and we edit the IPv4 Protocol.
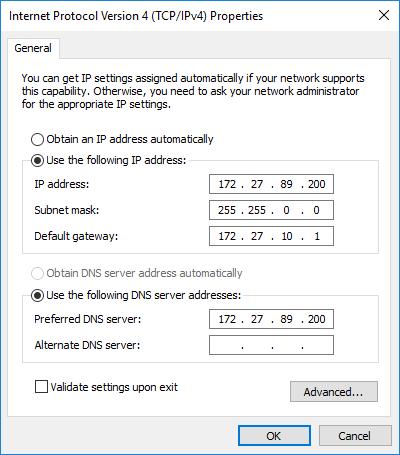
We put in the static IP address, Subnet Mask, Gateway and DNS Server. Once we have verified that we have correct network connectivity, we move on to the next step.
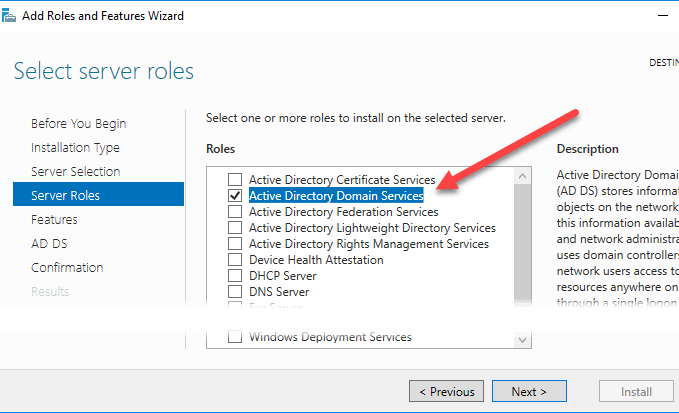
Install Active Directory Domain Services Role
On the next step, we open Server Manager, go to Add Roles and Features, select Active Directory Domain Services and hit Next.
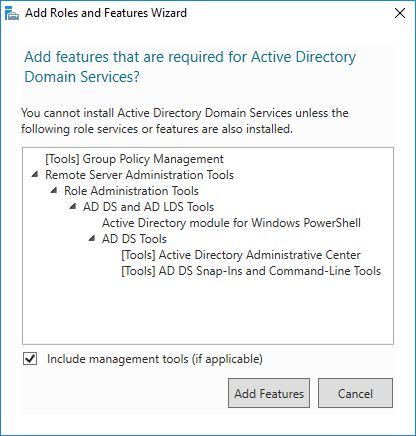
We will get a prompt letting us know which tools we are installing aside from the role itself. Click Add Features and then move on to the next prompt.
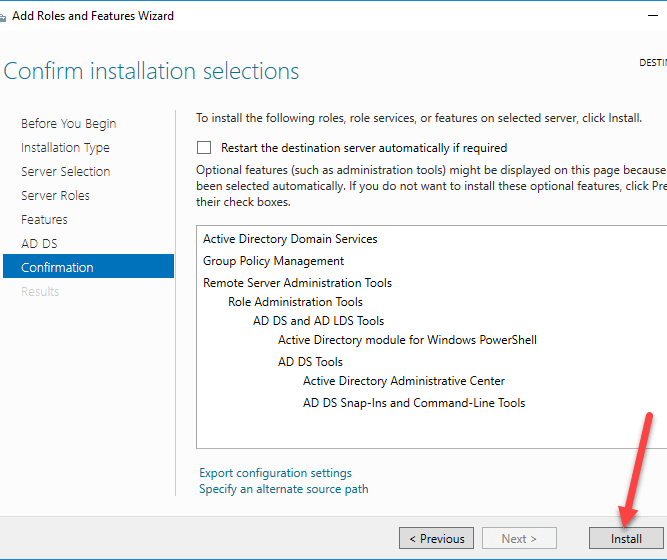
Once everything checks up, we hit the Install button and wait for the ADDS Role installation to finish.
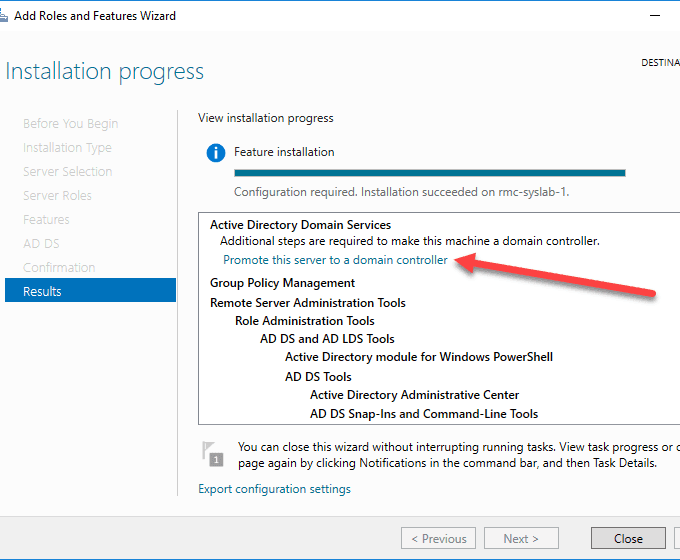
If the installation finished successfully, we will receive the following window where we have to click on Promote this Server to a Domain Controller link.
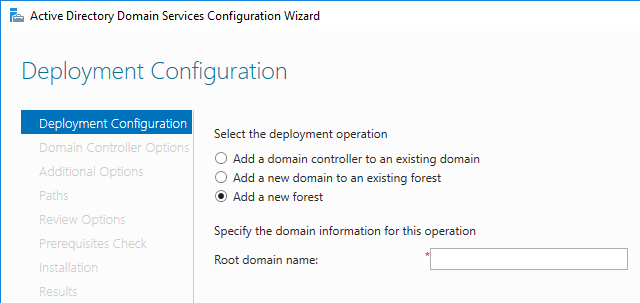
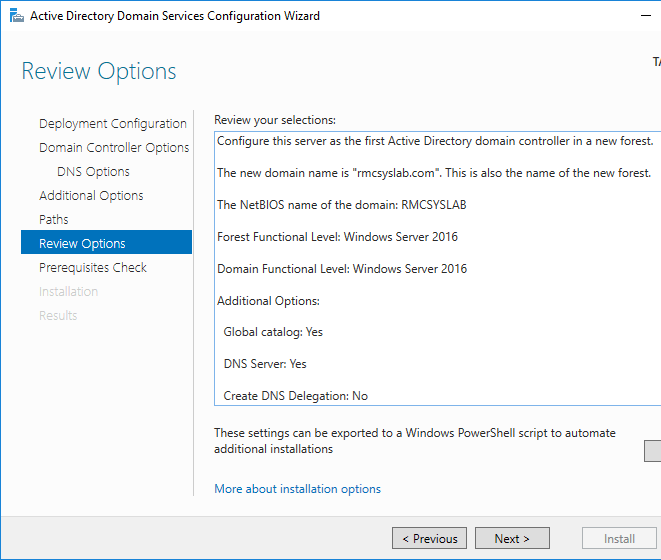
Now the fun begins. On the first prompt, we have three options. Since this is a new domain in a new forest, we will chose the third option Add a new forest and we we will type in the root domain name, which in my case is rmcsyslab.com.
Please note you can put in any name in name.domain format; it does not have to be .com. For example, we can put in lab.local and that would be completely fine.
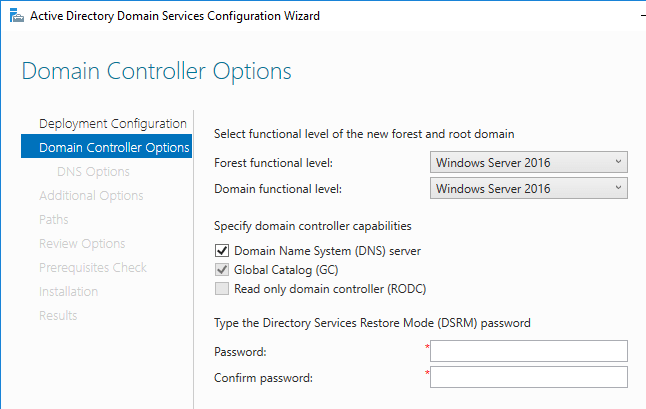
Next, we have the option to change the Forest Functional Level and Domain Functional Level to suite our environment. Since we will have only Windows Server 2016 servers, we will leave it at the default value, put in the DSRM password and hit Next. The DSRM (Directory Services Restore Mode) password is very important in case we have an issue with the Domain Controller, we will be able to boot it in DSRM and fix the problem.
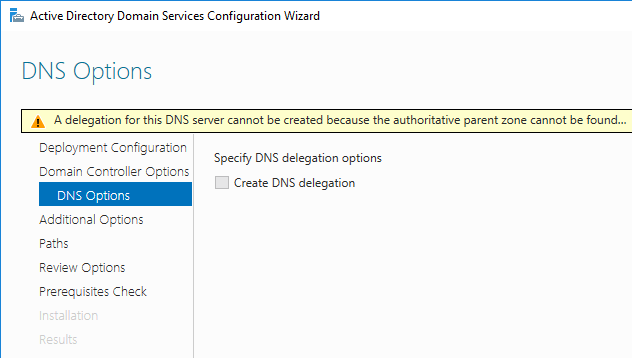
On the next screen, we just hit Next since we don’t have any existing DNS Server hosting our new domain.
On the next screen, we check that the value of the NetBIOS name is correct and hit Next.

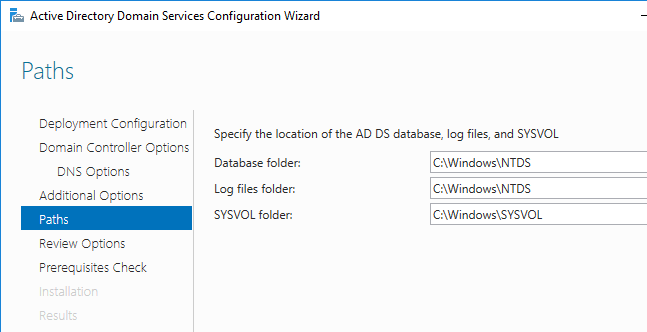
On the next screen, we have the option to change the location of the default SYSVOL, DB and Log folders. It’s highly recommended we leave them as they are, since this server is only going to host Active Directory.
On the review screen, we just click Next and then Install.
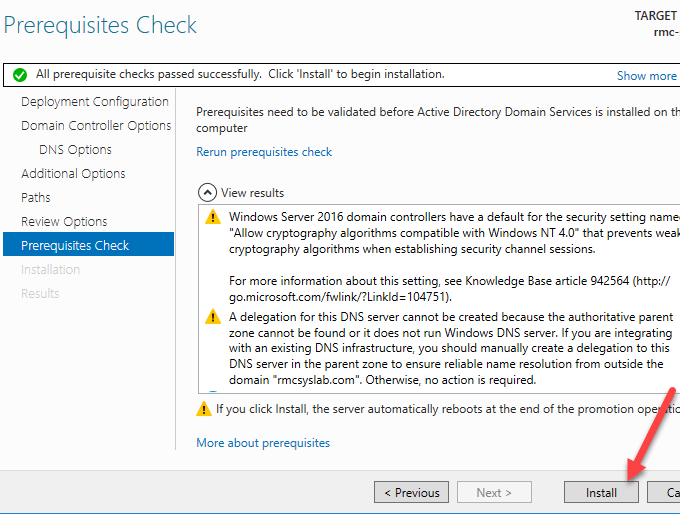
Now we will just have to leave the installation to complete. During the process, the server will automatically restart one time.
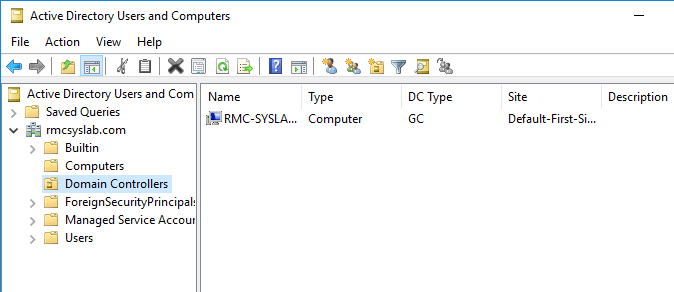
Once the server is back online, we need check that everything is OK by going to the Run dialog again and typing dsa.msc to open Active Directory Users and Computers.

If everything is OK, we should be greeted with this lovely interface where we can start configuring our domain as we’ll see in the next tutorials.
Thank you very much for your time reading this tutorial. Many more to come. In the meantime, enjoy!